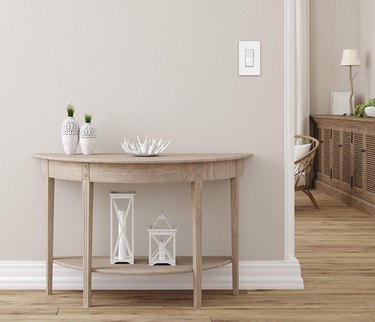
Rocker light switches, introduced by Leviton in 1973, are also known as decora (short for "decorator") switches. Besides adding a bit of extra style to your habitat, they are easier to operate than traditional toggle switches. You simply push the end of the switch that protrudes, which is something you can do with your elbow if you're carrying groceries and, crucially, something that the elderly and people with disabilities can do more easily than flipping a toggle.
Rockers look different than toggle switches, but the wiring for them is almost exactly the same. The only difference is that rocker switches often have self-clamping holes for 14-gauge wires on the back. Not every electrician likes these "backstab" holes because they can be unreliable, but not to worry — rockers also have the same two brass terminal screws you find on every other switch. If you're replacing a toggle switch with a rocker or you're replacing a rocker with another rocker, you can skip the backstab holes and use the terminals instead.
Video of the Day
Video of the Day
Things You'll Need
How to Change a Rocker Light Switch
1. Turn Off the Power
Locate the circuit breaker in the main panel that controls the light fixture and turn off that breaker. If you don't know which breaker it is, turn on the lights and flip off the breakers one by one until the lights go off.
2. Expose the Old Switch and Test It
Unscrew the cover plate for the old switch using a flat-head screw driver and remove the cover plate to expose the switch. Hold a noncontact voltage tester close to each of the switch terminals in turn and make sure it doesn't register voltage (no light flashes and no beep sounds).
3. Disconnect the Switch
Unscrew the switch from the electrical box and pull it out. If the wires are wrapped around the terminals, loosen the terminal screws with a Phillips screwdriver and pull off the wires. There are three screws to loosen: the two brass ones on the side of the switch and the green ground screw on the bottom.
If the switch is wired with the backstab holes, you can't pull them out, so you'll have to cut them with wire snips. Cut as close to the switch as possible, especially if the person who installed the switch didn't leave much slack. There's no backstab hole for the ground wire, so you always have to pull it off the ground screw.
4. Prepare the Wires for the New Switch
If the old switch was wired using the screw terminals, the wires should be ready to simply hook back onto the terminals of the new switch. You have the option, however, of snipping off the hooks and inserting the straight wires into the backstab holes, but this is only possible if the circuit is wired with 14-gauge wire. Twelve-gauge wire won't fit.
To prepare wires you cut, strip about 3/4 inch of insulation from the end of each one using a wire stripper. You can leave them straight if you're going to use the backstab holes. If you want to use the terminal screws (which is a more reliable option), bend a clockwise J-hook on the end of each one using pliers. The ground wire will already have a hook, so you can leave it as it is.
5. Hook Up the New Switch
Wire the new switch in the same way that the old one was wired. If you use the terminal screws, hook one hot wire to the top terminal and the other hot wire to the bottom one and tighten down the screws. If you use the backstab holes, insert one hot wire into the hole behind the top terminal screw as far as it will go and then insert the other hot wire into the hole behind the bottom terminal screw. Finish by connecting the ground wire to the green ground screw and tightening down that screw.
Tip
The white wires for the circuit will be twisted together and capped inside the electrical box. You can leave them as they are.
6. Finish and Test
Push all the wires into the electrical box, screw the switch onto the electrical box, and install the cover plate. You may want to use a new cover plate if the new switch is a different color than the old one. If the old switch was a toggle switch, you'll have to use a new cover plate because the old one won't work.
After installing the cover plate, go back to the panel and switch on the breaker. Turn the switch on and off to make sure the lights go on and off.
