Before refrigerators, freezers and the plethora of preservative chemicals available to keep foods from spoiling, people relied on drying to store fresh food safely. Removing the water when you dry fish gives bacteria, mold and hungry bugs less to feed on. This means it takes far longer for dried fish to spoil, making it a perfect treat for camping, hiking, lunchboxes, long-distance drives and other unrefrigerated situations.
Choose and Prepare the Fish
Video of the Day
The more fat your fish contains in its tissues, the longer it takes to dry. For example, fatty fish like salmon do well in a dehydrator but may not dry efficiently when simply salted and air-dried. So match your choice of fish to your drying method. Flounder and cod are excellent choices for salting, drying and fish jerky as are bass, crappie, halibut, pike, snapper and tuna.
Video of the Day
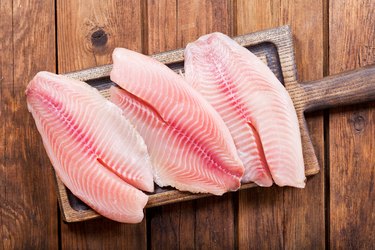
If you're starting with a whole fish, remove the head and tail and clean out the internal organs. Leave the skin on or remove it according to your personal taste. Fillet the fish thinly, keeping the thickness consistent to ensure that all the pieces dry at the same rate.
Salt Drying
Salt helps draw moisture from fish and may be the oldest known way of making dried fish. Once the fish is cleaned and rinsed, soak it in a solution of 1 cup of salt to 1 gallon of water. The measurements don't have to be exact. Soak the fillets for 30 to 60 minutes, rinsing them thoroughly afterward.
Add a bit of extra flavor by coating the fillets with a seasoned salt rub. Garlic, lemon pepper, sage and chili powder all complement the taste of most fish.
Lay your fillets on a nonreactive mesh screen and set it in the sun for two to three days. Cover the fish with cheesecloth to protect it from bugs if you like, but don't cover it with anything solid like plastic wrap or the water won't evaporate properly.
Oven Drying
The key to oven-drying fish is a low temperature and leisurely timing. Prepare your fish by soaking it in brine and rinsing it thoroughly. Oil your oven rack or a non-galvanized mesh screen to keep the fillets from sticking.
Preheat the oven to 110 degrees Fahrenheit. If it won't go that low, set it at 145 F or the lowest it will go and leave the door open a crack.
Season your fillets with an herb salt rub if you prefer. Lay them in a single layer on the oiled mesh screen. Leave them in the warm oven for 60 minutes and then turn them. Continue cooking the fillets until they're thoroughly dried and store them in an airtight container.
Using a Dehydrator
Dehydrators help to speed the drying process to make fish jerky, though the prep work is the same as for salting or oven drying. Expect it to take one to two hours to dry your fish, depending on the size and thickness of your fillets.
There are two basic types of dehydrators. One offers stackable trays with a fan on the bottom to blow hot air over the food. The other is a box with shelves that can be removed. Fans in the second type can be found in the back as well as on the bottom, and some don't have fans at all because they use convection heat.
Small, stackable models are generally the least expensive, but the hot air distribution and temperature control may not be precise enough to safely dry fish. Trays must be rotated to ensure even drying, which can be time consuming. Larger dehydrators tend to distribute heat more evenly, and you don't have to rotate the trays.
Fish Jerky Tips and Hints
Dried, salted fish can be used in a variety of ways from being served as a snack to adding flavor to other dishes. Rinse salted and dried fish before adding it to your recipes to tone down the strong salt flavor. Dried fish can be crumbled over salads and pastas or added to soups. It's a staple of many Asian recipes.