Add a personal touch to terra-cotta pots by turning them into chalkboards. Painting the pots with chalkboard paint creates a blank canvas for you to draw patterns and designs and to write messages, which allows you to get creative with your home decor, inside or outside. The project is an easy one, but it takes patience of a few days to let the paint fully cure before you can decorate them.
Things You'll Need
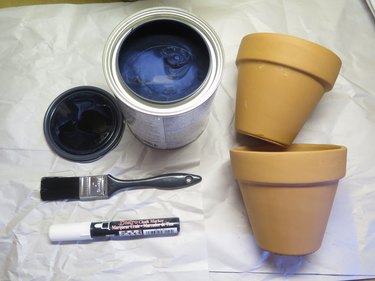
Chalkboard paint, brush-on or spray
Chalkboard pen (any color)
Any size terra-cotta pots
Regular chalk
Paper towel
Primer (optional)
Video of the Day
Tip
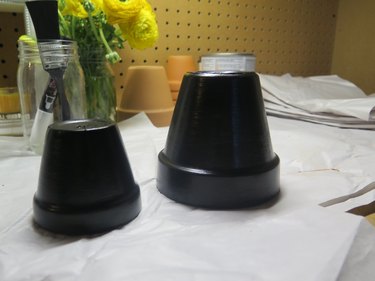
- A 29-oz can will cover much more than the three pots pictured here (two 3-inch and one 6-inch), so if you have some leftover from a different project, use that before buying more.
* If you want to re-draw on your pots, you'll need regular chalk to season them.
Warning
- Always lay down a protective surface where you will be painting and drying your pots.
- When using paint from a paint can, stir the paint before applying. When using paint from a spray can, spray in an open area and wear gloves to protect your hands from overspray. * Use a nylon or polyester brush if using chalkboard paint from a can.
- Use a nylon or polyester brush if using chalkboard paint from a can.
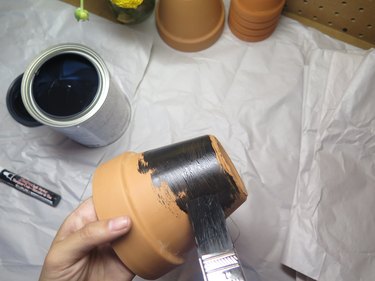
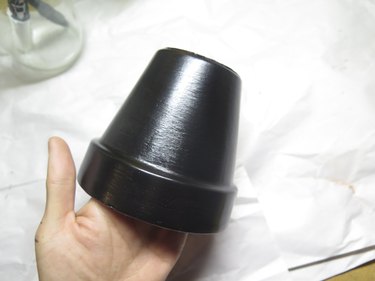
Step 1: Paint the First Coat of Chalkboard Paint
Wipe down your pot to make sure it is a clean surface. Hold your pot and start to paint the first coat of chalkboard paint. Allow the paint to fully dry (approximately 60 minutes) before painting the next coat. You can start painting the second pot while the first dries, to save time. If you are using primer before applying chalkboard paint, you will want to allow the primer to dry for four to six hours before top-coating with chalkboard paint.
Video of the Day
Step 2: Paint Two More Coats
Paint three coats of chalkboard paint on your pot, allowing the paint fully dry between each coat.
Step 3: Let Stand & Cure
Due to the porous qualities of chalkboard paint, you will want to let your pots cure for at least 24 hours. For three coats, let them cure for 72 hours.
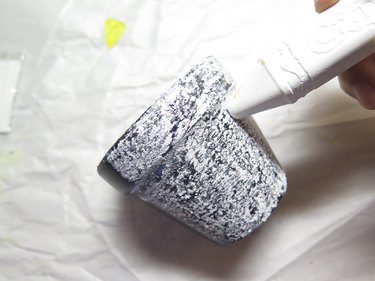
Step 4: Prep Your Chalkboard Surface
If you want to be able to reuse the chalkboard surface of your terra-cotta pots, you will want to prep the chalkboard surface. If you want the designs to be more permanent, then do not prep the surface and skip to Step 5. Rub a piece of chalk against the chalkboard surface of your pot. Then erase the entire surface. Paper towel will work if you do not have a chalkboard eraser.
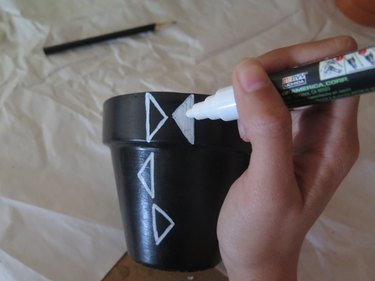
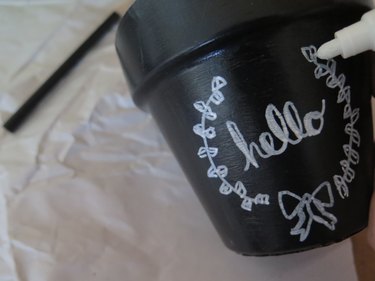
Step 5: Draw Designs With the Chalkboard Pen
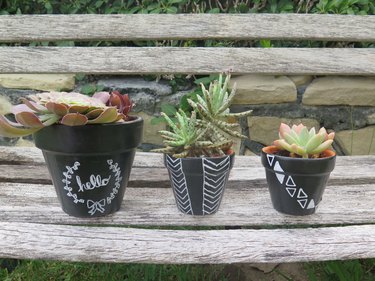
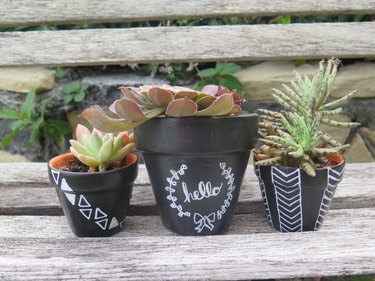
With the chalkboard pen, begin to draw designs or patterns onto the chalkboard surface and let dry. When you want to change your design, simply wipe off with a moist towel or towelettes and let dry. Watch where you hold the pot when drawing the designs, as you don't want to smear what you just drew. Chalkboard pen drawings will smear in contact with water or anything moist, so be careful when watering your plants.
Step 6: Pot Plants & Display
Pot plants or flowers into your new chalkboard patterned terra-cotta pots and display.