When you want to omit grout from your home renovation project, you can't use just any old tiles; the ones you use must be specifically designed for groutless installation. One such product consists of clickable panels that fit together like laminate flooring boards and, like laminate boards, they float on the subfloor. Moreover, some natural stone tiles have super-straight edges and are designed to be installed without grout. There is so little room for error when installing these, however, that the job is best left to a professional.
Video of the Day
No Grout? No Way!
Grout can be difficult to apply, and not everyone likes the way it looks, but few professionals recommend installing ceramic tiles without it. Unless you have specially cut tiles with very straight edges, gaps are unavoidable, and if you don't fill them with grout, they get filled with dirt and other gross stuff like food debris. Grout also provides a buffer that prevents tiles from pushing against each other and breaking.
Video of the Day
... Unless You Have Clickable Tiles
Capitalizing on the popularity of do-it-yourself laminate flooring systems, at least one manufacturer has developed a clickable tile system that not only does away with grout, but mortar, too. If you want to avoid the process of applying conventional grout, you can also find clickable systems that require urethane grout, like SnapStone. No-grout tile systems are easier to install, but they aren't recommended in rooms where spills and accidents frequently occur because they are breakable.
Groutless Tile Installation Procedure
The procedure for installing clickable, groutless tile is similar to that for installing laminate flooring. The main difference is that you cut the tiles with a diamond blade wet saw instead of a conventional wood saw.
Always follow the manufacturer directions for power tools and other materials while performing the installation. Use gloves, respirators and protective eyewear to keep yourself safe around chemicals (such as leveling compounds), tools (such as wet saws and belt sanders) and debris (such as dust) that may arise during installation.
Prepare the Subfloor
Remove everything from the room and pull up any carpeting or existing floating flooring. You can install the tiles over an existing hardwood floor, as well as a plywood or concrete subfloor. Level the subfloor to within a tolerance of 1/16 inch per 40 inches, using floor leveling compound to fill depressions and a belt sander to level humps. Vacuum and sweep the floor thoroughly; any small piece of debris can cause a tile to crack.
Start in a Corner
Choose any corner in which to begin the installation. Arrange the first tile with its tongue -- the smaller edge -- against the wall, and set spacers between it and the wall to maintain a 5/16- to 3/8-inch expansion gap. Maintain this gap around the perimeter of the floor.
Lay Along a Wall
Lay one row of tiles along the straightest wall, then lay the adjacent row next to it, and continue in this way until you reach the other side of the room. Line the tiles up with each other -- unlike laminate flooring, a click-lock tile floor doesn't require staggered joints, and it looks better if the joints form straight lines.
Use the Tools
An installation kit available for clickable tiles includes a tapping block and pull bar. These tools make it easier to click the tiles together, especially in tight corners. Use them whenever you can't get the tiles to snap together securely with your hands.
Cover the Edges
Remove the spacers from between the tiles and the wall when the installation is complete, and cover the gap with baseboards. Attach the baseboards to the wall with nails or glue -- do not glue them to the tiles.
Other Groutless Options
Luxury vinyl tiles also click together, and some are designed to closely resemble real ceramic tiles. These are even easier to install than clickable ceramic tiles. In addition, you can choose cork tiles, which more closely resemble laminate flooring boards, or you can opt for a laminate floor.
Vinyl floor tiles don't require grout and make a good utility-grade floor. You can buy self-stick tiles, or you can spread mastic on the subfloor with a trowel and lay tiles without pre-applied adhesive. Any subfloor is suitable, as long as it's clean, dry and level.
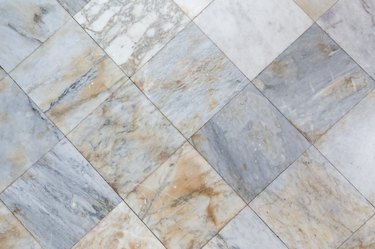
On countertops and walls, your options are limited to groutless granite or marble tiles. You install these in much the same way as one that require grout, but they must be precision-milled so you can butt them together without a gap.