Jiffy Professional Greenhouse kits are designed for beginner and experienced gardeners alike. The self-contained system gives you a jump start on raising garden vegetables, herbs and flowers. The peat pellets that come with the kit take much of the guesswork out of planting, growing and transplanting your plants. The kits are available in sizes that hold from six to 72 peat pellets per tray. After you transplant the seedlings to the garden and sterilize the tray, you can buy refill pellets to start growing more plants.
Step 1
Remove the packaging and the clear liner. This liner is the dome lid that retains the moisture in the propagation chamber to form a humid environment for the plants.
Video of the Day
Step 2
Re-seat the peat pellets into the circular wells at the bottom of the tray so there is one peat pellet in each depression. You may need to repeat this step after the pellets absorb water.
Step 3
Fill the tray with warm distilled water to about 2 inches above the peat pellets. Wait for the pellets to absorb the water. This should take no more than 15 to 20 minutes.
Step 4
Pour out any water that the pellets did not absorb. Set the swollen peat pellets back into place if they shifted position. The swollen pellets will contain the root balls of the plants after the seeds sprout and grow.
Step 5
Push back the netting from the center of the peat pellet to expose the planting medium. Place two or three seeds on the top of each pellet. Gently cover the seeds with the planting medium.
Step 6
Set the clear dome over the Jiffy pellet tray. Place the tray under a plant grow light or on a sunny windowsill. You can place the tray on a garden heat mat if you desire bottom heat.
Step 7
Remove the growing tray lid when the seedlings are about 2 inches tall or have developed their first set of true leaves. The lid should be removed before the seedlings can touch the top to avoid mold growth.
Step 8
Thin the seedlings so there is one healthy plant per peat pellet. You can either replant the seedlings in a new peat pellet or discard them.
Step 9
Pinch back the seedlings -- remove the top set of leaves -- when the seedlings have two or more sets of leaves to promote bushy growth.
Step 10
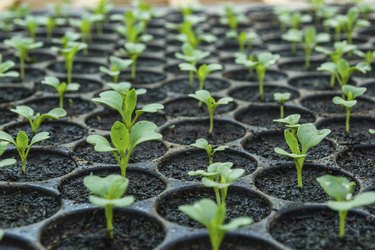
Harden off the tender plants when the roots start showing through the netting on the peat pellets. Set the plants in a shaded area of the garden for a few hours each day to expose them to the outdoor temperatures and sunlight.
Step 11
Remove the young plants from the Jiffy growing tray and transplant them into the garden. Dig a hole approximately 2 to 3 inches deep to accommodate the peat pellet root ball. Space the plants 6 to 18 inches apart, depending on the plant.
Step 12
Sterilize the empty Jiffy Professional Greenhouse kit with a mixture of 9 parts water and 1 part chlorine bleach. Wait for the tray and lid to dry completely before storing or reusing.
Video of the Day