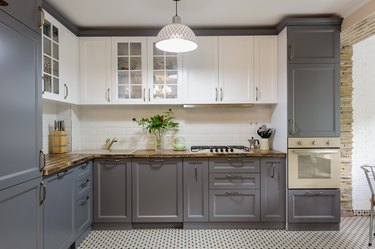
It's easier to make your own kitchen or bathroom countertop than you might expect, but you need the raw material, which is usually a store-bought wooden slab. Manufacturers produce countertop slabs by laminating strips of hardwoods like maple or oak, and they often precut the sink hole, but they don't finish the wood, so you have to do that yourself. Polyurethane is a good all-purpose coating for countertops because it's durable and waterproof. You can apply it with a brush, but it isn't suitable for butcher-block cutting surfaces, for which you need a nontoxic oil.
Preparing a Wood Countertop
Video of the Day
You can order stock countertops from several sources, and you may even be able to find a solid slab with a live edge, which is more decorative than a laminated slab but more in need of a finish because of the possibility of warping. To determine the size, measure the area of the top of the cabinet and allow for a minimum overhang of 1 inch on the front. You don't need an overhang on the back or ends of the cabinet that sit flush against the wall, but you need overhangs on all sides for an island cabinet or a bar top, and they should also be at least 1 inch.
Video of the Day
Whether the manufacturer cuts the sink hole or you do, it needs to be done before you apply the finish. Sand the edges smooth, particularly if you're planning to install an undermount sink. The rim of a top-mount sink will hide the edges, but you should still sand them somewhat smooth so the finish provides maximum moisture protection.
Finish All Countertop Sides
An important prerequisite to wood countertop installation is a period of acclimation to allow the wood to come into equilibrium with the installation space. Armani Fine Woodworking recommends five days, and after that period, you should apply a single coat of polyurethane to the top, bottom and edges of the slab before you install it. This is especially important if you plan to delay the installation while you finish constructing the cabinet. Don't leave the slab exposed to the elements for an extended period or it could warp.
Polyurethane is suitable for food surfaces but not for cutting surfaces, for which a product like Rubio Monocoat 2C Oil is a better alternative. If you choose polyurethane varnish, J. Aaron recommends an oil-based product, such as ZAR Oil Based Polyurethane Wood Finish. It dries more slowly than water-based poly, but it flows out more smoothly and lacks the plastic appearance.
Applying the Final Finish
Apply the top coat, which typically consists of two or more coats of clear finish, as soon as you've fastened the countertop to the cabinet and before you install the sink. Start by scuff sanding the countertop with 220-grit sandpaper to knock down the seal coat that you applied previously, then lay on the polyurethane in long, even strokes. Since you're applying an oil-based finish, you should use a natural-bristle brush, which will leave fewer stroke mars than synthetic bristles.
Apply one coat, let it dry overnight, then scuff again and apply a second coat. Whether or not you apply more coats depends on how smooth and glassy you want the surface to look, but you should definitely apply another coat to the outside edges and the edges of the sink cutout for extra moisture protection. If you want the smoothest finish, scuff the second coat with 400-grit wet/dry sandpaper before applying a third coat, and repeat if necessary.