The Honeywell mercury thermostat has been a standard in homes and businesses for decades, but most of these old non-programmable thermostats have been replaced with basic digital thermostats or smart thermostats. Mercury thermostats are simple and long-lasting, but, like all thermostats, they can develop problems in the wiring or internal components of the unit. It's helpful to understand the basic parts and function of a mercury thermostat before you do any problem-solving.
Here are some easy DIY steps for troubleshooting an old Honeywell mercury thermostat to make sure it's working properly for your heating or cooling system.
Video of the Day
Video of the Day
How a Honeywell Mercury Thermostat Works
Any kind of thermostat — whether it's used to control a heat pump, furnace, air conditioning, or baseboard heaters — is in essence a temperature-controlled switch. In a mercury thermostat there is a mercury bulb, a small glass tube with a drop of mercury sealed inside. Two wires protrude into the tube at one end. The tube is held in place by a metal coil made of bimetallic material that expands and contracts at a consistent rate due to changes in temperature.
When the air temperature around the thermostat changes, the coil rotates and tilts the mercury bulb one way or the other. When it tilts enough, depending on the thermostat's temperature setting, the mercury moves to one end of the bulb so that is makes a connection between the two wire contacts, allowing electricity to flow between them. This electricity powers a relay that turns on your furnace or air conditioning system.
Honeywell Round Thermostats
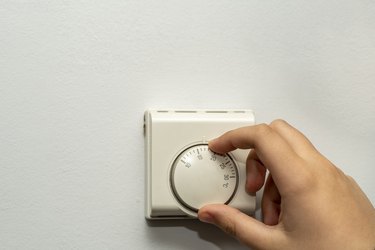
Old Honeywell thermostats with mercury bulbs are most commonly small and round, giving them the nickname of "Honeywell round." These are non-programmable, mechanical (not digital) thermostats. They can be replaced with newer, mercury-free thermostats that look just like the old Honeywell rounds. You can also swap one out with a digital thermostat or even a smart home thermostat such as a Nest thermostat.
Heat Only Thermostats
Some Honeywell mercury thermostats have a switch that lets you select heating or cooling mode. This switch must be moved manually at the start of the heating or cooling season. If you do not have air conditioning and your thermostat does not have a "cool" option, you have a heat only thermostat, also called a heating thermostat.
Troubleshooting and Testing Honeywell Mercury Thermostats
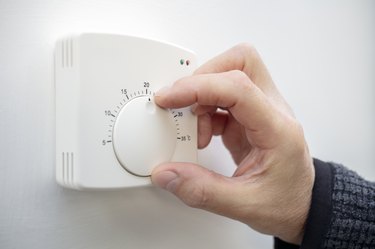
If your thermostat is giving you trouble, remove the thermostat cover and look at the mercury bulb while turning the temperature control dial; the bulb should tilt as the dial is turned. The mercury inside the tube should move and make contact with the wire contacts as the temperature selector is turned up. If you have a cooling thermostat (capable of controlling a furnace and an air conditioner), there will be a second set of contacts within the tube that controls the cooling cycle and makes contact when the thermostat is turned down. Here are a few electrical tests you can perform to help diagnose mercury thermostat problems.
Test the Thermostat for Continuity
Remove the wires from the contact screws and check for continuity across the contact screws. There should be an open circuit when the mercury is not contacting the wire contacts and a closed connection when it is. If the thermostat fails either of these simple checks, it is defective.
Test the Thermostat With a Jumper Wire
You can also check for thermostat failure by jumping across the terminal screws with a jumper wire. Usually the power wire is red and the heating wire is white; making a connection between those two screws should turn on your furnace. If it does come on, do the same test with the cooling circuit (if applicable) by connecting between the red and yellow wire. This test bypasses the thermostat, sending power directly to the furnace or air conditioner. If both circuits work when the thermostat is bypassed, the unit has failed and must be replaced with a new thermostat.
Test the Thermostat Transformer and Power Supply
If nothing happens during a jumper test, check the power supply to the thermostat. Locate the low-voltage transformer (typically 24 volts), and use a multimeter to check for output voltage. If there is no voltage, check the input circuit for power. This is line voltage (120 volts), so the safest way to check them is with a non-contact voltage tester.
If you confirm there is input voltage but there is no output voltage, the problem is the transformer; replace that.
Finally, if the transformer is functioning properly, check the low-voltage wires supplying the thermostat. Disconnect both ends of the wires from the transformer and check for continuity after turning the thermostat all the way to its highest temperature setting. If your tester doesn't light up, the wiring has a problem, there is likely damage or a break in the low-voltage wiring.