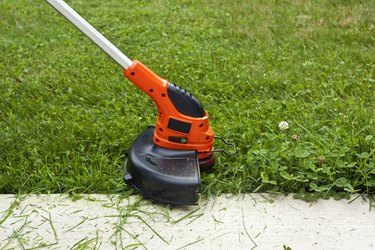
Stihl made its reputation by manufacturing rugged chain saws, and the company has extended its expertise into a broad line of power tools, including string trimmers. Stihl manufactures more than two dozen trimmer models, ranging from light-duty residential models to heavy-duty professional-grade trimmers. Gas-powered trimmers create loud sounds and can throw debris great distances. Always wear protective clothing, ear protection and eye protection when operating these tools. Stihl recommends that minors not be allowed to operate gas powered trimmers.
While starting a Stihl trimmer will vary slightly based on your model, most starting procedures are similar. Electric models are much easier to start than gas ones, and the procedure can be described in a sentence: Press down on the starting lockout lever and squeeze the trigger. The procedure for starting gas models is a bit more complex.
Video of the Day
Video of the Day
Things You'll Need
Safety goggles
Ear protection
Work gloves
Protective clothing
How to Start a Stihl Trimmer
Step 1: Put Fuel in the Tank
Remove the filler cap and inspect the fuel tank to make sure you have enough fuel in the tank. If the fuel level is low, add additional fuel. Gas-powered Stihl trimmers use a 50-to-1 gas-oil fuel mixture. This step is unnecessary on electric models, such as the FSE 60. Move the trimmer at least 10 feet away from the fueling site before you attempt to start it.
Step 2: Check Your Surroundings
Check the area around you. Your Stihl trimmer head spins rapidly as soon as you start the machine. If the trimmer line comes into contact with a foreign object, it can fling it a considerable distance. Make sure there is no other person within 50 feet of you before attempting to start your trimmer.
Step 3: Turn On the Switch
Press and hold down the throttle trigger interlock, called the lockout lever on some models, and squeeze the throttle trigger. While engaging both levers, move the starter switch to the "On" position, indicated on most gas models by a capital "I" symbol. Some models use a "Start" position and require you to move the switch to the "I" position once the engine turns over. Release pressure on the levers.
Step 4: Set the Choke
Move the choke lever to the full choke position if the engine is cold. For warm engines, set the choke lever to the half-choke position. Depress the fuel bulb until it is filled with fuel. If your model has a decompression value button, press it now before attempting to start.
Step 5: Put the Trimmer on the Ground
Lay the trimmer on the ground on the opposite side of the starter grip handle, allowing it to rest securely on its deflector. Make sure the trimmer line or cutting attachment is not touching the ground or any other object.
Step 6: Pull the Starting Cord
Pull the starter grip handle out slowly until you feel resistance, then give it a sharp tug. Guide the rope slowly back into the housing to prevent tangles. Give the starter grip four more sharp pulls, then move the choke lever to the middle setting if applicable. Continue cranking the engine with sharp pulls until it fires. Once the engine starts, flick the throttle trigger to return the engine to its idle setting.