Things You'll Need
Used treadmill
Drill
Lumber
Hammer
Nails
Screws
Circular saw
Jigsaw
Automotive wheel and hub assembly
Tap kit
Pulley
Belt
Mounting bracket
Plaster or cement
Small bolts
Particle board
Paint
Silicon
Lacquer
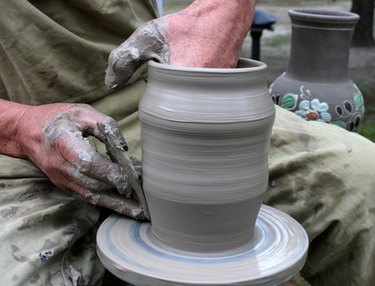
Professionally built pottery wheels can cost more than $1,000. It's much cheaper to build your own pottery wheel using recycled materials.
The basic necessities for a pottery wheel are a motor, speed controller, table, and a wheel with a spindle and a bearing. A used treadmill can supply a matching motor and speed controller, while a wheel, hub, bearing and spindle from a car can be purchased from a junkyard.
Video of the Day
Step 1
Disassemble a used treadmill and salvage the motor and speed controller. Also save any medium density fiberboard (MDF) which may be suitable for using in the table that will support your pottery wheel.
Step 2
Build a table with three legs. This can made of scrap lumber, scavenged parts from the treadmill, or lumber bought specifically for this purpose. Cross brace the legs, and make the table a comfortable height for whomever will be throwing the pots (usually a bit shorter than dining table height).
Step 3
Tap threads into the hub shaft. The threads must match the bolt which will be used to attach a pulley to the hub shaft once it is mounted on the table.
Step 4
Drill a hole in the table top the same size as the hub shaft from your salvaged wheel and bolt the hub to the table top with the hub shaft protruding underneath, through the hole. Bolt the pulley onto the hub shaft.
Step 5
Mount the treadmill motor to one of the table legs using the existing mounting bracket. Run a belt from the motor to the pulley. Mount the speed controller and switches under the table where they will be protected from splashes.
Step 6
Fill the automotive wheel with plaster or cement to make a smooth potter's wheel. If you want to use bats, or discs that sit atop the wheel, embed small bolts in the plaster or cement to act as pins, and construct the bats out of particle board with corresponding holes drilled out.
Step 7
Paint the table. Waterproof the table and all electrical components thoroughly using silicon, lacquer, and plastic coverings.
Tip
You may wish to wire the speed controller to a foot pedal for ease of use while throwing pots.
Warning
If water from the pot throwing process lands on unprotected electrical components, it may cause a dangerous electrical short. Waterproof everything carefully.
Video of the Day