Acrylic nails are popular because they are much stronger than natural nails, hold nail polish without chipping and make your hands look feminine and groomed. They do require maintenance every two weeks, however, and visiting the salon that often gets very expensive. You can do your own acrylics at home, save money and have shiny, attractive nails to paint or design in whatever color you like best. It does take practice to master acrylic nail application, so work slowly and carefully to avoid making mistakes.
Remove any old nail polish completely, and gently push back the cuticles with an orange stick. Cut your nails short, and then buff with a filing block over the entire nail. Be gentle; you just want to rough the surface a little bit. Wash your hands to remove any oils or dust.
Match the acrylic nail tips to your own nails, finding a tip that is the correct size for each of your fingers. If you cannot find an exact fit, you can lightly file a tip on the sides so it matches your nail perfectly. Lay the tips out in order so you easily see which tip goes to which finger.
Apply a tiny drop of glue into the little indentation at the base of the acrylic tip. Place the tip onto your natural nail, easing back so that the indentation fits right at the end of your nail. Be certain the nail is straight and positioned correctly, and that no air bubbles are underneath. Hold the acrylic tip in place for a few seconds to let the glue set.
Clip the acrylic nails to the length you desire, and file into your preferred shape.
Brush on a coat of nail primer. This dries out the nail and allows the acrylic finish to adhere better.
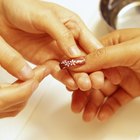
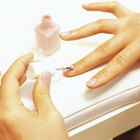
Start with the pinkie finger on your left hand. Dip your brush in the acrylic liquid, then blot lightly on a paper towel. Dip your brush into the acrylic powder; you will see a tiny ball form at the tip of the brush. Touch this ball to the line where the acrylic tip joins your natural nail. Smooth the acrylic over your nail, using your brush to flatten and smooth it.
Repeat the above step on the rest of the fingers on your left hand, doing thumb last, and then apply acrylic to the fingers of your right hand, again starting with the pinkie. Let dry for at least 10 minutes.
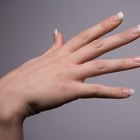
File and shape the acrylic nails with a grit nail file, removing any bumps and shaping the nails to look natural. Smooth the nails with a white buffing block, then wash your hands to remove any dust.
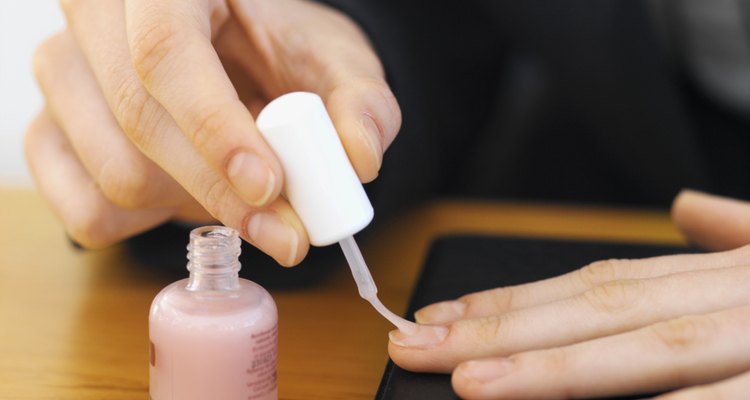
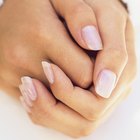
Paint your nails with any color you like. Apply two coats of polish, and allow to dry for five minutes. Apply a final coat of high gloss top coat, and allow your nails to dry thoroughly for at least 10 minutes. Be careful not to smudge or touch the polish while it is drying.
Related Articles

How to Fill in Nails
How to Use a Nailene Acrylic Sculpture ...
How to Put an Acrylic Nail Back on ...
How to Get a Smooth Surface When ...
How to Get Natural-Looking Acrylic Nails
How to Use Sanding Blocks for Nails
How to Apply Artificial Nails Using ...
How to Apply Nail Polish Without Streaks

How to Do the Sharp Nail
How to Make Thin Lines on Your Nails
How to Know What Length to Get on ...
How to Remove Nail Tips
How to Remove Acrylic Nails Without ...

How to Do Two-Tone Nails

Can Sweet Almond Oil Be Used to Soften ...
How to Get Nail Stickers to Stick Well
How to Keep Your Pink & White Nails ...
How to Apply "Tip and Dip" Nails ...
How to Apply Acrylic Over Polished Nails
How to Soak Acrylic Nails off in Nail ...
References
Writer Bio
Living in California, Michelle Ullman is a professional writer with particular expertise in home, garden and pet/nature topics. Her work is published on many websites. She loves crafts and has a deep interest in design and DIY projects.
Photo Credits
Stockbyte/Stockbyte/Getty Images