Overview
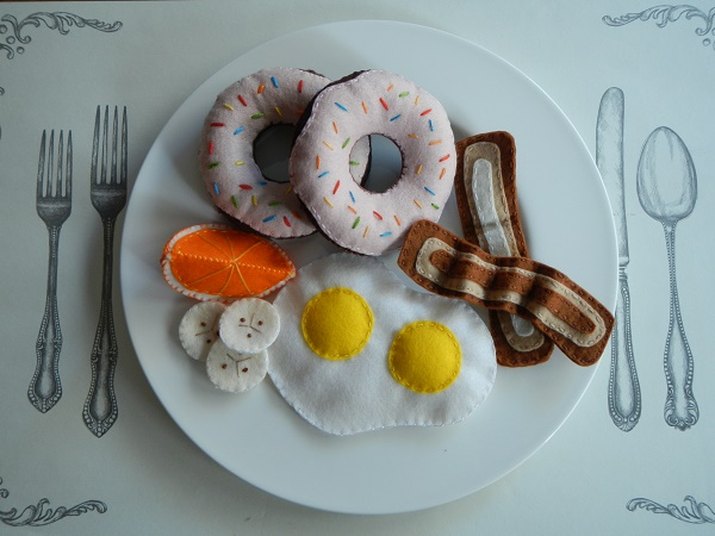
What's better than waking up to the smell of crackling bacon? Have your bacon and play with it too with a plateful of felt versions of classic breakfast foods. Make these breakfast food items fit for a play kitchen using felt, embroidery thread, floral wire, polyester fiberfill and a needle.

Materials You'll Need
To make your own felt version of the most important meal of the day, you'll need eHow's free printable templates, felt in various colors (wool felt works best), floral wire, embroidery thread in assorted colors, scissors, polyester fiberfill and a needle.
Related: Download the free printable templates to make your own felt food here
Cut Out the Felt Shapes
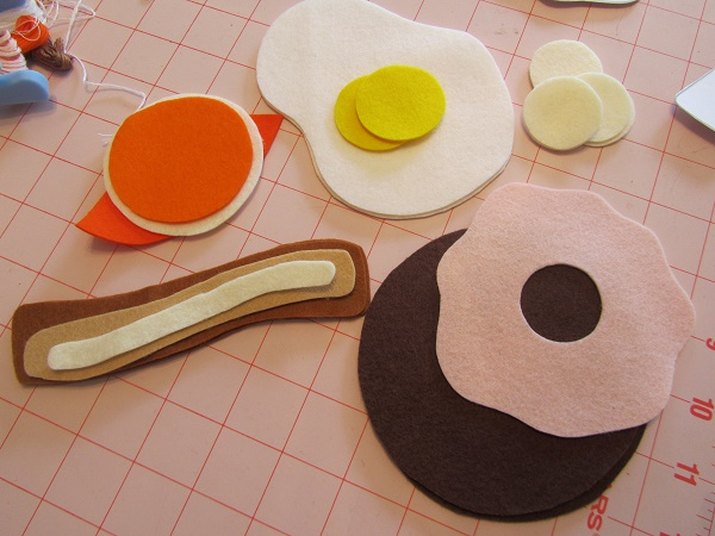
Using the provided templates, cut out all the pieces needed to make the breakfast items. For the orange slices, you'll need orange and ivory felt. Sunny side up eggs are made with white and yellow felt. Ivory felt makes for great banana slices. Bacon slices require dark brown, light brown and ivory felt. A frosted donut is composed of pink felt frosting and a brown felt donut.
Related: Download the free printable templates to make your own felt food here
Sunny Side Up Eggs
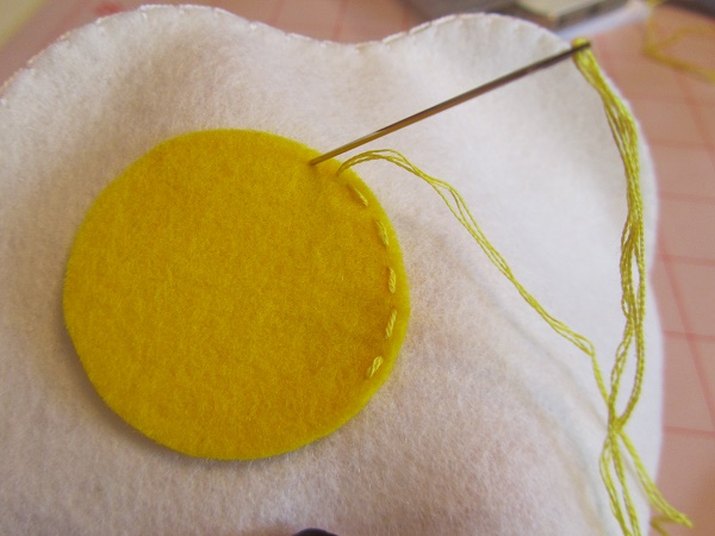
Cut out two egg whites from white felt and two yolks from yellow felt. One of the egg white pieces will be the back of the egg and the other will serve at the front of the egg. Stitch the yolks onto one of the egg whites with yellow embroidery thread using a simple stitch. This will be the sunny side up portion of the egg.
Related: Download the free printable templates to make your own felt food here
Finishing the Egg
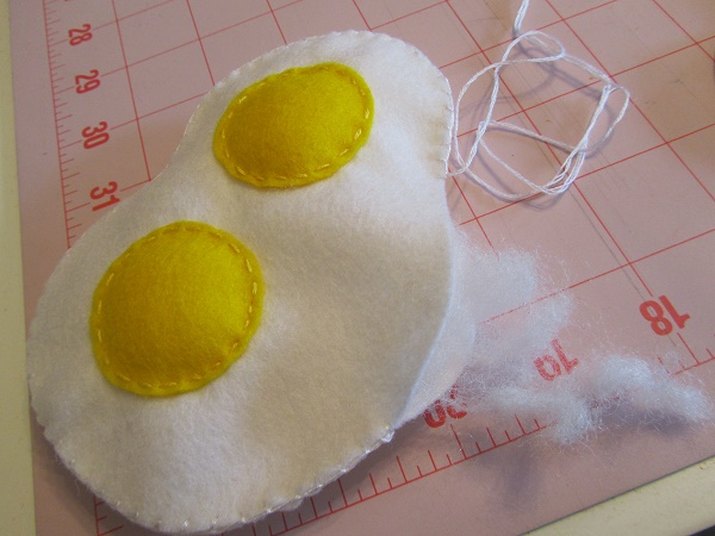
Stitch the front and back pieces of the egg white together with white embroidery thread using a running stitch. Before finishing the stitching for the egg whites, create a space to stuff the egg with some polyester fiberfill. Be sure not to over stuff the egg. You want it to be light.
Related: Download the free printable templates to make your own felt food here
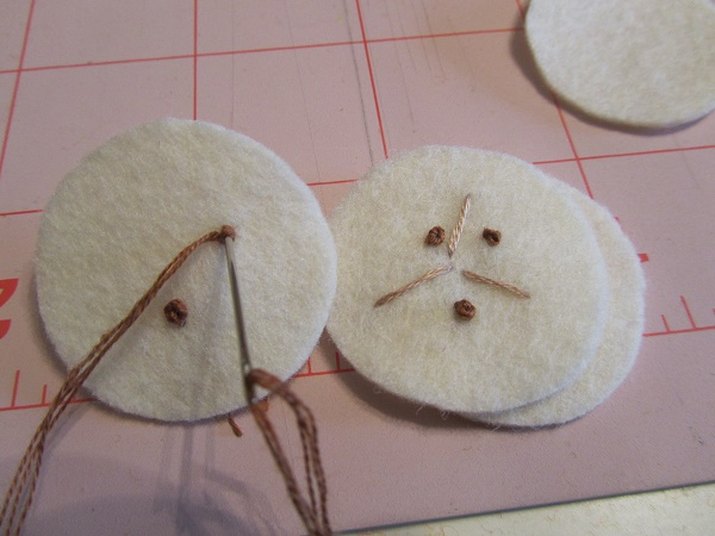
Banana Slices
You'll need two pieces of ivory felt to form each banana slice -- one for the front side and one for the back side. To create the details, stitch three lines with light brown colored embroidery thread and three french knots with a brown colored embroidery thread onto the front side of one piece of felt for a realistic looking banana slice.
Related: Download the free printable templates to make your own felt food here
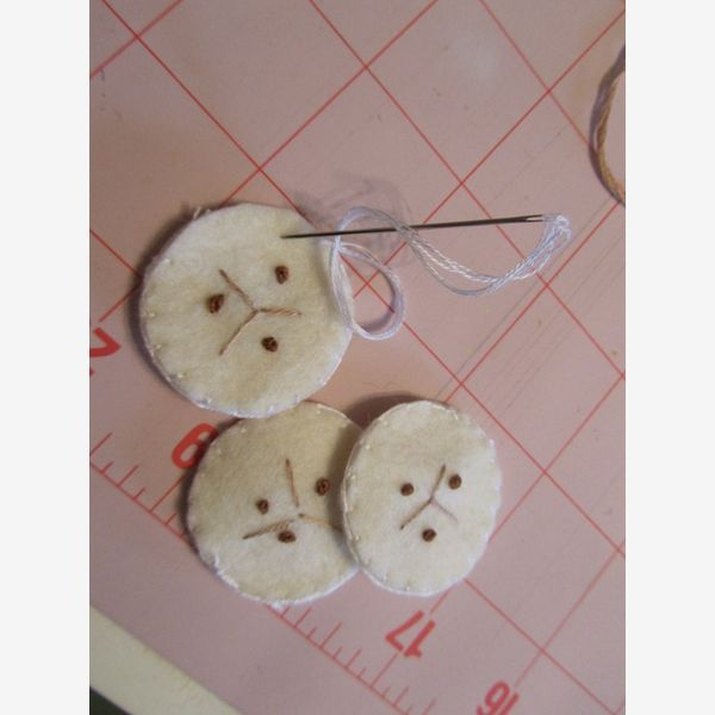
Finishing the Banana Slices
Stitch the two banana slices together with white embroidery thread using a blanket stitch. Each banana slice is two layers of felt and there is no stuffing needed for these so they remain light.
Related: Download the free printable templates to make your own felt food here
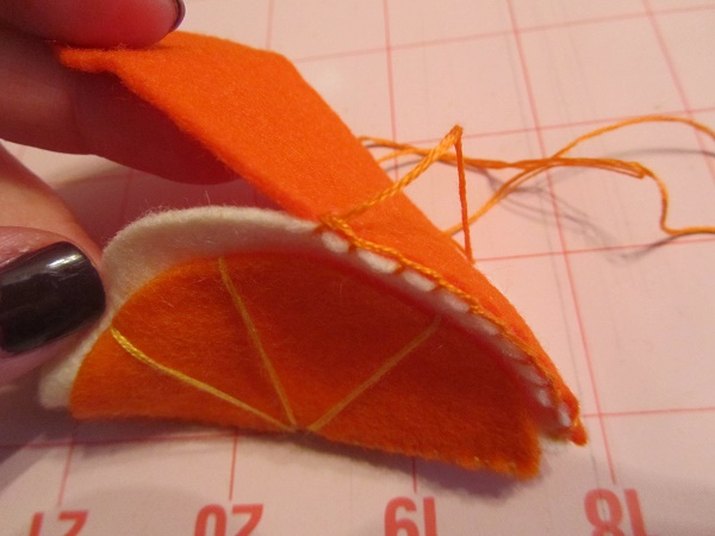
Orange Wedge
Cut the fruit of the orange and rind in half and stitch them together with orange embroidery thread using a suture stitch. Place the orange piece over the rind and stitch in the details with the same orange embroidery thread.
Related: Download the free printable templates to make your own felt food here
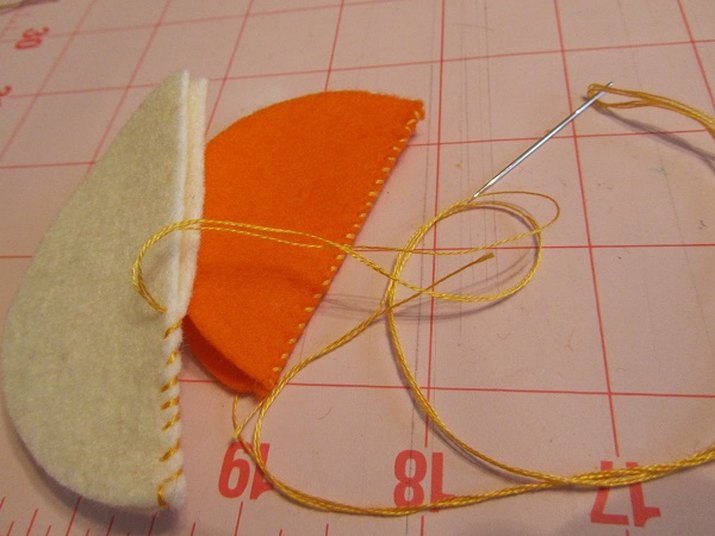
Stitching on the Peel
Stitch the orange and rind to the peel with orange embroidery thread using a blanket stitch.
Related: Download the free printable templates to make your own felt food here
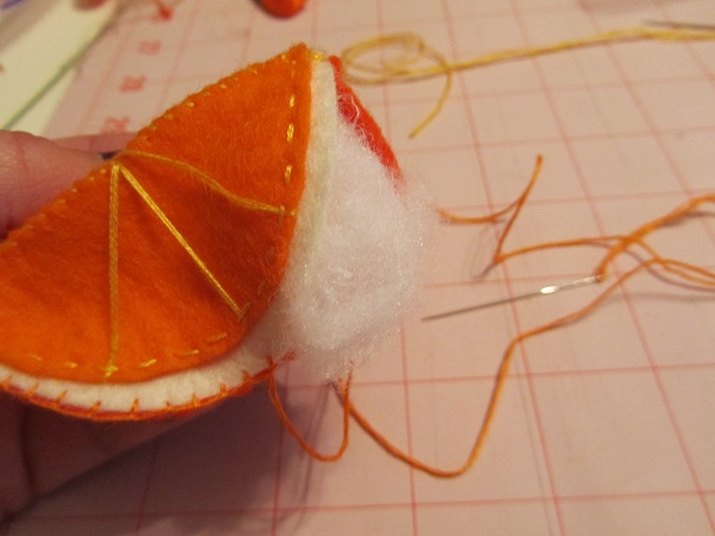
Finish Stitching the Orange
Create a space to stuff the orange and then finish the stitch.
Related: Download the free printable templates to make your own felt food here
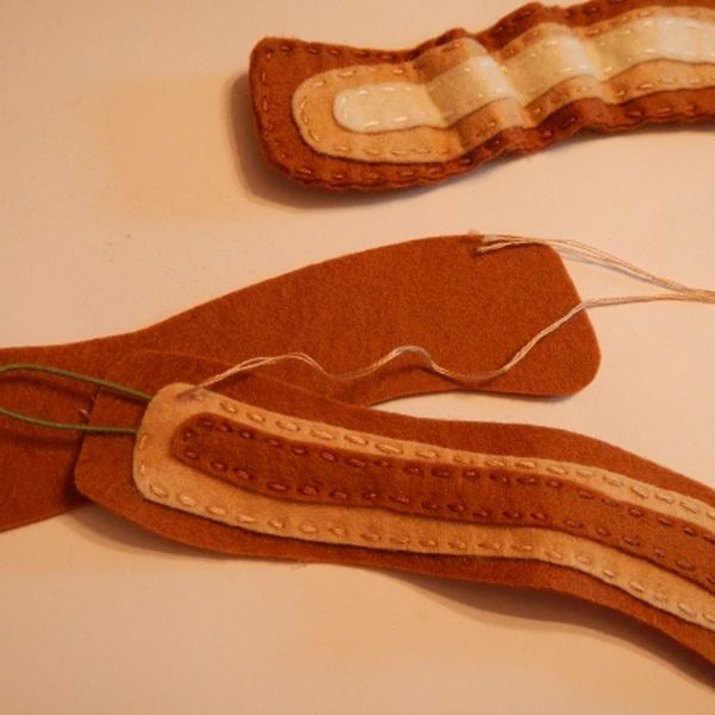
Assembling the Bacon
Cut the felt pieces needed to assemble bacon from the provided template. Stitch the first three layers of bacon together using a simple stitch and alternating the color of the embroidery thread to match the color of the layer. Start by sewing the smallest layer onto the second smallest layer and sew those two layers to one of the base layers. When you've stitched the first three pieces together, you're almost ready to stitch that piece to the fourth piece.
Related: Download the free printable templates to make your own felt food here
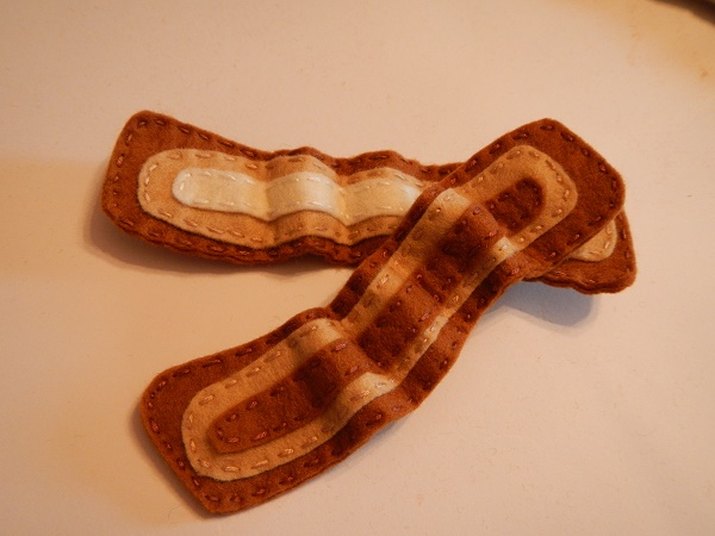
Finished Bacon
Before you finish stitching the layered assemblage to the final base layer, insert a piece of floral wire. The wire will help make the bacon look crinkly and crunchy. The bacon does not require any stuffing.
Related: Download the free printable templates to make your own felt food here
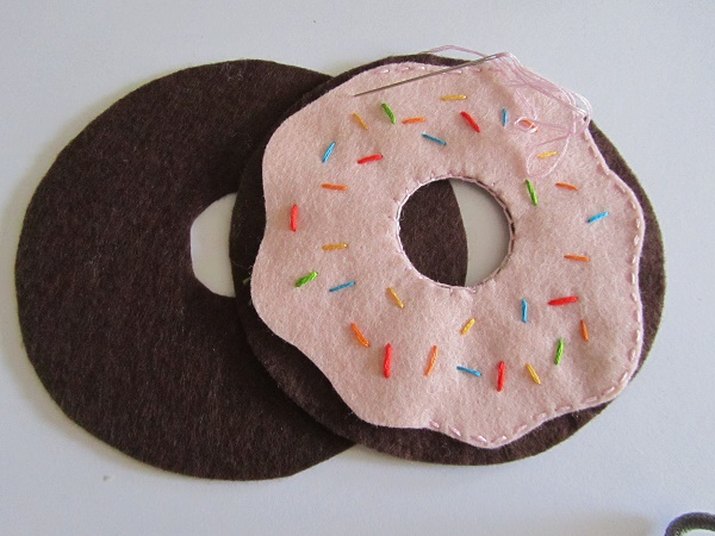
Donut
First, stitch in the sprinkles to the frosting layer using a colorful array of embroidery thread. Then stitch the frosting to one layer of the donut. Do this at the edge of frosting and in the center hole.
Related: Download the free printable templates to make your own felt food here
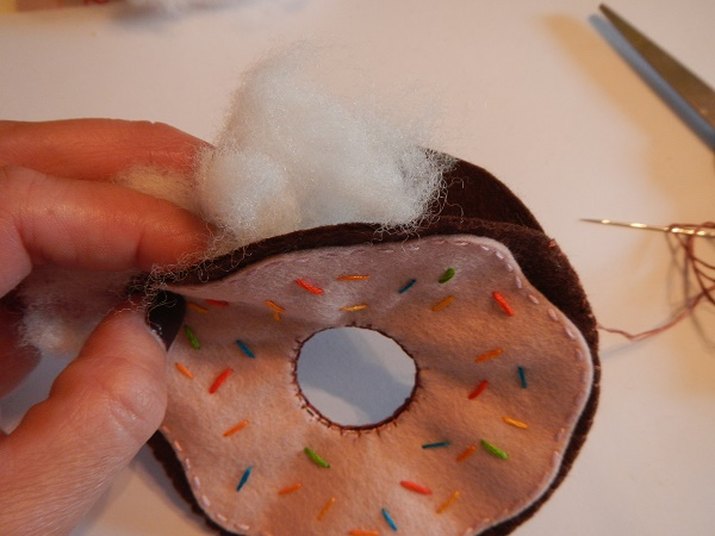
Stuffing the Donut
Stitch the center of the donut to the second donut layer. Add stuffing to the donut as you stitch the outer layer together.
Related: Download the free printable templates to make your own felt food here
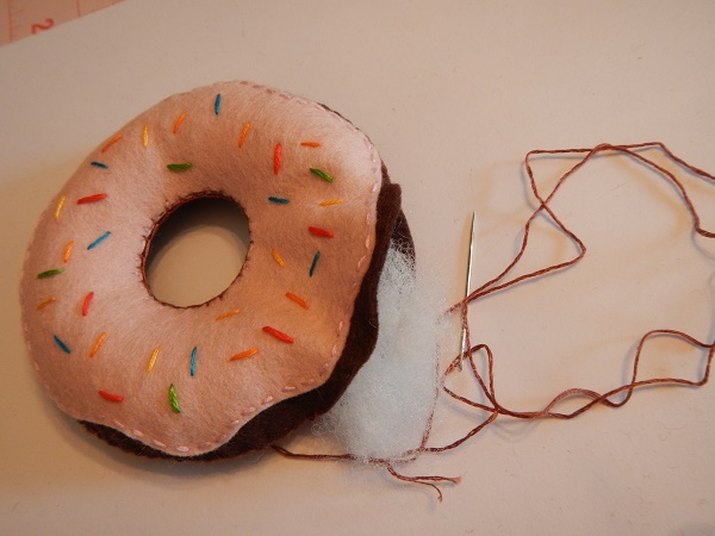
Finishing the Donut
You want to keep the round shape, so stuff donut to a firm consistency.
Related: Download the free printable templates to make your own felt food here
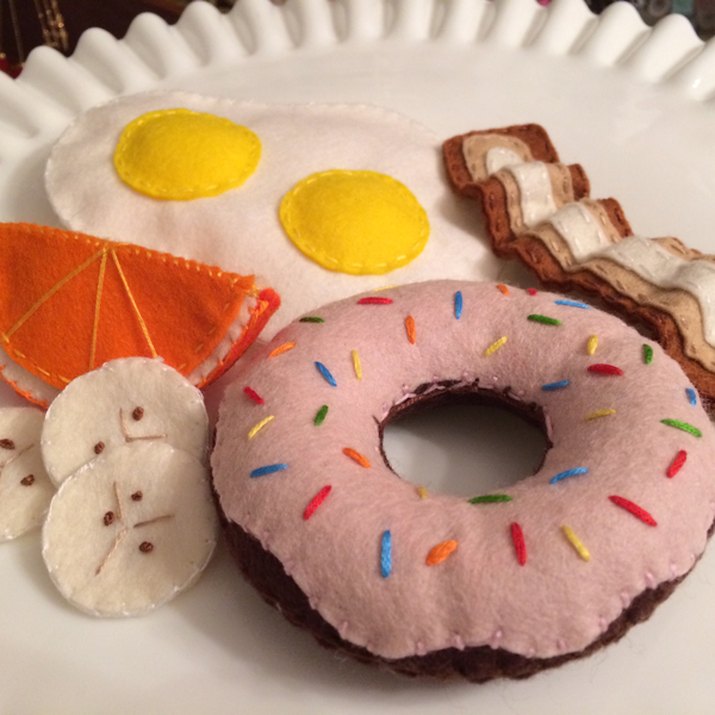
Breakfast is Served
Once you've created your breakfast items, all that's left to do is serve them to the hungry diner. Kids will love arranging and serving up platefuls of fun and healthy felt foods.
Related: Download the free printable templates to make your own felt food here
Advertisement
Video of the Day