
Your amplifier or home stereo has three main components: preamp, power amp and speaker. Your preamp converts the audio signal into an electrical current. Your power amplifier receives the electrical current from the preamp and adds voltage before sending the signal to the speakers. If there is a fault with the power amplifier, the speakers do not receive a powered signal and therefore don't produce sound. The complexity of the repair depends entirely on the malfunctioning part and its location within the power amp.
Step 1
Turn the amplifier off at the wall and allow it cool down. Turn the volume to zero.
Video of the Day
Step 2
Turn the amplifier back on. If the LED that indicates "on" is illuminated, you can rule out a problem in the power supply. Turn the volume dial up slightly and attempt normal operation. If there is sound coming from the speaker, but it is of diminished quality or volume, the power amplifier is functioning but not to its optimum capacity. This could be a loose connection. If no sound is coming out of the speakers, it is more likely that a part is broken.
Step 3
Unscrew the back panel and remove the chassis. Unscrew the lid of the chassis to expose the circuit board. Look for any obvious signs of damage, such as blown fuses or transistors. These will have a brown discoloration. If you spot a blown fuse or transistor, replace it with an identical part.
Step 4
Inspect the wiring and solder joints. Trace the circuit wiring from input and gently pull on the wire. If it is slack, there could be a loose connection. Melt any loosely connected wire joints with your soldering and re-establish the connection. Brush away any solder residue.
Step 5

Examine the printed circuit board. Look out for loose-fitting capacitors and resistors. When one of these parts comes away from the circuit, the circuit is shorted. Once a resistor is no longer performing its job of regulating current, the entire circuit fails.
Step 6
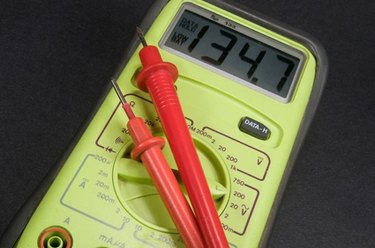
Test the resistors. Place your voltmeter probe directly after the first resistor in the signal chain. Set the meter to "resistance" and power up the amplifier. Each resistor has its value printed on the side. When you power up the amplifier, the voltmeter should give a reading within a 5 percent variance of that value. If it is outside this variance, the resistor is malfunctioning. If it is zero, the resistor is completely shorted.
Step 7
Turn off the amplifier and replace the resistor. Disconnect the solder joint on the base of the circuit board and remove the resistor. Solder in an exact replacement.
Step 8
Test the output transformer. Unscrew the transformer housing to expose the primary winding. Attach your meter leads to the winding inside the transformer and turn the amplifier on. The output transformer should give a reading approximately the same as the power handling detailed in the user manual. A zero reading indicates a shorted transformer coil. An unexpectedly high reading indicates an open (leaking) transformer. Both require replacement.
Video of the Day