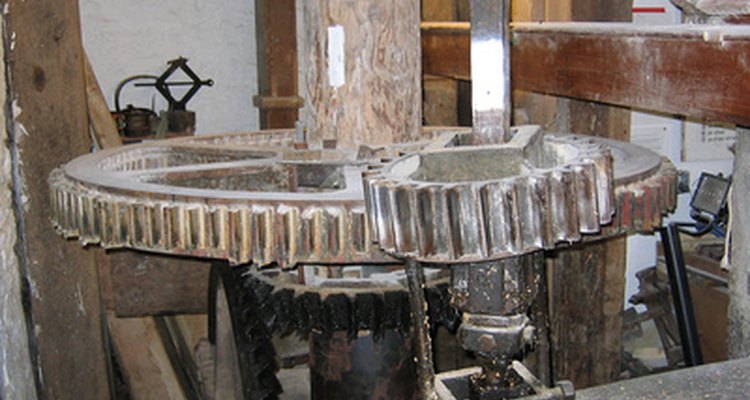
A flour mill makes whole flour out of any grain or seed plant such as corn, wheat, rye, barley, oats, buckwheat, millet, quinoa, nuts, peas, lentils and rice. Such flours are typically used to make breads, pastas and tortillas, or can be used to make pastes such as nut butters, pate choux or bean pastes. Advanced flour mills powered by water, such as the gristmill, were first seen in the 1600s. Primitive flour mills and presses were seen well before the 1600s, proving that milling is an important process to make grains edible for human consumption.
Base
Center one of the 2-by-4 pieces of wood on one end of the 4-by-4 to make a "T" and nail it through the 2-by-4 to the 4-by-4. Repeat this on the other end of the 4-by-4 to make a capital "I" shape with the 4-by-4 in the center and the 2-by-4s at each end. You can see an example of the finished pedal grain mill to better visualize this in the references section.
Place the wood pieces with the 4-by-4 up and 2-by-4 pieces touching the ground to act as feet.
Nail another piece of 2-by-4 with the long end facing up to one end of the 2-by-4 to create an “L” shape out of the 2-by-4 and upward facing 2-by-4.
Using the last two pieces of 2-by-4, make an “L” shape with one piece facing horizontal and the other vertical, so that the pieces touch at one end. Nail these pieces together.
To the end of the piece of wood added in step 3, center the pieces from step 4 on top with the leg of the “L” facing up and toward the inside of the base “I."
Gears
Place the bicycle base on the open end of the wood base, with the bike pedals opposite the pieces of suspended 2-by-4 and the chain mount toward the outside.
Make a mark where the holes in the end of the bicycle base used to screw into the bike frame on the 4-by-4. This should be closest to the suspended pieces of 2-by-4. Drill two holes in the 4-by-4 at your markings and screw the 1/2-inch bolts through the bike base into the 4-by-4 to attach the two pieces securely.
Center the bike gear on the uppermost piece of the 2-y-4, 3-inches from the top. This should create an upward angle of about 20 degrees from the bike base to the bicycle gear.
Holding the bicycle gear in place, ensure that the chain reaches from the bicycle base to the bicycle gear. If it doesn't, move the bicycle gear off center to ensure the chain would be pulled taught between the bicycle base and gear. Mark the center hole on the bicycle gear where it meets the 2-by-4.
Drill a hole in the 2-by-4 where the gear hole was marked, and secure the bicycle gear using the 5-inch bolt. Secure the chain to attach the bicycle base and gear as it would be on a bicycle.
Mill
Screw the grinding stone onto the end of the 5-inch bolt, opposite the bike gear, and secure it with the nut. Once tightened, loosen the nut three turns, so that the grinding stone turns when pushed lightly. Do not loosen the nut so much that the grinding stone can slide back and forth on the bolt.
Measure 1-inch down on the funnel spout from the funnel mouth, and mark this point.
Saw the funnel spout off at the point where it was marked.
Align the top of the mouth of the funnel to the top of the 2-by-4 where the gear and grinding stone are attached. Center the funnel opening over the grinding stone. Measure 1 millimeter between the funnel spout and grinding stone, and mark where the funnel touches the 2-by-4 at this point.
Using the two 1-inch screws, drill the screws through the funnel mouth to the 2-by-4 to attach the funnel securely to the 2-by-4 over the grinding stone. To keep grain from falling through without first being ground on the stone, it is very important that the funnel is not more than 1 millimeter from the grinding stone.
Related Articles

How to Make a Dutch Cheese Press

How to Build a Hop Harvesting Machine

How to Tie Shoelaces With a Ladder ...
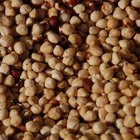
How to Grind Hazelnuts
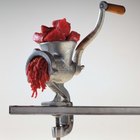
How to Use a Universal No. 2 Meat ...

How to Build a Bamboo Wedding Arbor

How to Preserve Mangoes

How Long to Cook a Suckling Pig on a ...

Baking Chicken Dredged in Flour

Brands of Coffee Good for Percolators

How to Clean Tilapia

DIY Himmeli-Style Christmas Star Tree ...

Free Things to Do in Pittsburgh
How to Replace the Shoestrings in ...

How to Make a Hanging Rope
How to Make a Poncho From a Blanket
How to Remove Watch Band Links From an ...
How to Make Cowboy Spurs

How to Fry Queso Blanco

How to Install a Slide Buckle