Things You'll Need
Safety goggles
Assorted wrenches
Socket set
Flat Screwdriver
Phillips Screwdriver
Old armchair-style bench
Wood (Select one that is not expensive but durable, like pine or oak)
Weather-resistant varnish or polyurethane
Sandpaper
Wood saw
Hammer
Nails
20 dowels
Drill gun
8 pivot hinges
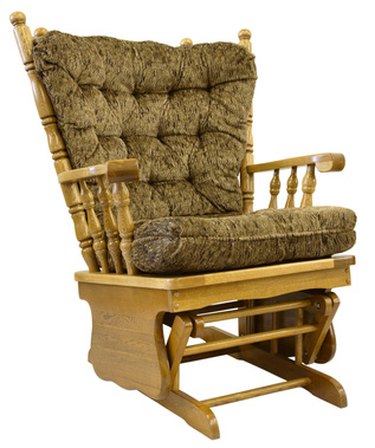
Having a wooden glider chair in your yard provides a place for relaxation and a chance to enjoy nature. A glider chair is a combination glider-rocker that moves back and forth as the seat swings. Many nursing facilities use glider chairs rather than the traditional rocking chairs for safety reasons and because a glider chair has more space to sit with a companion. Glider chairs are also good for feeding babies and lulling them to sleep. By making a customized gliding chair you have the freedom to choose your own design, materials and finishes. An old armchair style bench can be easily converted to a glider to save money.
Step 1
Select an old armchair-style bench to convert into a glider. Choose one with a slim wooden seat and with high open backrest.
Video of the Day
Step 2
Construct the glider base. Measure the distance between its forelegs and hind legs. Cut two planks of wood, measuring 2 inches wide and ensure that it is 2 inches greater in length than the distance of the hind legs and front legs.
Step 3
Make the first side of the glider's support stand. Use two dowels and cut them according to the height of the bench's armrest handles.
Step 4
Ensure that the rest of the vertical dowels are at 60-degree angles to the end of the planks. Hammer down and attach the dowels to the plank.
Step 5
Make the horizontal dowel. Cut the wood; it should have the same length as the bench's armrest handle. Hammer down and attach the horizontal dowel to the top of the vertical dowels.
Step 6
Construct the opposite-side glider support stand. Build the second vertical plank and dowel rhombus. Make sure that the second horizontal support is 3 inches below the top dowel. Hammer down and attach the second support dowel to the other stand.
Step 7
Build the central bench support. Lay down each of the supports constructed and nail and attach the center hardwood plank to the lower horizontal dowels.
Step 8
Brace the center bench rest using two dowels at 90 degrees, from the midpoint of the bench to the rest of the planks.
Step 9
Attach the side stands to the bench legs using four dowels. Measure and cut the dowels accordingly.
Step 10
Drill holes into the dowels and legs and affix the hinges to the holes.
Step 11
Check and assess the functionality of the glider. Straighten and align as needed.
Step 12
Check for loose screws and dowels and replace them when needed.
Step 13
Sand the glider and coat it with varnish or polyurethane to finish.
Video of the Day