Things You'll Need
X-Acto or carving knife
Straightedge
Pencil
120-grit sandpaper
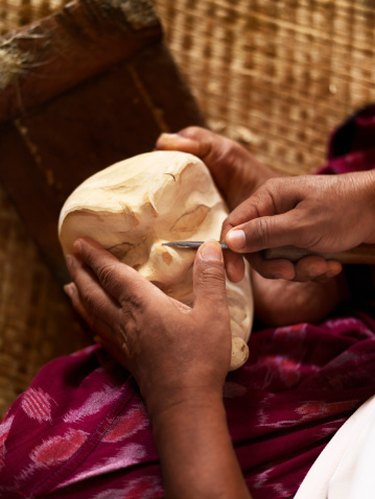
Balsa wood is one of the easiest types of wood to work with. It is a reliable option for creating wood models and structures due to its soft characteristics. Carving balsa wood requires a sharp X-Acto knife and some patience in order to create a pleasant finished product.
Step 1
Draw the design you intend to carve onto the balsa wood using a pencil.
Video of the Day
Step 2
Cut the design out of the balsa wood using an X-Acto knife. Cut against a straightedge for any straight sections that need cut.
Step 3
Hold your X-Acto knife at a slight angle, and carve around the edges of the cut-out design. This will curve the edges, creating a more realistic appearance for the design.
Step 4
Turn the cut-out structure over and place on a flat surface. Angle the blade again, leaning to handle of the X-Acto knife against the center of the object. Cut around the edges from this side to create a point along the edges. This can be repeated at any location where a curved edge is desired.
Step 5
Insert the tip of the knife into any design elements that do not pass the entire way through the structure, and carve a thin line all the way around each design element. Avoid passing the blade the entire way through the balsa wood.
Step 6
Carve a line from edge to edge of each design element you are creating in the structure. Gently pull the edges from the line to remove the entire interior of each design element. This is especially helpful when carving eyes into a balsa wood face, for example, without going the entire way through the wood.
Step 7
Shape the edges of the design using 120-grit sandpaper. Gently rub around the edges to curve the carving into a flowing design. Balsa wood is extremely soft, which allows you to achieve fast results using a smoother sandpaper.
Step 8
Sand around the structural impressions you worked on removing in Steps 5 and 6. Sand gently to avoid pressing through the wood, which can cause a break in the design.
Video of the Day