Using Adobe Photoshop CC, you can type text along a variety of shapes, including circles, arcs, spirals and other curves. To create circular text, use the Elliptical Marquee Tool. For a spiral, use the spiral available in Custom Shapes. For any other curves, use the Pen Tool.
Text on an Oval or Circle
Video of the Day
Step 1
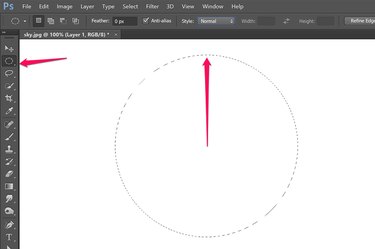
Select the Elliptical Marquee Tool from the Toolbox. Drag the cursor across the canvas to create an oval. To create a circle, hold down the Shift key while you drag the cursor. To create a circle centered on a specific point in the canvas, hold down the Shift and Alt keys and drag the cursor away from that starting point.
Video of the Day
Step 2
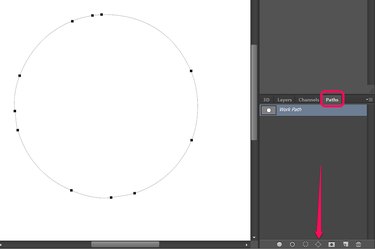
Click the Window menu and select Paths to reveal the Paths panel. Click the fourth button from the left at the bottom of the Paths panel to transform the oval or circle you drew into a work path.
Step 3

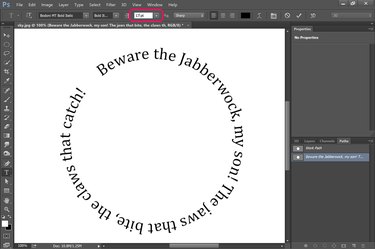
Select the Horizontal Type Tool or the Vertical Type Tool from the Toolbox. Hover the cursor over the path until you see a wavy line appear over the center of the cursor. Click the path and type the text you want to appear.
Step 4
Highlight the text to change the font style and color using the Options bar, just as you would any other text in Photoshop. To select an entire word, double-click it with the Type Tool. To select all the text, click it three times.
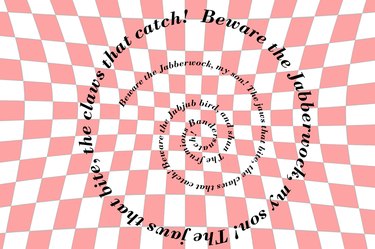
If you want to have the text complete a circle, type a size in the Font Size text field and adjust the size until the type fits perfectly. For example, if 17 pt is too small and 18 pt is too large, try 17.5 pt. The text field accepts up to two decimal points.
Text on an Arc
Step 1
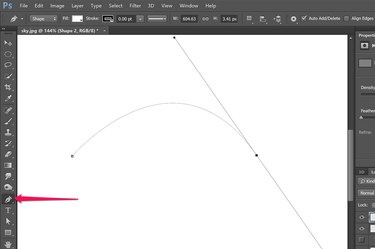
Select the Pen Tool from the Toolbox. Click on the canvas to create an anchor point and then click and hold to create a second anchor point. Before releasing the mouse button, drag the tool to create a curved line between the two points.
Step 2
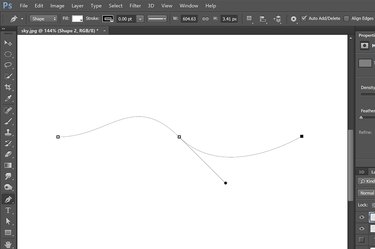
Add an additional curve if desired by selecting a spot for a third anchor point. Click and hold that spot and drag the tool as needed to curve the line between the second and third anchor points.
Step 3
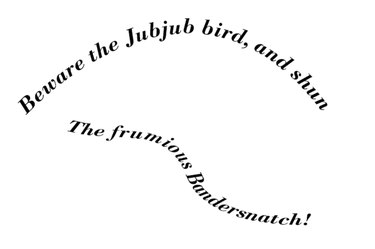
Click on the arc with the Horizontal Type Tool or the Vertical Type Tool and enter the text. Format the text and delete the path layer in the Layers panel.
Text on a Spiral
Step 1
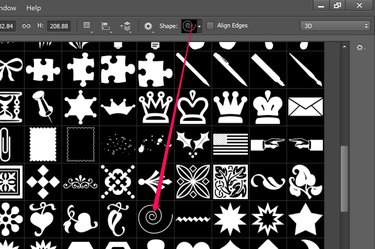
Click theCustom Shape Tool in the Toolbox and then click the Shapes menu in the Options bar. Select the Spiral from the drop-down menu.
Step 2
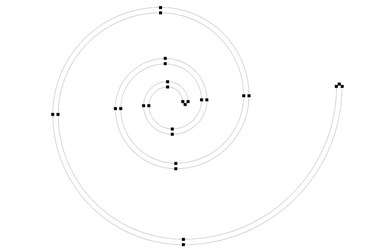
Drag the cursor across the screen to draw a spiral with no fill or stroke. Select a color for the type. Using the Horizontal Type Tool or the Vertical Type Tool, click on the spiral where you want the text to begin and enter the text.
Step 3
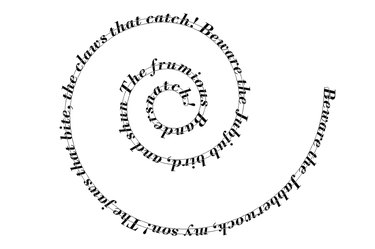
Format the text using the Options bar. When the words appear as you want them, delete the Shape layer in the Layers panel.
Text That Is Warped Into a Curve
Step 1
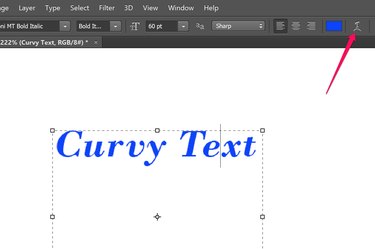
Click the Horizontal Text Tool in the Toolbox. Drag the cursor over the screen and enter the words you want to appear. Adjust the text's appearance by highlighting it and using the selections in the Options bar. Click the Text Warp icon on the right side of the Options bar.
Step 2
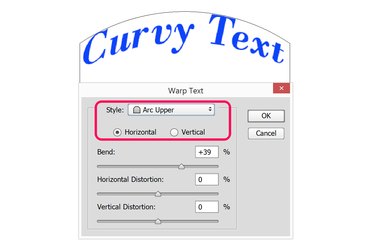
Click the Style menu and select how you want the text warped. The Arc Upper option curves the middle of the text upward, while the Arc Lower option curves the middle downward. Click the Vertical button only if you want the text to curve left to right instead of up and down.
Step 3
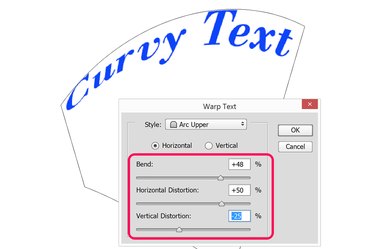
Drag the Bend slider to the left or right to decrease or increase the amount of curve. Use the Horizontal and Vertical Distortion options to further bend the text as desired. Click OK.