You've installed your tile perfectly. Once the thinset dries and the tiles are firmly in place, you can finish up the tiling job by grouting. You'll need a few grouting tools to make the job easier. These tools are specially designed to press the grout into the tile gaps and get a smooth finish.
Grout Float Tool
Video of the Day
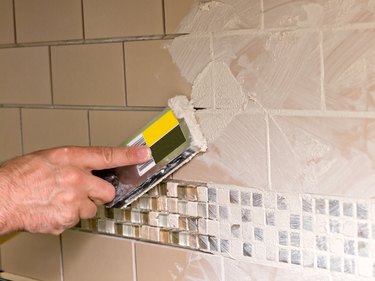
The primary tool used to actually apply grout to tile joints is the grout float. This tool features a large, flat bottom surface, which is what you use to scoop up and spread the grout. That part of the float is made of rubber so the grout wipes off easily while also gliding over the tiles without damaging them. The float also has a handle, which can be in many different styles. Pick up the grout floats to test out the comfort of the handle before making your purchase.
Video of the Day
Standard grout floats work for most tiling jobs, but you may need a specialty float depending on the situation. If you're using epoxy grout, which is an especially sticky type of grout, get a float designed for that type with beveled edges to make the job easier. You can also get specialty grout floats for use with natural stone tiles. The softer rubber on these floats aims to prevent scratching and cuts down on the grout residue on the naturally bumpy stone surface.
When grouting, dip the flat part of the float into the grout mixture to get a small amount on the tool. Swipe the float across the tile to push the grout into the joints. The float has rounded corners to help shape and smooth the grout lines once you fill them.
Grout Bag Alternative
An alternative to the float is a grout bag. Think of it as a pastry bag but for use with grout instead of frosting. If you're looking for grout application tips for porous or uneven tiles, this may be your solution. To use, fill the bag with the prepared grout. It has a tip on it so you can direct the grout into the joints instead of smearing it over the entire tile. As you twist and squeeze the bag, the grout fills up the gaps. It's best to work in small batches, applying even, consistent pressure on the bag for the best results.
Clean Sponge and Cloth
An important part of the grout application process is cleaning off the tiles. If you leave the grout on the tile surface for too long, it becomes very difficult to remove. Wipe the tile surfaces with a damp sponge, working diagonally, after the grout sits for about 20 to 30 minutes. Be careful not to dig the wet grout out of the joints. The sponge needs to be rinsed often to effectively remove the grout from the tile surfaces.
You can also use the sponge to help shape the joints after you clean off the tiles. Look for joints that are uneven or high. Run the sponge over the joints, pressing gently with your finger into the sponge along the joint to smooth and level it. If you press too hard, you'll dig into the joint or pull out too much grout.
After about 30 minutes more, you'll notice a dried haze on the tiles. This is where your clean cloth or towel comes in handy. Use a soft, damp cloth to wipe away the haze. Continue wiping until you remove the haze from the tiles.
Using a Putty Knife
A putty knife is a useful tool for many home improvement projects. While the wide, flat surface seems ideal for applying grout, it's best not to use a putty knife for the actual application. Why? The metal blade can scratch your freshly installed tile, leaving it marred before the grout even dries. Using a putty knife to mix up small batches of grout or to scoop it into a grout bag is an option. But stick to a bag or float when you're applying the grout to the tiles.
Grouting is the final stage of a tiling project and helps get the crisp lines and finished look you want. With a little patience and the right tools, you can complete the job easily.