Things You'll Need
Pine needles
Artificial sinew
Two embroidery needles or any other type of sharp needle that the sinew will fit through the eye
Scissors
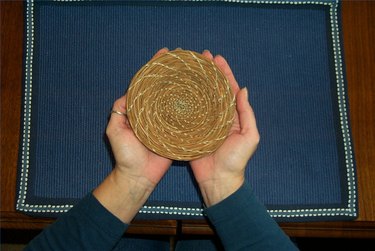
Chances are that you have looked at pine needle baskets and decided that you could do that too--and you can! It doesn’t take a special talent or expensive equipment—just time and patience. These instructions are for a basic “plate” shaped basket from 4 to 6 inches across. It’s a good beginner’s project, and once you succeed you’ll want to make more. When you master the basics, your designs are only limited by your imagination.
Step 1

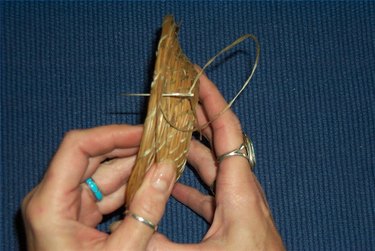
Pull off the caps (the sheath on the needles that hold the needles together) on the needles. Pliers make this job a lot easier.Soak a few dozen needles in water for up to an hour. It’s important to soak these needles well for the “start,” because they need to be very pliable as not to break. When you need more needles, soak them for no more than 10 minutes. If they are soaked too long, they shrink when they dry and the basket becomes flimsy. Cut about a 9 foot length of sinew and thread your needle. If you find this too cumbersome, use about 6 feet. Gather four of the thinnest needles and hold them in your left hand with the blunt ends even. Take the end of the sinew, and place it ¼ inch from the blunt end of the needles. Pull the sinew about two inches down the needles, and hold it there. Begin wrapping the sinew around the needles toward the blunt ends. At this point, the pine needles should be pointing to your right, and the sinew should be wrapped over the needles, not under. Keep wrapping until you have ¼ inch of the blunt ends of the needles still showing.
Video of the Day
Step 2
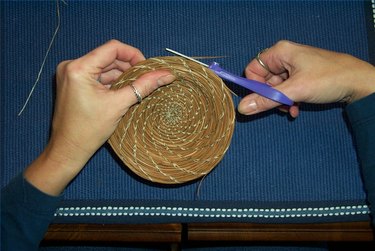
Very carefully (this is where the needles might break if they aren’t soaked long enough), bend the needles down until the bare, blunt ends are lying against the rest of the needles. Wrap the sinew around both the bare ends and the wrapped portion until the blunt ends are covered. This forms a loop. Bend the loop down until it is lying against the pine needles. The needles should be sticking out to your right, and the “start” should be below the needles. With the sinew coming over the needles, put your first stitch in, piercing the sinew in the start. Pull it through and continue stitching until you do a full coil. When you start on the second coil, pierce the stitch on the first coil and continue stitching in the same way that you did the first coil. This will give you the swirling pattern. It’s important at this point to get your stitches even. If there’s too much of a gap, or if they are too close, it becomes exaggerated as your basket progresses. Fortunately, it’s easy to make adjustments at this point. If you find you need to adjust, you can add or drop a stitch or nudge the stitches over, and this won’t show in your finished project.
Step 3
Although there are a number of stitches for coiled baskets, the chain stitch is the easiest, and it is very attractive. It gives the baskets a graceful swirled look. The chain stitch is achieved by simply bringing the sinew from behind the basket, over the coil, and piercing the stitch (to the right) in the previous coil. The swirling comes naturally. After your start is completed, continue to stitch in this manner. You’ll notice that you’ll have a good side (the side that you can clearly see your pattern) and a bad side (the side where the stitches run parallel). In this project, you will want the good side facing toward you.
Step 4

As you end your start, you’ll need to add more needles to do two things: increase the diameter of the coil and to add length. When you took the caps off the needles, you probably noticed that some of the needles clung together in a clump; some were thinner, and some were thicker. You don’t want them to be uniform. Begin to slowly add in more needles at the end of the start, no more than one per stitch and use the thinnest ones to start out. The blunt end of the needle should be buried within the coil so that it doesn’t stick out as you coil. The first few may have to be held in place until you make the next stitch. As the diameter of the coil increases, you can use the thicker needles. The desired diameter is a little less than the diameter of a pencil; although, everyone has a preferred diameter to work with. Experiment a little to see what you are comfortable with. Some coilers like to use a guide. This can be made from the metal eraser holder from a pencil or a piece of metal tubing. The guide is slipped over the needles and then more needles are added as needed. Whether you use the guide or not, the idea, in this project, is to keep the diameter as consistent as possible. Occasionally, you will find that your coil is too thin, and you can add more than one needle per stitch or a clump of needles.
Step 5
When you are down to about 10 inches of sinew, you will need to add more. Measure off about 9 feet, and thread the other sewing needle. Count down three coils from your last one, and put the sewing needle, with the new sinew, through the same hole that the stitch made. Pull the sinew through until there is about 2 inches of “tail” left. Come back up through the second stitch down, being careful not to pull the tail through the basket. Go back down through the first stitch. Make one stitch with the new sinew as you normally would. Stitch over the top of the new sinew with the old sinew, taking care to line up both as well as possible. Make two more stitches with the old sinew, and then run the old sinew down two coils—similar to what you did to add in the new sinew. Your old sinew should now be on the bad side of your basket. Stitch on top of the old sinew with the new sinew until both are even. Snip off the tail and the old sinew close to the basket. Continue coiling. When you reach the doubled stitches where you added new sinew, make sure that your needle goes through both of the layers. Your stitches where the new sinew was added will be almost undetectable after a few coils.
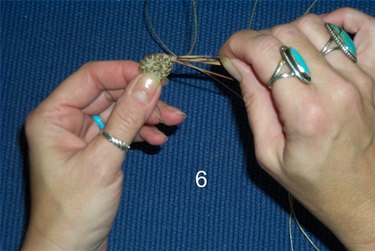
Step 6
Shaping your basket isn’t difficult and gets easier with practice. When your center disc is 2 to 3 inches across, you will need to start coming up on the sides. This is done by gently placing your coil at an angle from the previous coil. On this basket, the angle will be fairly sharp. You will need to push inward slightly on the first coil to hold it in place, but the next coils will fall into place. You learn to feel the angles of your basket as you make more. For a plate shape, continue this angle for three to four coils, and then place your next coil outward, forming a lip. Continue this angle for two to three coils. If you would like a bowl shape, simply continue the upward angle.
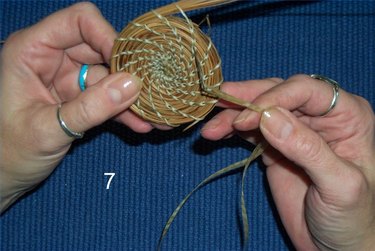
Step 7
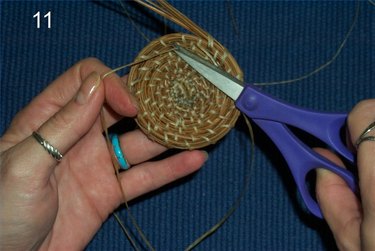
When you get the desired size of the basket, you are ready to finish it off. Take a few minutes to consider the shape of the basket. Because coiling adds a new row on each time you coil around, you’ll need to determine approximately where you started so that your basket doesn’t have a lopsided shape. Some people like to mark the beginning of the start with masking tape to make it easier to figure where to end. When you have determined where you want to end your basket, gradually begin to decrease the diameter of the coil by not adding more pine needles. When you’ve reached the point where you want to end, bring your sewing needle down through the hole made by the stitch in the previous coil, and continue this for several rows. End with your sinew coming through the bad side, and snip off the sinew close to the basket. Carefully snip any excess pine needles from the last stitch. You basket may look a bit “hairy” from ends of pine needles sticking out from between stitches, so carefully snip them off taking care not to cut the sinew in the process.
Tip
Don't try to do this project in one sitting. Be patient; it's worth it. Use the longest pine needles you can find. Avoid using white pine or very thin needles.
Video of the Day