Things You'll Need
Transfer pencil
Fabric
Embroidery hoop
Thread nippers
Crewel needle
Crewel yarn
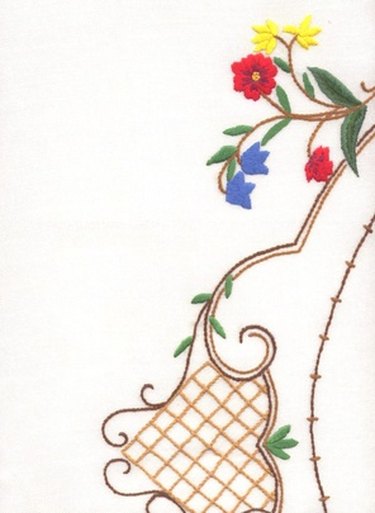
Crewel embroidery uses basic embroidery stitches to create artistic designs and motifs on fabric with two-ply wool yarn. Basic stitches in crewelwork include satin stitches, running and chain stitches, French knot stitch and outline stitches common to other types of embroidery. Crewel yarn is thicker than embroidery threads made of cotton or silk. As with most embroidery projects, crewelwork follows lines transferred or stenciled to fabric, embracing conventional floral patterns, leaves, stems and curving vines. Woven cloth, like linen, cotton or silk, makes the best structure for crewel embroidery, and light or natural colors show off your stitching best.
Step 1
Draw or stencil a design onto the fabric. Any pencil medium will do, including a lead pencil. The stitches cover any pencil marks. Make marks for dots, lines, curves and circles.
Video of the Day
Step 2
Place the fabric into the embroidery hoop. Stretch the material taut, pulling and adjusting the material around the hoop until the fabric is flat and even.
Step 3
Cut a piece of thread--about 20 inches long. This allows enough thread to work efficiently without tangling or knotting.
Step 4
Thread the needle. A crewel needle has a larger eye than an embroidery needle, which is necessary to accept the thicker thread. Insert thread into the needle's eye pulling it through until there is a shorter and longer length, unless a pattern calls for doubled thread.
Step 5
Insert the needle from underneath the fabric, emerging on the top side. Pull the thread through the fabric, leaving a 1-inch tail on the underside. Place the tail in the stitch pattern to catch and hide it, stitching over it as you go. Follow the design using your chosen stitch.
Step 6
End a stitching pattern by leaving the needle and thread on the underside of the fabric. Take the leftover thread and draw it through the back of the stitches with the needle, snipping off any leftover thread. This hides the thread and keeps it securely in place, so you don't need to knot the thread end.
Tip
Satin stitches are good to fill in leaves and flower petals while running stitches, chain stitches and outline stitches work well with longer, curving vines and stems.
If you have difficulty threading the needle, cut a small strip of paper slightly narrower than the needle's eye. Fold it over the end of the yarn and slide it through the eye.
Video of the Day