
How to Brace a Self-Standing Pergola

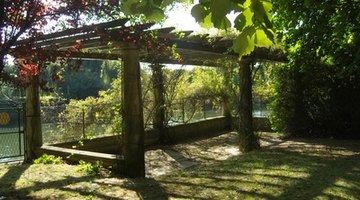
A pergola is very much like an arbor that supports the roof of a trellis. Pergolas are practical in that they provide a shaded area for a backyard or garden. They are also the ideal structure to allow climbing plants to grow on to enhance the look of a garden or outdoor area. There are a lot of different design plans when it comes to making your own pergola, as well as different methods of bracing a free-standing pergola.
Check With Local Codes Before Installing Pergola Posts
-
Check with your local planning office so that you know the approved methods of installing pergola posts in your area and are working to code. Free-standing pergolas need to be solidly braced by anchoring the posts securely.
-
Dig a hole about eight to 12 inches deep for each pergola post. The width of the hole should accommodate the post with three or four inches on each side of the post. Place small stones or gravel at the bottom of each hole. This will ensure better drainage out of the holes.
-
Mix concrete in a wheelbarrow. Cement mix is usually three parts gravel, two parts sand and one part cement stirred with water to a stiff consistency, however, you may also use quick drying cement. Ask an assistant to hold the post upright in the hole. Pour cement into the hole around the post right up to the point where it is level with the ground.
-
Put a bolt down pergola bracket around the bottom of the post and over the cement area. A bolt down pergola bracket kit comes with four U-shaped brackets and with four bolts for each bracket. Put the bolts through the four holes and secure them with a nut. The brackets will hold the post in place while the cement dries completely and will further brace the posts for additional support.
-
Repeat steps three to five for the other pergola posts.
References
Tips
- Installing pergola posts into cement in the ground will ensure stability for the pergola. It will also encase the underground portion of the post which will protect it from moisture and bugs to maintain the durability of the lumber.
Writer Bio
Dawn Sutton began her writing career in 2004 with an article on Internet counseling for a psychology journal. She writes numerous Internet articles on a variety of subjects including health, travel, education, crafts and much more. Sutton has published the books "The Manual" and "God's Girl" and numerous feature film scripts. She has a master's degree in social work from the University of Toronto.
Photo Credits
- pergola image by titi78430 from Fotolia.com
More Articles