Things You'll Need
Top-grain leather
Leather shears
Carbon paper
Stamps
Engraving tools
Hole punches
Lacing chisels
Stylus
Mallet
Water
Sponge
Leather burnisher
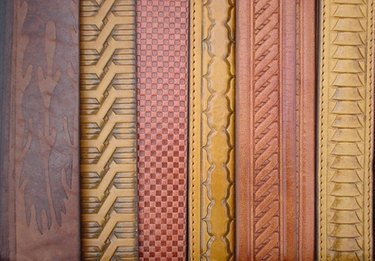
Personalizing leather with custom lettering, engraving, designs, lines, edges, borders, colors and other types of treatments is quite popular for items such as belts, boots and jackets. But, leather is commonly worked or tooled for many other applications ranging from books to tabletops and beyond. Because well tended leather is durable, and available from sustainable resources, it is often a good choice for quality items designed to endure over time.
Step 1
Select a top grain leather appropriate to your project. Tooling is done on the smooth face of the leather. Make sure your leather does not have a finish applied to it before you buy it.
Video of the Day
Step 2
Cut your leather to the size and shape you want using leather shears. Keep in mind that tooling the leather will cause some expansion or spread and that keeping the leather wet during tooling will mean that the leather will shrink as it dries. It is good to keep a sample of your finished size drawn on scrap paper so you can check your progress to see if your leather is growing or shrinking too much as you work.
Step 3
Lay your leather flat. Place carbon paper carbon side down over the leather. Position your pattern so that it fits the leather and trace your design onto the leather. Remove the papers.
Step 4
Punch holes using a leather punch or chisel. Use a leather mallet to strike the chisels or tools as metal hammers will drive the chisel too hard.
Step 5
Soak your leather for 20 to 30 minutes. Pull the leather out of the water before it becomes too "fleshy." Each leather type is different so keep a close eye. If you over-water your leather, allow it to dry to the right soft leathery texture before tooling.
Step 6
Engrave using engraving tools. Place the tool along the line you wish to indent. Hold the tool level to the leather and tamp the end with a leather mallet. Tooling leather is a skill that develops with practice, you do not want to strike too deep and leave small cuts and you do not want to strike too shallow and have some of the pattern on the metal engraving tool not show up on the leather.
Step 7
Keep your leather moist while you work by adding water with a sponge. You will soon have a feel for how much is the right consistency to produce the engraved look you want. Use various stamps and shapes to form your designs. Use a stylus to draw lines.
Step 8
Rub your work smooth with a leather burnisher when you are finished. These are metal or wood tools with smooth edges that allow you to rub (as if polishing) along areas to smooth out the look. Burnishing helps engraved work last longer.
Tip
Apply dyes, colors, treatments and finishes once you are certain that all tooling is finished.
Video of the Day