
Simple electrical projects for school students can be fascinating, and even basic circuits can provide interesting results. Using a dry cell battery as a power source is safe (children should be supervised by an adult), and the voltages and currents involved in the corresponding circuits are too low to do any damage. Alligator clips on the wires let you change your circuits quickly, and they can clip onto terminals or electrical components making a good electrical connection. Use colored wires for your project so you can keep track of which wire has to be connected to a given point. Mounting everything on a wooden board or stiff cardboard makes it easier to work with the circuits. Once you have mastered the projects described later, they can easily be extended to new projects with different electrical components yielding more insights into how electricity works.
Warnings
Do not open, pierce or in any way damage batteries.
Build an Electric Power Supply
Get an AA dry cell battery and firmly attach wires to it. If you examine the battery carefully, you will notice that it has a minus sign near one end. The wire color associated with the negative end of a battery is black while for the other end, the positive side, the color is usually red. While any wire will work, if you want to follow the convention, attach a red wire to the positive side of the battery and a black wire to the negative side.
To make it easier to connect the wires to other electrical components, use wires with alligator clips on the ends not attached to the battery. You may have to get a battery holder to attach the wires to the terminals. The battery with the wires is the power supply for your electric circuits.
Create a Simple Electric Circuit Project
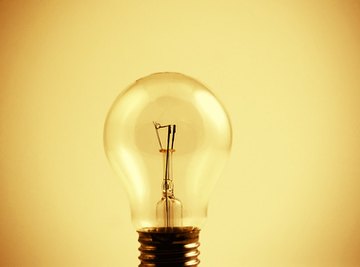
Mount the power supply on a piece of wood or a stiff cardboard. Get a 1.5-V light bulb, a light bulb socket and a low voltage switch. Mount the light bulb socket and the switch on the board and put the light bulb in the socket. An easy way to get a socket for the light bulb is to take apart an old flashlight and use the bulb holder. Once you have everything mounted, you can create your circuit.
Connect a wire from the switch to the light bulb. If you are using the color convention this wire could be any color but white wires are often used for connections that are not positive or negative. Make sure the switch is switched off. Connect the black alligator clip to the empty terminal of the light bulb and the red alligator clip to the empty terminal of the switch. Switch the switch on and the light bulb will shine. You have closed an electric circuit.
Discover Which Materials Conduct Electricity
Leave the black wire connected to the light bulb and disconnect the red wire from the switch. Attach a new white wire with alligator clips to the switch. Carry your circuit board around the school and attach the white and red clips about an inch apart on different materials. Switch on the switch, and if the light comes on, the material conducts electricity.
Many objects around the classroom can easily be tested and you can attach the clips to chairs, desks, door handles, keys and clothes. In general, metals conduct but not wood or cloth. You may find that some materials conduct only a little, making the bulb glow rather than shine.
Add a Motor to Your Circuit
Get a 1.5-V electric motor and mount it on your circuit board. Connect the two terminals to the two terminals on the light. Make sure the switch is off and the red and black clips are connected to the switch and the light. Turn on the switch. The light shines and the motor turns. The bulb and the motor are both in your circuit in parallel.
Try switching the black and red clips to see if it makes a difference. It doesn't affect the light bulb, but the motor now turns in the opposite direction. For the motor, it is important where the positive and negative wires are connected.
Additional Electric Circuit Projects for School
Once you have your circuit board set up, you can mount and connect all kinds of electric components. To work on your system, they have to be made for 1.5 volts. For example, you can try connecting LEDs, a nail wound with wire to make a magnet, a small heater or a fan. You'll see how the switch controls when they run, and you can check whether the connection of the negative and positive wires affects their operation. Learning about basic circuits through such a simple electric circuit project is an important step for understanding how electricity works.
References
About the Author
Bert Markgraf is a freelance writer with a strong science and engineering background. He has written for scientific publications such as the HVDC Newsletter and the Energy and Automation Journal. Online he has written extensively on science-related topics in math, physics, chemistry and biology and has been published on sites such as Digital Landing and Reference.com He holds a Bachelor of Science degree from McGill University.
Photo Credits
light bulb image by Photosani from Fotolia.com