Attaching your Nikon DSLR camera to a telescope lets you photograph distant objects in the night sky such as the moon, planets and stars. Long-exposure photographs reveal far more detail than you can see with the unaided eye, rendering in vivid color objects otherwise only faintly visible through a telescope. Use your DSLR to capture breathtaking images of the universe to share with friends and family or to document your observing experiences as an amateur astronomer.
Turn off your camera. Detach the lens by pressing the lens-release button and holding it down while you turn the lens clockwise.
Attach the T-ring to the camera by screwing it counter-clockwise into the lens mount. T-rings differ from camera to camera, so make sure you purchase a T-ring compatible with your Nikon camera. Screw the T-adapter into the T-ring.
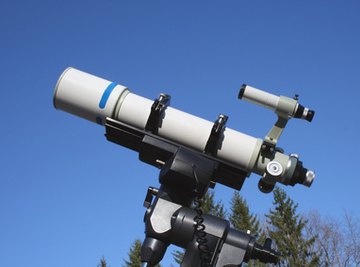
Insert the T-adapter into the telescope’s focuser. Tighten the thumbscrew on the side of the focuser to ensure the camera does not slip out during use. Wrap the camera’s carry strap around the telescope’s tube to further secure the camera.
Configure the camera for astrophotography. Turn it on and set it for “Manual” mode. Disable the flash, autofocus and noise reduction. Switch from “JPG” to “RAW” mode to disable image compression. RAW mode provides the highest image quality possible with your camera and gives you more options when editing your pictures with image-editing software.
Set the ISO setting to 200 or lower if imaging bright objects, such as the moon or planets. Otherwise, set the ISO level above 200 if photographing fainter objects, including galaxies, emission nebulae and planetary nebulae. Higher ISO settings produce sharper images, according to FVAstro.org, but can introduce noise and discoloration into images because of the increased light sensitivity.
Configure the shutter speed. Set the shutter speed to 30 seconds or lower if using a “push-to” mount. Longer shutter speeds produce distorted images of the stars because the Earth’s rotation becomes apparent with exposures above 30 seconds. If using a “go-to” mount that moves the telescope in parallel to the Earth’s rotation, set the shutter speed to “Bulb.” This will allow you to capture more light, producing more colorful, detail images than with shorter exposures.
References
About the Author
Joel Douglas has been writing professionally since 2004. In addition to running a music website for several years he also has copy-edited books on social philosophy and produced training materials for a public library. Douglas has a Master of Arts in English.
Photo Credits
refractor telescope image by Jim Mills from Fotolia.com