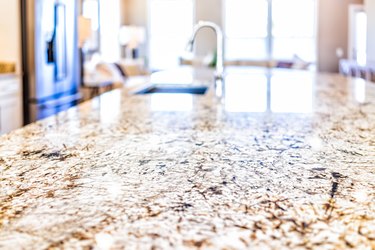
A wide expanse of gleaming granite countertop is a gorgeous accent to any room. This material is quite dense and heavy, though, so cutting granite to fit your space will require patience and the proper tools.

Types of Granite
Granite comes in thick, continuous slabs or thinner, more manageable tiles. The large slabs will need to be cut down to fit the countertop or area where you plan to install it. Once it's cut, it will need to be grouted along the seams.
Video of the Day
Video of the Day
Granite tiles are less expensive than a large slab of granite. They may be easier to cut and install, depending on the location where they are being used.
How to Hire a Pro
Granite can be difficult to manage. It is an expensive and heavy material to work with so you will need a lot of patience as well as the many tools required to cut the thick stone. An expert can cut the tiles to your exact needs.
Before you hire an expert granite tile, check that they are licensed and have a good standing with the Better Business Bureau or contractor's board in your area. It's preferable to hire someone with at least a few years of experience with granite, not just tile.
Calculating How Much Granite You Need
When you're preparing to cut granite, make sure you have enough for all parts of your project. Make allowances for mistakes, breaks, lips and backsplashes. These can often get forgotten as the project winds down and the supply of granite is nearly gone.
To know how much granite you'll need, you'll first have to crunch some numbers. Multiply the lineal footage of the countertop by 2.5. The typical countertop has linear footage of 24 inches.
Add extra tiles for two main reasons: breakage and the front lip. The front lip requires at least one tile to cut per two tiles across the front of the countertop to ensure you have enough. If you plan to install a backsplash, add tiles to cut for this as well.
From that number, subtract measurements for the sink, stove or other countertop built-ins or space that won't be covered in tile.
Cutting the Countertop Lip
A front lip on a granite countertop gives it a crisp and distinct finish. Cutting the tiles for the front lip can be tricky. They should be cut at 45-degree miters in order to fit snugly against the flat countertop and with each other. If the saw blade is dull, it may create minor imperfections in the granite. This will cause the lip to buckle or otherwise not lay smooth and flat along the front line of the countertop.
A circular saw with a dry-cut segmented diamond blade is the best tool for getting a clean cut on these tiles to be perfectly placed.
Tools for Cutting Granite
To correctly cut granite for a countertop or other home project, you'll need a few tools to get the job done. These include:
- Diamond Blade for either wet or dry saws.
- Dremel tool.
- Clamps.
- Plastic spacers for backsplash tiles.
A wet tile saw and a circular saw with a dry-cut segmented diamond blade will cover all your cutting needs for granite tile or a slab. A wet saw should be used for thick granite. Always use a sharpened diamond blade to safely and cleanly cut through granite.
A Dremel rotary tool is good to have on hand for cutting small holes for plumbing or electrical. A honing stone is ideal to soften edges.
Used Granite Tools
You can easily obtain used granite tools online. If you do, make sure that they're sharpened before you begin to cut the granite slab or tiles. Used tools can be cheaper than renting and can save you money on the project, particularly if you're planning on only using them for just one granite cutting job.
The electrical cord is often overlooked when people purchase pre-used tools. Check the connection where the cord meets the tool. Go down the length of the cord to make sure it isn't frayed or badly damaged.
Plugs tend to be forcefully yanked from outlets, so also check that the prongs are in good condition and aren't loose in the housing that connects to the main cord.