Crown molding is a decorative accent for ceiling and wall joints. It softens these lines with architectural detail, adding dimension and style to the room. Installing crown molding is a simple way to add value to your home. Installing crown molding involves meticulous cuts that factor in the two angles on the back of the crown molding. With the right angle, measurements and cutting technique, you can install crown molding in a few steps.
Check the Wall Corner Angle
Video of the Day
Check the corner of your wall where your mitered crown molding will fit. Most corners are at 90 degrees. Use a piece of paper and insert it into the corner. Mark the way the mitered cut will have to be made onto the paper, just as a guide. Transfer the angle of the cut onto one end of your crown molding.
Video of the Day
Measurements
Measure the entire length of the space where your crown molding will fit. Factor in the angle cuts and make sure that the measurements extend to the longest lengths, not the shorter side of the angle cut.
For very long walls, more than one piece of crown molding may be needed. Mitered angle cuts are used to create a tighter seam when joining the crown molding. One end will be cut at a 45-degree angle in, while the other end will be cut at a 45-degree angle out. This way, the two pieces will overlap one another.
Transfer the measurements to the wood. If the angle cuts will make the crown molding meet in the corner, mark the location of the front side--the shorter length--of the angle, then the backside--the longer length--of the angle. This will form a diagonal line on the top of the crown molding once the two marks are connected.
Very Important Step
Now that the angles have been sketched and the measurements have been taken, place the crown molding in the miter box, upside down. By flipping the crown molding, the angle cut will be made in the opposite direction as well. This is where your marks will come in handy to help you see the direction of the cut.
Unlike other pieces of molding, the crown molding must rest on a slant, with its two back, angled surfaces resting on the miter box--one on the bottom and one on the side. The front of the crown molding is facing up on a slant, and the back is suspended between the two resting angled sides. Typical crown molding will rest at a 45-degree angle, flush to the miter box.
Making the Cut
You may want to test your measurements on a small test piece of crown molding before making the actual cut. Double check your angle and use a pencil to mark the direction of the cut. Recheck your measurements as well.
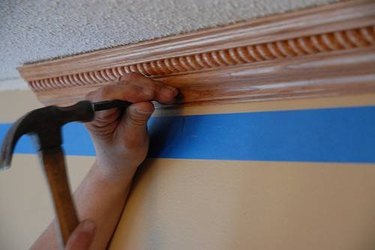
Use a fine-toothed miter saw, lining up the cut line with the appropriate groove for the saw. Begin sawing the crown molding without putting extra pressure on the blade. The back-and-forth sawing action is enough to help the blade work its way through the molding. Once the molding is cut, use a level and attach it to the wall and ceiling using finishing nails.