A school project that requires your child to make an instrument from scratch can be lots of fun and educational on different levels. It teaches the basic principles of sound waves and lets kids explore the many ways that instruments create and manipulate sounds. These hands-on projects require some dexterity and artistic skills, but what entices kids most is the end result -- the chance to conjure up a wonderful cacophony, all in the name of homework.
Sticky Drum
Video of the Day
Things You'll Need
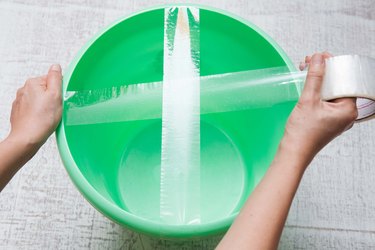
Clear packing tape
Large coffee can, paint can, plastic bucket
Many household objects serve as de facto drums, but crafting a drum that resembles the real thing impresses your child's teacher. The basic components include clear packing tape -- which produces a loud, clear sound most like a real drum -- and an empty large coffee can, paint can or plastic bucket. Stick strips of tape over the opening, first forming a plus sign; then add strips diagonally in a star shape, all intersecting at the center. Pull the tape taut and seal the sides to eliminate gaps. Wooden knitting needles and chopsticks make excellent drumsticks.
Video of the Day
Humming Harmonica
Things You'll Need
Craft sticks
Small rubber bands
Paper
Scissors
Toothpicks
Make a harmonica by sandwiching a strip of paper between two craft sticks to replicate the sound produced by a clarinet or oboe. Hold the three layers -- two craft sticks with a strip of paper cut to the same size in the middle -- by looping a rubber band around each end. Insert pieces of toothpick between the layers at each end to act as spacers and give the paper air space in which to vibrate. When you hold the harmonica up to your lips and gently blow, the paper vibrates and makes a sound. Change the pitch by squeezing the sticks together at different spots. Children can use paint, markers or washi tape to decorate the craft sticks before assembly.
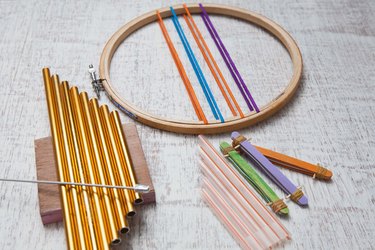
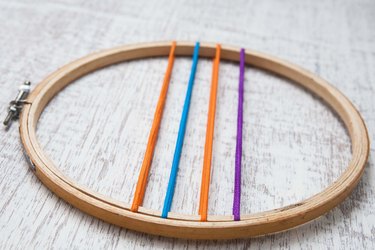
Hoop Harp
Things You'll Need
Embroidery hoop
Rubber bands
Craft a very simple string instrument, similar to a harp or mandolin, using only an embroidery hoop -- plastic or wooden of any size -- and some rubber bands. A wooden hoop is easier to paint, if you want to decorate it. Stretch four or five rubber bands over the inner part of the hoop, spacing them evenly apart. The outer hoop holds the bands in place and keeps them taut. Pluck the harp as you would a guitar, holding it in one hand or placing it flat on a table. If the rubber bands snap from too much playing, they're easy to replace.
Related: HelloBee: DIY Wood Instruments
Playable Pan Pipes
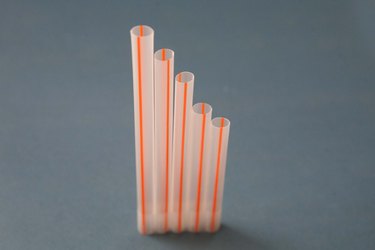
Things You'll Need
Drinking straws
Scissors
Sticky tape
Ruler
Marker
To make a playable set of pan pipes, use drinking straws -- the larger the better -- cut into four or more pieces of successively longer lengths. Arrange the straws so that the upper edges are aligned and the bottom edges go from longest to shortest. Hold the pipes together with sticky tape. Older children can use a ruler and marker to cut the pipes to specific lengths that correspond with musical notes. For a five-note set of pan pipes that will produce the notes C, D, E, G and A, cut the straws to 6 1/16, 5 3/8, 4 3/4, 3 15/16 and 3 7/16 inches. Play both versions by blowing gently across the tops of the pipes like a flute.
DIY Xylophone
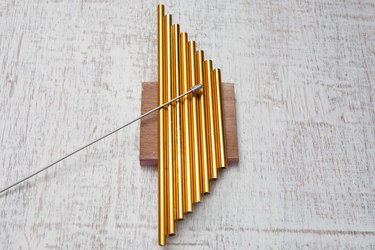
Things You'll Need
Picture frame
Metal pipes
Hot glue gun
Duct tape
A DIY xylophone consists of two parts: short metal pipes in various lengths that measure the same in diameter. Browse your hardware store's plumbing section for the pipes, and ask an employee to cut a metal pipe into sections. Find a picture frame, smaller in width than the shortest pipe is in length. Remove the glass and backing from the frame, and arrange the pipes evenly, from tallest to shortest, across the frame. Center the pipes so that all the ends extend beyond the frame. Use a dab of hot glue at the upper and lower end of each pipe to stick them to the frame. Assist younger children with the glue gun or do it for them. Stick a strip of duct tape along the center, across the front and back of the pipes and frame, for added security. Use wooden mallets to strike the pipes, or glue wooden balls to the ends of dowels for a homemade version.
Tip
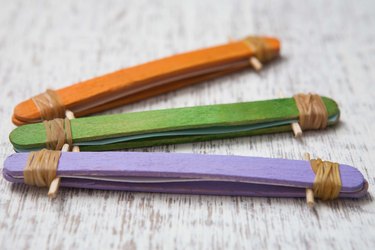
Help your child better understand the way their instrument works by discussing whether it is a wind, percussion or string instrument. Talk about what "real" instrument it is most similar to.