
Eggs and teeth seem like an unlikely pairing for an experiment, but eggshells make a realistic model of dental enamel. In these experiments, hard-boiled eggs serve as a model for teeth, showing kids what can happen if they don't practice proper oral hygiene. These experiments are simple enough for kids of all ages, as they use basic materials that are readily available.
Assemble the Materials

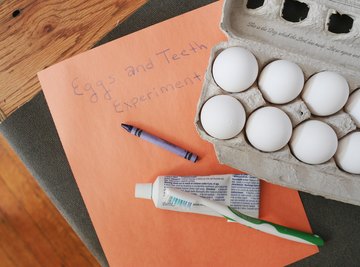
In this dental health experiment, the eggs represent teeth. Inspect the eggs for cracks, as cracks could affect the outcome of the experiment. You'll need containers large enough to hold liquids and an egg. This project focuses on two different dental hygiene issues: stains and decay. For the stain experiment, you need a dark liquid, such as cola, and a light-colored liquid, such as water or milk. To model decay, you need vinegar and a cavity-protection toothpaste with sodium fluoride as the active ingredient. You also need a toothbrush.
The Stain Experiment

For this experiment, you need two eggs. Place each egg in its own cup or small container. Fill one container with your cola or other dark liquid. The egg should be completely covered. Pour the milk or water in the other cup. Ask the kids what they think will happen to each egg. After 24 hours, lift both eggs out of the liquid to see if they look different. Then, put them back in the liquid for another 24 hours. The egg in the dark liquid will have a slight stain on the shell. Let the kids brush the stained egg with toothpaste and a toothbrush.
The Decay Experiment

This experiment requires some prep time to protect one of the two eggs. Coat one egg completely with the fluoride anti-cavity toothpaste. You should have a thick layer covering the entire egg. Wait four days before you rinse off the toothpaste. Place the protected egg and another raw egg in a container of vinegar. After 12 hours, pull the eggs out of the vinegar. Tap each egg gently to see how the shell feels. The untreated egg shell should start to soften. If it isn't soft, put both eggs back in the vinegar for two more hours or until softened. Let the students gently tap both eggs so they can feel difference. The shell on the treated egg should still feel hard, and the untreated egg will feel soft, because the acid in the vinegar eats away at the shell.
The Takeaway Message

Reinforce the idea of good dental health care by discussing what happened with the eggs. Ask your students how the eggs could represent teeth. They might connect the stains on the eggs to stains their teeth might get if they don't brush well. The vinegar experiment shows that different foods and drinks can break down the enamel on teeth, just like the vinegar did with the eggshell. Remind your students that just as you cannot fix the eggshell, they cannot replace the enamel on their teeth. Have your students draw pictures or write about what happened to the eggs as a follow-up to the experiments.
References
About the Author
Based in the Midwest, Shelley Frost has been writing parenting and education articles since 2007. Her experience comes from teaching, tutoring and managing educational after school programs. Frost worked in insurance and software testing before becoming a writer. She holds a Bachelor of Arts in elementary education with a reading endorsement.
Photo Credits
Sarah Vantassel/Demand Media