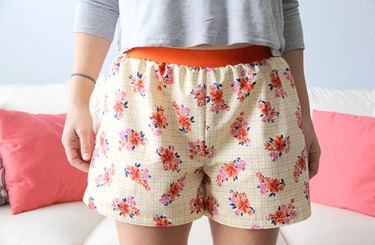
Looking for the perfect pajama shorts to lounge around in on a lazy Sunday? How about making your own boxer shorts! Download our free boxer short pattern to sew your own, following our easy step by step tutorial. Don't feel intimidated -- this is a beginner level sewing project.
Things You'll Need
1 yard cotton fabric
Pins
Sewing needle
Coordinating thread
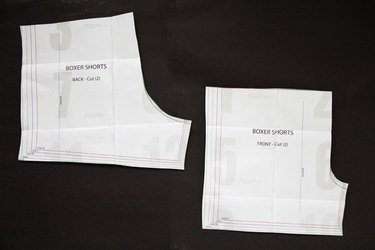
Step 1: Print Out and Tape Together the Pattern Pages
Print out the free pattern pages and follow the instructions printed on the pattern pages to tape them together at the gray page borders. Cut out your pattern size based on the size chart on the pattern pages. Please note the pattern includes a 1/2" seam allowance.
Video of the Day
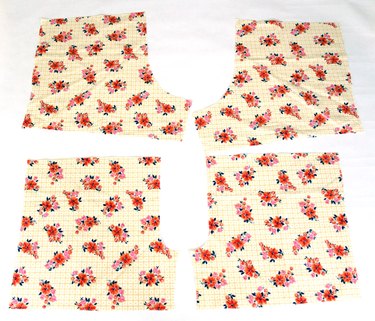
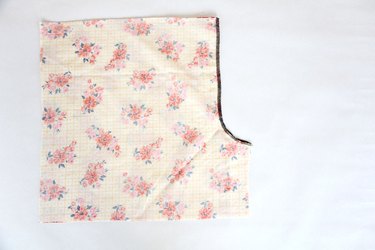
Step 2: Cut Out Pattern Pieces From the Fabric
Fold your fabric in half, wrong sides together. Place your paper pattern pieces on top of your folded fabric, and use either pattern weights or pins to secure the paper to the fabric. Cut out your pattern pieces from the fabric. This will give you two mirror image pattern pieces of both the 'Front' and 'Back.'
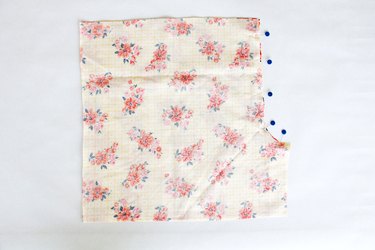
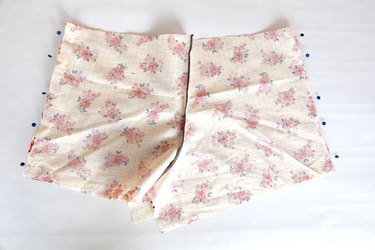
Step 3: Sew Crotch Seam Together
Place your 'Front' pattern pieces right sides together, and then pin and sew the crotch seam. Clip curved seam edges. Repeat for your 'Back' pattern pieces.
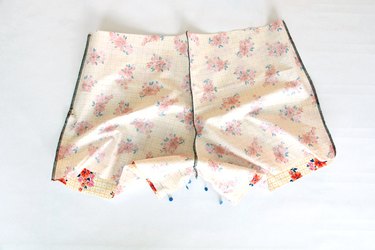
Step 4: Finish Seams
You will want to finish all of your seams with this pattern, otherwise your fabric will fray. You can use either a serger, zig zag stitch, or pinking shears to do so. If you're using one of these stitches, simply sew over your exposed seam with the serger or zig zag stitch. If you're using pinking shears, simply cut along the raw seam edge. Press seam.
Tip
Sure, you can use pinking shears or a zig zag stitch to finish your seams and keep them from fraying, but a serger will bring your home sewing to a whole new level. If you've been thinking about stepping up your sewing game, and making your garments look more professional, now might be the perfect time to invest in a serger. A serger, or sometimes referred as an overlock machine, trims the seam and encloses the seam allowance inside a thread casing, all in one step. There are a variety of sergers on the market, including this Brother 1034D Serger which is a top pick for beginners and an extremely easy-to-use machine. The Janome 8002D Serger is another good machine for someone just starting out in the world of sergers. The SINGER | ProFinish 14CG754 is a good bargain. The JUKI MO654DE Portable Thread Serger Sewing Machine is a small but a powerful and high-performing machine. Any one of these sergers would be a good investment to help improve your home sewing techniques.
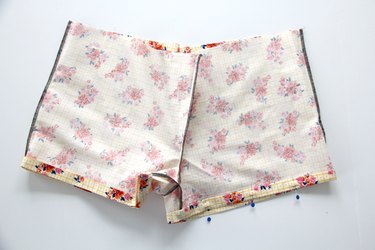
Step 5: Sew Front and Back Pattern Together at Side Seams
Place your 'Front' and 'Back' pattern pieces right sides together. Pin along the side seams and sew. Finish the seams as mentioned in the previous step, and press to complete.
Step 6: Sew Inner Leg Seam
With your pattern still wrong side out, pin together the inner leg seam. Sew and finish seam. Press.
Step 7: Hem the Bottom of the Shorts
Fold the shorts bottom 1/4" towards the wrong side and press. Fold again 1/2", enclosing the raw edge, and press. Sew around to secure. Repeat for both legs. Finish the top raw edge of your boxer shorts at this time as well using a serger, zig zag stitch, or pinking shears.
Step 8: Measure Your Waist
Wrap the elastic around your waist to determine the amount you need to cut. For a snugger fit, subtract a couple of inches from your waist measurement when cutting the elastic.
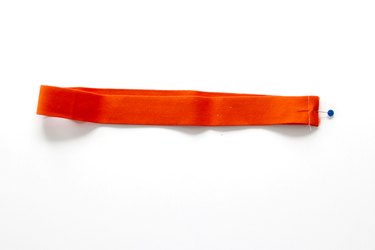
Step 9: Sew Elastic Ends Together
Fold your elastic together, matching the raw ends. Pin and sew, using a 1/2" seam allowance.
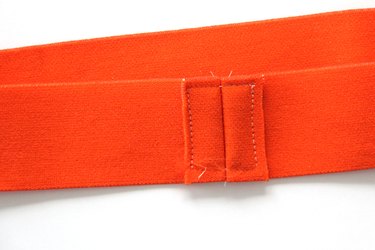
Step 10: Sew the Elastic Seam Allowance
Press open your sewn elastic seam, and pin down at the raw edges. Sew a rectangle around the entire seam to secure.
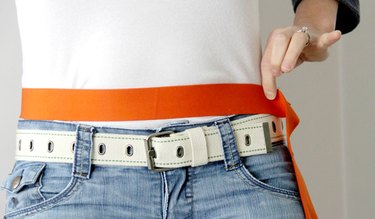
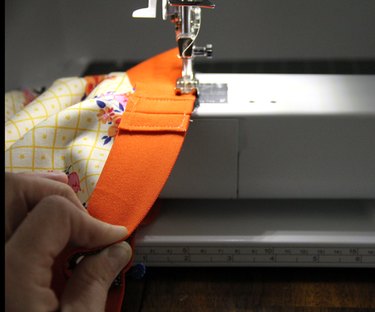
Step 11: Sew Waistband to Shorts
Slip the waistband around the top of your shorts, right sides together. The bottom of your elastic should match up with the top raw edge of your shorts. Additionally, match up the elastic seam with the back center seam of your boxer shorts. You will notice that your elastic is smaller than the waist of your shorts -- this is good! Pin the elastic to the top of the shorts in 4 strategic places -- the front and back and the sides.
Step 12: Sew the Waistband
To sew the waistband to the shorts, sew using a straight stitch 1/4" away from the top of your shorts / elastic. Stretch while you sew so that the elastic is the same width as your shorts, removing the pins when you get to them.
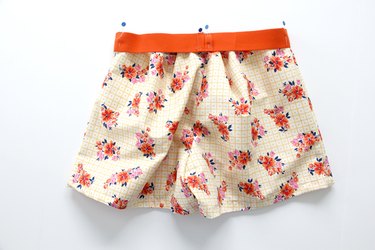
Step 13: Fold and Press the Waistband
Fold the elastic up so that the seam is inside of your shorts and press, and you're finished!
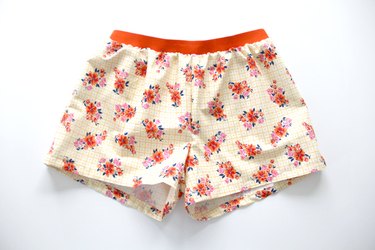
Now sit back and lounge in your new boxer shorts. You can either grab a good book and curl up on the couch...or go and make another pair from your favorite fabric. You know you want to.

Video of the Day