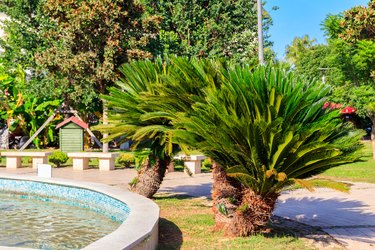
The compact curving trunk, glossy fronds and small sweet dates of the Robellini palm (Phoenix roebelenii) add a tropical look and a sweet taste to the landscape across its perennial range in U.S. Department of Agriculture plant hardiness zones 10 and 11. Among other types of date palm trees, this particular palm species is commonly called the pygmy date palm due to its diminutive stature. Mature trees grow just 6 to 12 feet tall and the fronds spread out in an area 6 to 10 feet wide.
Robellini palms make attractive specimen plants in the landscape either alone or planted in groups. The University of Florida IFAS Extension notes that pygmy date palm transplanting from one location in the landscape to another is easier than with broadleaf trees due to the specialized structures called adventitious roots that form the robellini palm root system.
Video of the Day
Video of the Day
Step 1: Remove Some of the Leaves
Remove a third of the leaves to reduce the stress that comes with transplanting a robellini palm. Take only the oldest leaves from the bottom. Use a sharp knife or pair of shears and clip the fronds close to the trunk.
Step 2: Saturate the Soil Around Roots
Soak the soil around the roots in an area 4 to 6 feet wide and at least 4 feet deep 12 to 24 hours before digging the palm.
Step 3: Sever the Roots
Place a sharp shovel on the ground 2 to 3 feet away from the base of the trunk. Drive the shovel into the soil at a slight angle towards the tree. Continue around the circle at a space 2 to 3 feet from the base of the trunk.
Step 4: Sever the Roots Again
Continue around the tree a second time, digging deeper and at an angle towards the trunk. The root ball should be 4 to 6 feet across and 4 feet deep.
Step 5: Remove Robellini Palm to Tarp
Spread a tarp out on the ground next to the site. Once the roots are cut all around and under the robellini palm, lift it from the planting hole and set it on the tarp.
Step 6: Relocate to the New Site
Transport the palm to the new planting site right away. If immediate transplanting is impossible, wrap the root ball in a burlap sack and keep it damp until you are ready to plant.
Step 7: Excavate the Planting Hole
Dig a hole at the new planting site that is 1 foot wider and as deep as the root ball of your robellini palm. Reserve some of the excavated soil for a soil test. The University of Florida IFAS Extension notes that pygmy date palms are susceptible to a potassium deficiency; a soil test will recommend the type and rate of fertilizer needed for your transplanted tree. Roll the palm off the tarp and stand it up in the hole. The base of the trunk should always be at the same depth it was at the original site.
Step 8: Tamp Soil and Water Tree
Push the extra soil back in around the root ball, pressing it down as you go. Add water to encourage the soil to run down under and around the roots, filling any air pockets. Add enough water to settle the soil around the roots, but not so much that the soil becomes muddy.
Step 9: Build a Water Reservoir
Pat down the soil to secure the robellini palm in its new location. Take extra soil and build a 6- to 8-inch-tall circular mound around the edge of the planting hole. This berm will catch water and encourage it to seep down into the root system rather than running off and away from the roots.
Step 10: Water Well Until Established
Water when the top 1 to 2 inches of soil feel dry to the touch. Fill the mound at each watering and allow the water to seep into the soil. Newly transplanted palms require enough water to keep the soil consistently damp but not saturated for the first four to six months.
Tip
Robellini palms prosper in full sun or partial shade and sandy or loamy soil with good drainage.
Things You'll Need
Pruning shears
Shovel
Tarp