The wick is the most important part of any candle or oil lamp because, without it, the lamp or candle would not burn. Generally, wicks are made of bundled fibers which draw the oil from the oil lamp toward the flame to be used as fuel to keep the flame burning. While it is easy to purchase oil lamp wicks at your local craft store, making them yourself can be an enjoyable project. When it comes to wicks, there are several methods and patterns to try out.
Basic Braided Wicks
Video of the Day
To make a basic, braided wick you will need three strips of heavy cotton yarn or string cut to the desired length of your wick. Mix 2 tablespoons of salt with 1 tablespoon of boric acid in a cup of water and soak your cotton yarn in this mixture for at least 12 hours. After the cotton has soaked, lay it on a flat surface outside to dry in the sun. Finally, braid the three strips of cotton together to create your oil lamp wick.
Video of the Day
Square Braided Wicks
Square braided wicks are thicker and last longer than basic braided wicks. To create one, soak two long strips of cotton yarn in the same mixture of water, salt and boric acid and dry them outdoors. To begin the braid, wrap the middle of one string twice around your finger, making two loops, then pass the end of the other string through the loops up to the middle of the string. Take the right end of the second string and weave it over the right loop and through the left then weave the other end of the string over the left loop and through the right from the opposite direction. Remove the loops from your finger, pull the knots tight then take the left and right strands and lay them over top of the completed stitches to form two new loops. Use the remaining two strings to weave over and under the loops as you did before. Continue weaving in this pattern until the wick reaches the desired length.
Priming Homemade Wicks
To be sure your oil lamp wick burns properly, it is wise to prime it before use. Priming homemade wicks is as simple as soaking them in hot, melted wax. Soak the wicks until they are completely saturated and begin to release air bubbles. Once the wicks are saturated in wax, remove them and dip them in water to cool the wax. Lay the wicks flat on a piece of paper and blot away any excess moisture with a piece of paper towel. The wicks should be hard and dry in less than a minute.
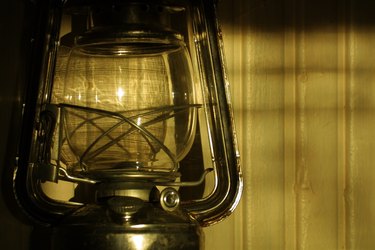
Using Homemade Oil Lamp Wicks
Each oil lamp is bound to be different, but you should be able to install your homemade wick by removing the globe — the protective glass casing — to expose the wick holder. Unscrew the wick holder, remove the old wick and replace it with one of your homemade wicks. After screwing the wick holder back in place, adjust the wick so no more than 1/2 inch of it is exposed. Exposing too much of the wick will produce more smoke than light, and if the wick is not exposed enough, the light it produces will not be very bright. To use your lamp, light the wick and carefully replace the globe. Adjust the height of the wick as it burns.