The second coat of paint is usually the final one, and whether it's on a wall, a stair railing or a piece of furniture, it defines the entire paint job. Just as preparation is important before you apply the primer or first coat of paint, it's still important before you apply the second. If you were having problems with flow-out or blushing when you applied the first coat, the time to correct these problems is when you're applying the finishing coat.
When Is the First Coat Dry?
Video of the Day
It's easy to mess up the paint job by applying fresh paint before the undercoat has completely dried. The brush or roller drags the partially congealed paint across the surface and makes streaks that you may never erase. Always let the paint dry for the recommended amount of time specified by the manufacturer -- and then some if temperatures are cold or the air is humid. A wait time of four hours between coats is recommended for latex paint, and 24 hours for oil paints.
Video of the Day
Because it's shinier, wet paint is easy to distinguish from dry paint, but you sometimes need a work light to spot wet patches. If you're unsure, use this definitive test: The paint isn't ready if you can make an impression with your finger.
Scuff It Up
Once the paint has dried, a light scuffing de-glosses the surface and gets rid of streaks, drips and other imperfections. Using sandpaper on the surface of your painted wall or trim before applying the second coat can help focus on the areas that need attention. Scuff walls with 120- or 150-grit sandpaper, and use a pole sander to avoid having to stand on a ladder. Scuff woodwork and furniture with 220-grit sandpaper. There's no need to use a sanding machine -- a light scuffing by hand, going with the grain of the wood -- will do the job.
Look for drips and ridges left by your paintbrush or roller. Take particular care to flatten this with the sandpaper. For larger drips, it may help to scrape them down with a razor blade to do most of the flattening. Wipe the surface with a damp rag when complete to remove sanding dust.
Paint Application Tips
Because it's usually the last one, the second coat requires special care. Any application mistakes may require another sanding job and an extra coat, which means more time and expense for you.
Add Paint Conditioner
Reduce visible brush strokes and roller marks and create a smoother surface by adding paint conditioner to the final coat.
Use the Right Applicators
Your paintbrush should have synthetic bristles if you're using latex (water-based) paint and natural bristles if you're spreading oil-based (alkyd) paint. Use a brush with a clean edge and no loose bristles that can fall out and get stuck in the finish. Use the same roller cover that you used for the first coat, but instead of cleaning it off between coats, store it in a plastic bag so it's preloaded with paint and ready to use.
Spread a Thin Coat
Don't load the wall, woodwork or furniture with a heavy topcoat. The paint takes longer to dry, and it collects dirt while it's tacky, not to mention that it has more time to drip and separate. Use just enough paint to get full coverage.
Keep a Wet Edge
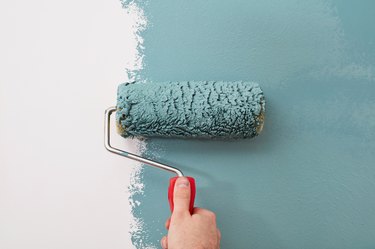
When rolling, always overlap the previous stroke by half, and roll the entire wall from top to bottom or from left to right in a single stroke. Stopping in the middle of a stroke and trying to save paint with narrow overlaps create streaks that may take an extra coat to correct. When brushing, always stroke toward the wet edge of the previous stroke, and keep all stroke lines parallel.