
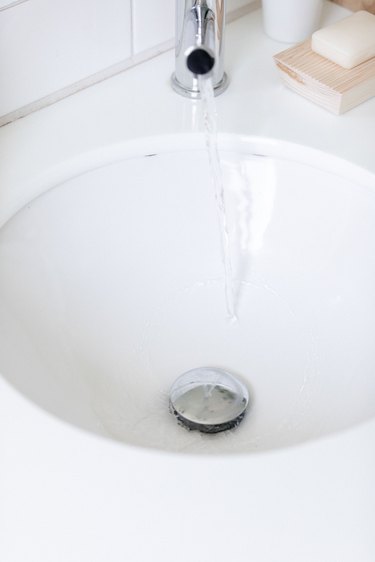
At its most basic, a bathroom sink has a fairly simple drain assembly made up of a drain flange, a gasket, a washer, a locknut and a tailpiece that connects to the P-trap and trap arm that allows the water to drain into the sewer pipes. However, some types of drains have far more bathroom sink drain parts to ensure they can operate properly. This is particularly true when it comes to the classic and widely popular pop-up drain, which requires a full rod assembly to allow for the sink stopper to go up and down depending on the position of the lift rod on the faucet.
Types of Bathroom Sink Drain Assemblies
Video of the Day
While pop-up drains are the most common type of drain assembly, there are plenty of other styles as well. It's a good idea to familiarize yourself with these options before deciding on the right choice for your sink, especially considering that a faucet with a lift rod requires the use of a pop-up drain and vice versa.
Video of the Day
Whatever type of bathroom sink drain you choose, it's a good idea to select a drain made with the same finish as your faucet. If you have an oil-rubbed bronze faucet, avoid getting a brushed nickel, polished chrome or stainless steel drain even if your options for finding a matching oil-rubbed bronze drain may be a bit limited. Your options for different drain types include:
- Pull-out plug drain: The most basic style and the oldest style of all
bathroom drains, a pull-out plug drain features either a wide-open drain flange
or a built-in strainer. To plug this type of sink, you'll need to have a separate
plastic plug that fits in the drain hole.
- Grid drain: The grid drain is similar to the pull-out plug except
it has a strainer that sits even with the basin bottom. Some grid drains are
particularly decorative, with strainers cut in beautiful shapes. If you want to
plug a grid drain, you'll need to purchase a flat rubber stopper that lays over
the drain holes.
- Lift-and-turn drain: As the name implies, these drains are
operated by screwing the drain stopper down to close it and lifting and turning it
the opposite direction to open it.
- Push-to-close drain: Sometimes also called a push button,
push-to-seal or push-pop drain, these drains are pushed closed and then opened again
with a quick tap. They incorporate a spring clip to allow them to open and
close.
- Pop-up drain: Pop-up drains are the most popular type of drain, as they are easy to use and are convenient. Unsurprisingly, the pop-up drain assembly is the most complex of all drain assemblies.
A Note on Drains With Overflow Openings
A drain with an overflow opening does not refer to the plug style but the fact that it has an opening on the front of the drain that hooks up to the overflow drain built into the sink. This ensures that if the upper part of the drain gets plugged up with hair or other debris, then the sink will still not overflow. This additional air gap also allows your sink to drain faster, as it allows air to escape out of the overflow drain as the pipe is filled with water.
As Trade Winds Imports explains, it is important to recognize that if your sink has an overflow drain, you must get a drain with an overflow opening, and if it does not have an overflow drain, you must buy a drain without an overflow opening.
Pop-Up Drain Assembly
When most people want to understand bathroom sink drain parts, they need to know about a pop-up drain assembly. In fact, in many cases when a sink with a pop-up drain is draining slowly, it is often because hair and other debris have been caught around the stopper. Removing the stopper and cleaning away the gunk can dramatically speed up the amount of time it takes for your sink to drain, and there's no need to call a plumber. To do this basic home improvement trick, you should know more about pop-up drain parts:
- Lift rod: The lift rod is the piece built into the faucet that
allows you to open and close the sink stopper.
- Clevis strap: The lift rod is attached to a long piece of
metal with multiple holes in it, known as the clevis strap. The lift rod and
clevis strap are connected with a piece called a clevis screw.
- Pivot rod: Also called a ball rod because it has a ball seal
secured against the side of the drain, the pivot rod fits through one of the
holes in the clevis strap and is secured with a spring clip. On the other end,
it goes through a loop on the end of the stopper. As Landmark Home Warranty explains, when the lift rod is pulled up and the clevis strap
pulls up the back end of the pivot rod, the other end of the rod pivots down inside the drain,
pulling down the stopper.
- Retaining nut: This is the nut used to secure the ball seal of
the pivot rod to the drain tailpiece. When you want to take a pop-up drain stopper out of
your sink, you'll need to unscrew the retaining nut and pull the pivot rod out
from the hole in the side of the drain pipe.
- Pop-up stopper: A pop-up drain stopper has a long plastic piece with a loop that goes down into the drain. The pivot rod goes through this loop, which is what allows it to open up and down. At the top of the stopper is a metal disc that closes over the drain hole to hold back water.

Basic Bathroom Sink Drain Parts
No matter whether you have a Danco pop-up, a Kohler grid, a Pfister push-button, an American Standard pull-out plug, a Moen lift-and-turn or any other type of drain, basic bathroom sink drain parts are pretty much the same. Knowing about these bathroom sink drain parts can be quite useful when installing a new drain or fixing a leak with repair parts.
- Drain flange: Also called the "drain body" or "drain
basket," this is the part that sits in the sink basin and is visible from
the top. If your sink has either a strainer or a built-in stopper, this will either
be part of the flange or will fit inside it. The flange is sealed to the sink
basin with plumbers' putty or a rubber gasket.
- Gasket: This piece fits around the flange under the sink
basin (or the countertop in the case of a vessel sink) and prevents leaks.
- Washers: A plastic washer fits between the gasket and the jamb
nut to help prevent damage to the gasket, which could cause leaks. Specialized
washers are also used to hold slip nuts in the right place when connecting two
pieces of pipe under the sink.
- Jam nut: The jam nut is a type of slip nut that secures the
gasket to the bottom of the drain hole.
- Tailpiece: This piece fits to the drain flange, connecting
it to the P-trap below the sink. If your sink sits particularly high (because
you have a high countertop and a vessel sink, for example), you may need a
tailpiece extension to connect the tailpiece to the P-trap.
- Slip nuts: These are used to secure the pipes under the
sink to one another. Slip nuts are compression-style nuts that use tapered washers to create a watertight seal. The nuts can be unscrewed by hand or with pliers, allowing for easy disassembly to repair leaks or to
fish out small personal items, such as jewelry or tweezers that have fallen into
the drain.
- P-trap: Before water drains into the sewage system, it must
travel through the P-trap. A P-trap has many benefits, but perhaps the biggest
is that it prevents sewer gases from entering your home since it always
retains a small amount of water in it. Another major benefit is the fact that
it can catch small debris, which can prevent clogs deeper in your sewer system
and allow you to retrieve any personal items that may fall into your sink
unexpectedly.
- Trap arm: The trap arm is the final piece in a bathroom sink plumbing setup and connects the P-trap to the branch drain pipe inside your bathroom wall.
- Landmark Home Warranty: How Does A Sink Pop Up Mechanism Work
- HomeTips: How to Fix a Sink or Bathtub Pop-Up Drain Stopper
- Signature Hardware: Bathroom Sink Drain Installation
- Home Depot: Parts of a Sink
- Ace Plumbing: What Is the Purpose of a P-Trap?
- Trade Winds Imports: Deciding When to Use Overflow Drains