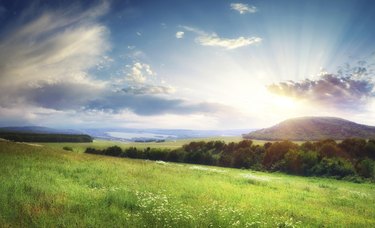
White clouds, light reflections and too much flash can all result in overexposed areas that ruin an otherwise good photo. Using Adobe Photoshop CC, you can usually reduce or even eliminate blown-out whites. Of course, this depends on the photo. If you shoot in RAW mode -- a feature found on DSLRs and most quality cameras -- the process is much easier. If you're working on a JPG or other file format, there is less digital information in the photo to work with, but you can usually play with the levels to bring some detail out from the whites.
Fixing RAW Files
Video of the Day
Step 1
Download your camera's RAW files to your computer. Locate the file you need to edit in Windows Explorer. Right-click the file, select "Open With" and choose "Adobe Photoshop CC" to open the file with Photoshop's RAW Camera plugin.
Video of the Day
Step 2
Drag the "Highlights" and "Whites" sliders all the way to the left so they are at "-100." Click and hold the "Whites" slider while pressing the "Alt" key. If the entire image is black, your photo should be salvageable. If you see color in the image, like red, yellow or white pixels, they are too overexposed to edit. Having small groups of overexposed pixels shouldn't be a problem. If a large portion of the image is overexposed, there may be little you can do with it.
Step 3
Drag the "Whites" slider slowly to the right while holding down the "Alt" key until you see yellow or red pixels in the image, then stop. Drag the slider back to the right until most of the colored pixels are gone. Repeat this procedure with the "Highlights" slider. Adjust the other levels as desired, including the exposure, blacks, shadows and contrast.
Step 4
Click the "Radial Filter" icon above your photo and drag the cursor over the area that is overexposed. Scroll down in the options and make sure the "Inside" Effect option is chosen. Adjust the exposure and highlight levels as needed to reduce the white area.
Step 5
Click "Open Image" to save the changes and open the photo in Photoshop.
Fixing JPG Files
Step 1
Open your image in Photoshop. Make a copy of the photo's layer by dragging the "Background" layer in the Layers panel onto the "New Layer" icon at the bottom of the panel. It's this new "Background Copy" layer that you will be working on.
Step 2
Select "New Adjustment Layer" from the Layer menu, click "Levels" and press "Enter." A graph shows you the digital information behind your input levels. The left of the graph shows you the amount of dark pixels, while the right represents white pixels. The bar shows you the output levels.
Step 3
Drag the "Black" input slider directly below the graph toward the right. This darkens the entire image, but for now focus only on the area that was overexposed. Drag the "White" output slider below the bar to the left. Adjust the position of each slider until the overexposed area looks as detailed as possible.
Step 4
Select "Merge Down" from the Layers menu. Make a copy of this darkened layer by dragging the "Background Copy" layer in the Layers panel onto the New Layer icon. Click the "Eye" icon beside the Background Copy in the Layers panel to make it invisible. Make sure the "Background Copy 2" layer is highlighted, since this is the one you will now be working on.
Step 5
Click the "Eraser Tool" in the Toolbox. After adjusting its size as needed in the Options bar, erase all of the dark areas of the photo. In most photos you will see a sharp contrast around the erased areas, which you can now fix by changing the layer opacity.
Step 6
Click the "Opacity" menu in the Layers panel and reduce the opacity to lower the contrast in your visible layers -- 80 percent should be good. If the contrast between layers is still too pronounced, select the "Background Copy" layer in the Layers panel, click its "Eye" icon to make it visible and reduce its opacity to about 20 percent.
Step 7
Adjust the opacity levels of the top two layers as needed until your photo looks good. Select "Flatten Image" from the Layers panel and then save your work.