When you go to college, there's one part of campus you should avoid: the bookstore. A college bookstore usually charges premium prices for books. They're typically the only game in town so, they can freely charge high prices. But there are ways to save money on textbooks.
Save Money and Rent a Textbook
Video of the Day
You'll probably only need that $150 quantum physics textbook for one semester. So why would you want to buy it? Renting a textbook for a semester not only saves you money but also frees up your bookshelf. They're available from several online companies.
Video of the Day
Amazon has been the leader in both new and used books for years. But did you know they also rent textbooks? Amazon touts that they can save a student 90 percent on used books and 49 percent on new books. Their webpage is easy to use. Enter the book you need, designate rental and check out. You can rent for a semester or a quarter. There's also a money-back guarantee in case you drop the class. Amazon also offers no-charge returns.
An alternative to Amazon is Campus Book Rentals (CBR). CBR was the first player in the textbook rental industry. They've been renting textbooks since 2007. Go on their site, enter the book title or author and how long you want to keep it. You receive your order along with a return shipping label. Although they ask that you be respectful to the next student who rents, highlighting text is permissible.
If you have a friend taking the same class, buy the textbook together and share. Besides sharing the book, you'll also be able to see each other's notes, which can be helpful. Obviously, this works best when you're not in the same class at the same time. Make sure you're taking the class on different days or, better yet, different semesters.
Buy After the First Day of Class
You seldom need a textbook on the first day of class. Usually, you're just going over the syllabus and other expectations. Some college professors are sympathetic to a student's strained wallets. They may not require the latest version of a textbook, or they may have digital versions available. It's also a good idea to first examine the syllabus to see how much the textbook will be used.
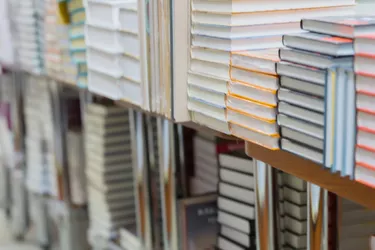
Used Textbooks Save Money
An updated edition is not always necessary for a college class. Used books are a viable choice and can save you hundreds of dollars. But don't go to the college bookstore to find a deal. Even though they're used books, the markup at the college bookstore is still high. You're better off going directly to another student or buying online.
BookFinder.com is an option for used books that will save you money. They are like a broker for used textbooks. They search hundreds of online booksellers to find you the best deals. This saves time and money. Enter the name of the book and, if available, they'll find it. But keep in mind, there's a big demand for used textbooks. That's why, when you go the used book route, it pays to shop early.
You'll want to pay attention to the condition. They're usually rated as good, fair or acceptable: the more writing or highlighting in the book, the lower the condition.
An added benefit to BookFinder.com is the option to sell your used books back. So, if you decide to do this, try to keep your books in good condition. The better the condition, the better the buyback price. Selling your used books back is an easy way to reduce your overall textbook expenses.
College Textbook Prices Shouldn’t Break the Bank
A college education is expensive. You don't want to add to that expense by paying high prices for textbooks. Buying used or renting are two ways to lower the cost. Shop around and you'll find the best textbook deals.