
How to Wire a 220V Hot Water Heater

Working with electrical cables can be daunting and potentially dangerous for an inexperienced homeowner, so review your hot water heater’s manual and research the basic principals of wiring before tackling any home electrical work.
Wiring a 220V hot water heater is not intended for a general homeowner to accomplish without professional experience or education. An electric water heater is often a heavy and complicated appliance that can be dangerous to hook up if you are not careful. When wiring, be sure to take your time, double-check your work and have someone assist you. An extra pair of eyes (or two) could make the difference between a successful installation and a potentially dangerous situation.
Things You Will Need
- Noncontact voltage tester
- Wire strippers
- Twist-on wire connectors
- Electrical tape
220 Volt or 240 Volt?
One thing you might notice is how 220, 230 and 240V hookups seem to be used interchangeably in many manuals. This is because electrical service is delivered in amounts of 120 or 240 volts per electrical box/outlet, but measurements like 220 and 230V are due to appliance or equipment design. An appliance can be designed to use 220, 230 or 240 volts, but you’ll still need to hook it up to a 240V electrical current.
Basic Home Wiring
In a standard home’s electrical system, you’ll find a variety of cables used to connect electrical power to different parts of the house. The cable most commonly used is called a nonmetallic or NM cable. An NM cable is one that contains two or more wires that are individually coated in different colors of plastic so they don’t become confused with each other. These cables come in many sizes and amperage ratings to accommodate different circuit needs, but you’ll probably use a 10-gauge for 30-amp NM cable for a 220V electric water heater. This type of cable usually holds the three following wires:
- A black wire is the “hot wire” which carries the current from the fuse box to the fixture.
- A red wire is another “hot wire” that carries the current. When two hot wires are used, they complete the circuit due to one being a negative charge and the other being a positive charge.
- A bare copper wire is the “ground” which grounds the circuit for safety.
Electric hot water heaters only need those three wires to form a straight 240 current. Some 240V appliances require a fourth “neutral” wire, which is usually white. This is only needed to power any extra accessories to an appliance that uses 120V, rather than 240V, such as the lights and timers of an electric range. Your electric water heater should not need the white wire to be connected, but always consult your heater’s manual to confirm the details.
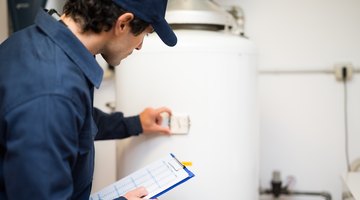
Electric Water Heater Installation
Whenever you’re installing an appliance into your home, the best place to start is to review the manual that comes with it, as well as any online resources provided by the brand of your appliance. When installing a standard hot water heater, however, there are some general steps that are good to follow:
-
This seems like an obvious step, but it cannot be overlooked. Often, the fuse box can be out of sight line of where you’ll be installing a hot water heater, so be sure to turn off the correct circuit and leave a note on the box indicating what you turned off and for people to leave it alone. Once you’ve cut the power, check the power with a noncontact voltage tester to see if the cable is no longer hot. If the voltage tester is still picking up electricity, then you should return to the fuse box to double-check the circuit you cut off. Be completely sure that the electricity is off before touching any cables or wires.
-
Examine your hot water heater until you find the junction box, usually located on the top of the hot water heater. After you open the junction box, you’ll see that it holds the wires separately or in a cable, so take the time to locate the black "hot" wire, the red "hot" wire and the copper ground wire. Sometimes this type of appliance will have three wires, but one of the “hot” wires will be white, not red. If this is the case, put a strip of electrical tape around the wire’s plastic coating to let a future electrician known that it is a “hot” wire.
-
Find the NM cable in the wall and using the wire strippers, cut the outside layer of the cable back to see the three wires inside. The ground should be a bare copper wire, but the other two will need to have the end of their wires opened up so that all three have copper ends exposed. Be sure you’ve done the same for the wires on the hot water heater.
-
Once you’ve stripped back the plastic coating on each wire, match up each wire to its corresponding wire: black with black, red with red, bare with bare, etc. Use a twist-on wire connector to twist the copper ends of each matching wire together, and seal each connection with some electrical tape.
-
After securing each wire together, replace the top of the heater’s junction box and turn on the live circuit to the heater. Use your noncontact voltage tester to examine each wire, making sure that the “hot” wires are working as intended. If there is an issue with one of the connections, turn the power off and make corrections as needed.
Shut Off the Power
Warning
Be sure to shut off all power to the circuit you’re working on to avoid electrocution.
Connect the Wires
Check the Connection
Tip
When in doubt, consult an electrician with any questions or concerns.
References
- ZenFixIt: Understanding 220 or 240 Volt Electrical Circuits
- The Spruce: Common Types of Electrical Wiring Used In Homes
- The Spruce: Learn the Fundamentals of Wiring an Electric Water Heater
- Ask The Electrician: Electric Water Heater Wiring
- Water Heater Timer: Basic 120 and 240 Volt Water Heater Circuit
- Lowes: How to Install an Electric Water Heater
Writer Bio
Heidi Nickerson graduated from Liberty University in 2013 with a Bachelor of Arts in English. She has a passion for home improvement, construction and interior design.
More Articles