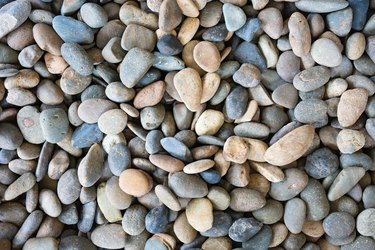
A river rock wall adds character to any landscape and will help define property lines. Constructing a wall is backbreaking work, but the results will be a structure that will for last for generations. Dry stone walls are methodically stacked rock structures that can be damaged by people, animals and weather. Slightly more work to build, a mortared rock wall will stand for decades or even centuries.
Things You'll Need
Shovels
Water
Dry sand
Garden rake
Wood stakes
Mason's line
Mallet
Gloves
Video of the Day
How to Build a River Rock Wall With Mortar
Step 1: Dig a Trench
Dig the area for the foundation of your rock wall with your shovel. The trench should be deeper than the frost line and at least 2 feet wider than the wall will be. Rake the bottom of the foundation hole until it's smooth. Use the plate compactor to tamp the soil until firm.
Video of the Day
Step 2: Add a Layer of Rocks
Line the trench with landscape fabric taking care to overlap the fabric at the seams. Place a 6-inch layer of small rocks on top of the fabric and tamp it with the plate compactor. Add more rock until the footing layer is 6 inches below the grade level.
Step 3: Create the Mortar
Mix mortar in a wheelbarrow, combining 3 parts sand and 1 part Portland cement. You'll use 5 to 6 quarts of water with a 50-pound bag of Portland cement, and you want to be careful to not use too much water. Pour water in the wheelbarrow and combine it with the cement and sand mixture. Stir the mixture and add water slowly until the mortar is a pliable thick paste -- you want it to stick to the trowel when you turn it upside down, not drip off. Air temperatures and humidity can influence the thickness of the mix. The mortar package instructions will give you an approximate amount of water to use, but you'll have to be careful to find the right consistency as you stir in water.
Step 4: Put Mortar on Rocks
Pour the mortar over the rock foundation and let it harden for at least one day.
Step 5: Create a Wall Base
Place a stake at each end of the foundation's trench and run a mason's line between them. Select the largest stones for the wall base. Place your first stone at one end just barely touching the mason's line. Place your next stone snugly beside the first stone and continue until the wall's base line is laid.
Step 6: Prepare to Add Mortar
Wet the rocks before applying mortar allowing the mortar to stick better. Trowel mortar between the base rocks. Use wet rags to wipe off any excess mortar.
Step 7: Apply Mortar to Rocks
Add additional stones one at a time with the flattest side facing up. Trowel at least a half-inch of mortar on top of each rock. Use a mallet to tap the rocks deep into the wet mortar. Remove, chisel, and, reapply any rocks that can't fit easily.
Step 8: Choose Flat Rocks for the Top
Select flat rocks that are flat on one side to be top stones. Place the top stones as the last layer of rock, taking care to make the top of the wall as flat as possible. Apply mortar to seal in the top stones. Wipe any excess mortar from the rocks.
Warning
Use caution when placing rocks into place by lifting with your knees, not your back.
Avoid using concrete mix, as it contains gravel and will not offer the sustained support found in Portland cement.
Be sure to wear gloves and proper clothing when handling Portland cement due to its corrosiveness.
Tip
On dry, hot or windy days, continuously mist the wall with water to allow the mortar to cure slowly.
Clean your tools thoroughly with water before the mortar can harden.