Things You'll Need
Wire strippers
Voltmeter
Slotted screwdriver
Wire cutters
12-gauge wire
Wire nuts
A ground-fault circuit interrupting (GFCI) outlet uses a current sensor and a circuit breaker to disconnect a dangerous electrical circuit. The electrical circuit that a GFCI outlet connects to contains two wires, plus a protective ground wire. The hot wire sends the current to the circuit's load and the neutral wire returns the current to the power source. If the GFCI outlet detects a difference between the current exiting and returning, the GFCI breaker trips. A GFCI protects multiple outlets when the wires twist together with a jumper wire, called a pigtail, and the jumper wire connects to the GFCI.
Step 1
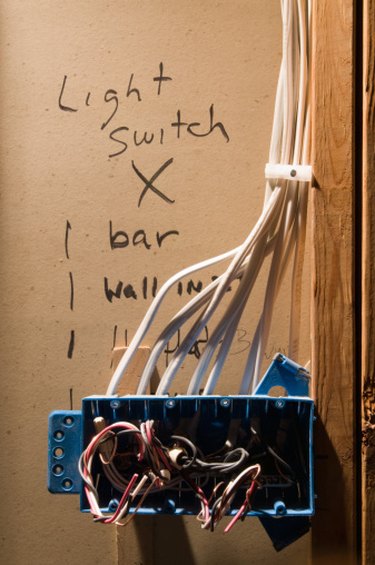
Pull out the ends of the wire sets from the electrical box that the GFCI will connect to. Each group of wires contains a black and white insulated wire along with an uninsulated wire.
Video of the Day
Step 2
Remove one-half of an inch of insulation from every insulated wire with wire strippers. Separate each group of wires. Do not let the ends of the wires touch anything.
Step 3
Identify the wire that leads to the circuit breaker that controls the GFCI's circuit. During construction, many electricians mark the wire set that leads to the circuit breaker with tape. If not, then turn on the circuit breaker and test each set of wires with a voltmeter. Place a voltmeter probe on each insulated wire in a wire set and read the voltmeter. Test each wire set until the voltmeter reads voltage across a wire set. The wires that read voltage across them lead to the circuit breaker. Turn off the circuit breaker.
Step 4
Examine the back of the GFCI outlet. The labels "Line" and "Load" identify two sets of wire terminals.
Step 5
Loosen the five terminal screws with a slotted screwdriver. The green terminal screw, located on the top of the GFCI's housing near its mounting bracket, grounds the outlet. Both the "Line" and "Load" terminal sets contain one gold and one silver colored screw.
Step 6
Wrap the black insulated wire from the circuit breaker around the GFCI's gold-colored "Line" terminal screw. Tighten the screw with the slotted screwdriver.
Step 7
Wrap the white insulated wire from the circuit breaker around the GFCI's silver-colored "Line" terminal screw. Tighten the screw with the slotted screwdriver.
Step 8
Cut three 4-inch long jumper wires with wire cutters. Make the jumper wires out of 12-gauge insulated wire. When used in a pigtail, jumper wires -- short sections of wire -- connect a group of wires to a terminal. A 12-gauge wire handles current loads up to 20 amps; residential 120-volt circuits use 15- or 20-amp circuit breakers.
Step 9
Remove half an inch of the insulation off of each end of each jumper wire with wire strippers.
Step 10
Twist all of the uninsulated wires and a jumper wire together. Hold these wires together with a wire nut.
Step 11
Twist the stripped ends of all of the remaining white wires and a jumper wire together. Hold these wires together with a wire nut.
Step 12
Twist the stripped ends of all of the remaining black wires and a jumper wire together. Hold these wires together with a wire nut.
Step 13
Wrap the end of the jumper wire from the uninsulated pigtail around the GFCI's green screw. Tighten the screw with the slotted screwdriver.
Step 14
Wrap the end of the jumper wire from the white pigtail around the GFCI's silver-colored "Load" screw. Tighten the screw with the slotted screwdriver.
Step 15
Wrap the end of the jumper wire from the black pigtail around the GFCI's gold-colored "Load" screw. Tighten the screw with the slotted screwdriver.
Video of the Day