Things You'll Need
Crack chaser blade
Wire brush
Water hose
Epoxy gel adhesive
Putty knife
Epoxy resin
Concrete sealant
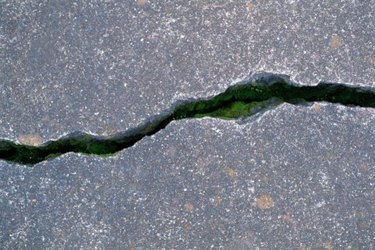
Exposed aggregate concrete uses a concrete surface where the aggregate -- the gravel in the concrete mix -- is purposefully exposed for visual appeal. Because of the exposure, the aggregate used is generally of a decorative kind, just as strong as normal aggregates but more colorful to help create a surface that's as much artistic as it is functional. This decorative nature makes patching larger cracks in the concrete a bit more difficult than normal patches. In order to create a successful patch that does not stand out, you must match the aggregate on the surface, replacing lost aggregate so that the patched area blends in seamlessly with the old concrete.
Step 1
Sweep the surface surrounding the crack with a stiff bristled broom to remove any dirt or debris. Clean out the crack itself with a nylon brush, emptying the crack completely so that you can access the crack bottom and sides.
Video of the Day
Step 2
Run a crack chaser blade through the crack to even out the crack edges and to create a somewhat level base to the crack. While there's no need to create a completely level base, you should attempt to create a base that doesn't change by more than 1 inch. Make the sides of the crack smooth horizontally, but angle them slightly wider as they descend to the base of the crack to provide an undercut for the patch to grab onto. Remove any concrete residue from the crack with the brush, and then clean the crack out with a hose. Wait about three hours for the crack to dry out after cleaning.
Step 3
Use a putty knife to apply a light layer of epoxy adhesive over the sides of the crack and along the crack bottom. Allow the adhesive to dry long enough to lose its wet appearance while retaining its sticky surface. The adhesive will help bond the new patching material to the old concrete.
Step 4
Cut the top from a tube of epoxy resin, and then inject the resin into the crack, filling it up to the surface of the concrete. Scrape off any excess resin to level it off.
Step 5
Pour an aggregate matching the existing aggregate onto the patch. Spread it around evenly using a wooden craft stick, then pour epoxy onto the aggregate to hold it in place. Wait 24 hours for the patch and aggregate to set.
Step 6
Spray concrete sealant over the patch area to add waterproofing to the patched surface. Wait another 48 hours before using the patched area as normal.
Tip
Wear work gloves, a pair of safety goggles and a face mask while repairing the crack to avoid touching the epoxy with your bare skin, inhaling its fumes or injury from a concrete chip.
Video of the Day