Things You'll Need
Pliers
Putty knife
Bathroom cleaner
Rags
Silicone caulk
Caulk gun
Teflon plumber's tape
Bathroom sink drain assembly (flange, tail piece, P-trap)
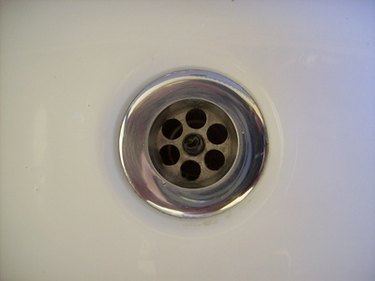
The bathroom sink drain assembly is the part of your drain that carries away used water to the sewer system in your house. The visible portion of the drain at the bottom of your sink is called the flange. Attached to the flange from underneath is a straight piece of plumbing called the tailpiece. Between the tailpiece and the sewer inlet sits a curved portion of pipe called the P-trap. Installing a bathroom sink drain assembly requires that these pieces all be connected together in the proper order.
Step 1
Clean the bottom of the bathroom sink drain, especially the area around the drain opening. A clean surface helps the drain caulk to adhere better. Use the bathroom cleaner and rags to remove any mold or mildew. Scrape away any old caulk or putty with the putty knife.
Video of the Day
Step 2
Invert the drain flange so that the bottom is facing upwards. Insert the silicone caulk into the caulk gun. Trim off the end to the 1/8 inch mark at a 45-degree angle. Apply a bead of caulk around the underside of the flange perimeter.
Step 3
Turn the flange right side up and press it into the drain opening. Continue holding this in place with one hand. With your other, take the tail piece and insert it into the threads on the bottom of the flange from the underside of the sink.
Step 4
Slide the rubber washer and retaining nut over the end of the tailpiece. Tighten the retaining nut with pliers.
Step 5
Take the piece of steel wool and clean off the threads on both the tailpiece and the sewer pipe inlet in the wall. Wrap the threads with nonstick plumber's tape. Make at least one complete circuit around the threads, then trim off any excess with scissors.
Step 6
Slip the P-trap into place between the tailpiece and sewer inlet. Tighten the couplings with pliers (on metal pipes) or by hands (PVC).
Step 7
Allow time for the caulk in the drain to dry according to manufacturer's specifications. Turn on the water. Check the sink for leaks.
Tip
Don't try to wipe up any caulk that might ooze out of the drain flange. Wait for it to dry and then cut it with a knife.
Video of the Day