Things You'll Need
Primer
Paintbrush or roller
Reddish-brown acrylic paint
Metallic copper acrylic glaze
Flat black acrylic paint
Sea sponges
Newspaper
Blue, green and white flat acrylic paint
Large tray
Household cellulose sponge
Verdigris photo
Rags
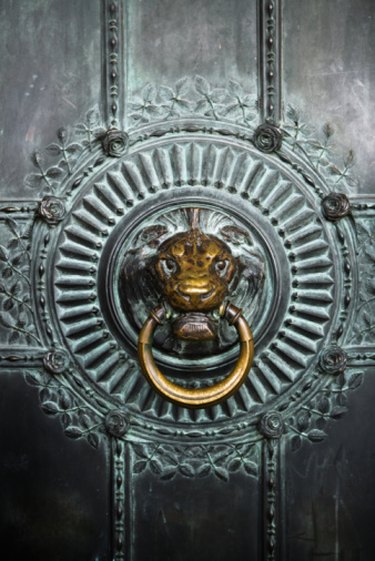
Verdigris is the bluish-green coating that copper and copper alloys develop when exposed to acetic acid over time. Although used in early medical formulas, verdigris is poisonous if ingested. You can get the look of aged copper without the dangers by creating a faux finish. Craft stores sell faux-finish kits that help you create the appearance of verdigris, but you can approximate the look yourself with a few simple tools. The finish requires several layers, so allow each layer to dry thoroughly before you move to the next.
Step 1
Prime your surface with the appropriate primer for your material. If you are painting metal, use a metal primer; for walls, use a drywall primer. Apply the primer with a brush for small areas or a roller for large areas.
Video of the Day
Step 2
Coat the primed surface with a medium reddish-brown paint, using a high-quality paintbrush or roller. Satin or eggshell finish is fine for this layer. The color should be as close to your copper glaze color as possible.
Step 3
Brush a coat of copper glaze over the dry base coat. Build up two or three layers of copper if your glaze is thin.
Step 4
Dampen a sea sponge and squeeze out the excess water. Dip the sponge in flat black paint and blot off the excess on newspaper.
Step 5
Dab black paint into any recessed areas of your surface if you are painting a three-dimensional object, or on random portions of flat surfaces. Copper generally oxidizes with a black coating before developing verdigris (unless exposed to acetic acid while new), so the black simulates this oxidation.
Step 6
Pour light blue, light green and white acrylic paint onto a large tray, keeping the colors separate by a small amount of space. Use only flat finish paints -- verdigris is not glossy.
Step 7
Dampen and wring out a household cellulose sponge. Dip part of it into each of the three paint colors.
Step 8
Look at a reference image of verdigris and begin dabbing the blue, green and white paint onto the surface, allowing them to mix directly on your painted item. Always press and release the sponge, rather than wiping with it, to ensure that you get the right texture.
Step 9
Cover most of your surface with the three colors, matching the color and texture layout to your photo. Allow some of the copper to show through, and dip a tiny corner of the sponge in the black paint from time to time to mix in a darker tone with the verdigris.
Step 10
Blot the entire surface with a clean rag. This removes some of the paint and adds to the texture.
Step 11
Build up a second layer of verdigris paint, but don't coat over your entire first layer. Verdigris builds up in several layers over the copper surface, so you want to simulate this.
Step 12
Blot off the second layer with a fresh rag.
Step 13
Add a third and fourth layer to decreasing portions of your surface, blotting with a clean rag after each layer.
Step 14
Dip a fresh, slightly damp sea sponge in the white paint and blot it off on newspaper. Dab it onto random points of a flat surface or protruding points on a three-dimensional surface to add highlights.
Tip
Practice your verdigris technique on a piece of wood or cardboard before you attempt it on your final projects so you can refine your technique.
Video of the Day