Things You'll Need
120 yds worsted weight yarn
1" button
H crochet hook
Tapestry needle
Scissors
Tape measure

This stylish headband will keep your ears toasty warm throughout the blustery cold months of winter. Crocheted in half double crochet, it comes together quickly. The scalloped crochet edge and button closure add the finishing touches. Made with machine-washable wool, this pattern is sized for a 21" adult head, but can be stretched to accommodate larger sizes.
Things You'll Need
Step 1
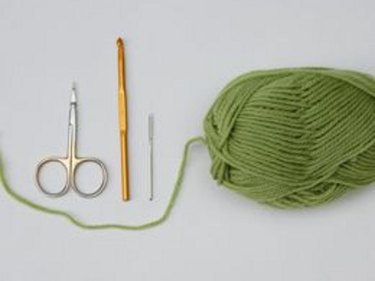
To create this headband you'll need: 120 yards of worsted weight yarn, a 1" button, an H crochet hook, a tapestry needle, scissors and tape measure. Please see the last slide for an itemized list of tools and materials.
Video of the Day
Step 2
Check your gauge! Crochet a 4" x 4" gauge in half double crochet. A gauge equals 16 stitches and 12 rows. Adjust crochet hook size to obtain proper gauge. Go up a hook size if too tight. Go down a hook size if too loose.
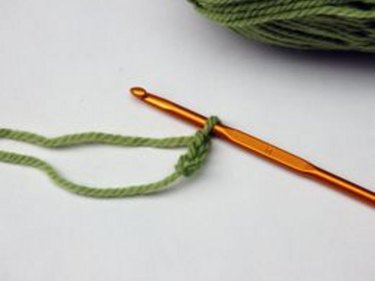
Step 3
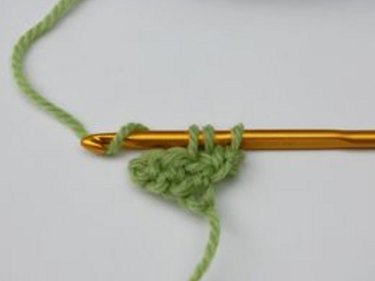
Chain 4. Turn. Skip first chain on hook and work 3 half double crochets. Chain 1. Turn. Increase by working 2 half double crochet stitches in the first and last stitch of the row for a total of 5 stitches. Work all crochet stitches through both halves of the stitch. Continue increasing by 2 stitches every row until you reach a total of 19 stitches.
Step 4
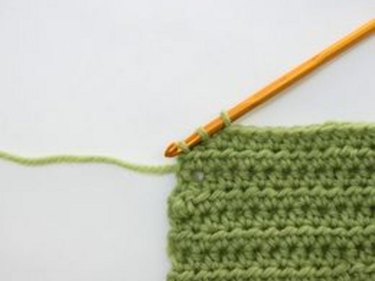
Work even for 9". Begin decreases. Decrease by two stitches at the edge of every row until only 3 stitches remain.
Step 5
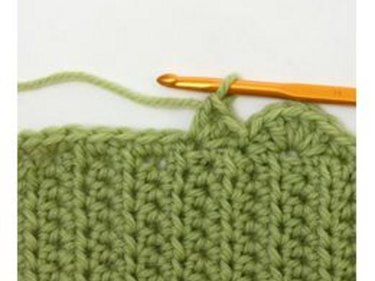
Chain 5. Attach with a slip stitch to the beginning of the last row. Single crochet 10 stitches into the loop. Finish with a slip stitch attaching it to the headband. Single crochet along entire edge of headband for a total of 144 stitches. Finish with 6 slip stitches along the base of the loop. Skip 1 stitch. Double crochet 5 stitches in the next stitch. Skip 1 stitch. Slip stitch into the next stitch. Repeat from * to * to the opposite end of headband.
Slip stitch 6 stitches along the edge. Repeat Step 3. Finish with a slip stitch at base of the loop. Cut yarn and pull through final stitch.
Step 6

Sew in all ends. Sew on button.
Tip
To make your headband a bit smaller, continue Step 3 for 8 inches rather than 9 inches.
Video of the Day