Things You'll Need
Two ribbons in first color (1/2-inch wide and twice as long as the desired length)
Two ribbons in contrasting color (1/2-inch wide and twice as long as the desired length)
Rubber band
2 paper clips
Binder clip
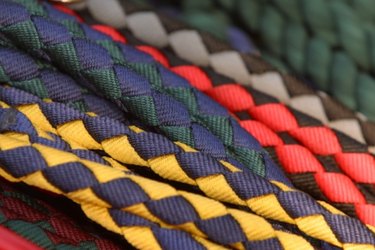
The diamondback pattern brings braiding into a new dimension. Unlike traditional two-dimensional braids, a diamondback braid has a round, cylindrical shape with a checkerboard pattern. When braided with two contrasting colors, there appears to be a series of diamonds running end-to-end down the braid, similar to the pattern on a diamondback snake. When braided with ribbon, the diamondback is often used for homecoming mums or finger-trap toys. When braided with plastic lace or leather, the braid makes a sturdy lanyard or keychain.
Step 1
Stack the four ribbons on top of one another, alternating the colors. Line up the strands at one end, and tie them together with a loose overhand knot.
Video of the Day
Step 2
Bring the strands of the first color (color A) to the right side and the strands of the contrasting color (color B) to the left side.
Step 3
Loosen the overhand knot slightly, and place the eraser of the pencil inside the knot. Position it so that the loose strands of ribbon flow downward over the pencil. Tighten the overhand knot around the eraser, and wrap a rubber band around the knot to secure. As you weave, you will encase the pencil in the braid. The pencil will function as a core and later be removed.
Step 4
Wrap the top strand of color A behind the pencil, and bring it around to the left side. Bring it forward between the two strands of color B, and wrap it back around the front of the pencil to the right side, placing it below the other strand of color A.
Step 5
Wrap the top strand of color B behind the pencil, and bring it around to the right side. Bring it forward between the two strands of color A, and wrap it back around the front of the pencil to the left side, placing it below the other strand of color B.
Step 6
Repeat until you've braided your way to the end of the pencil.
Step 7
Continue weaving if you want the braid to be longer. In order to continue braiding around the pencil, secure the two strands of color A with a paperclip. Secure the two strands of color B with another paperclip. Carefully dislodge the eraser from the overhand knot, leaving the rubber band where it is. Slide the pencil downward so that most of it emerges from the bottom of the braid. Place a binder clip where the pencil eraser is contained within the braid to secure its placement, and continue to weave.
Step 8
Repeat until the braid is the desired length. Tie the loose ends of the ribbon with an overhand knot to finish.
Tip
If you use a wider ribbon, you will need to use a thicker object as a core. If you use a thinner ribbon, you will need to use a thinner object as a core. For a smaller, sturdier braid, use plastic or leather lace instead of ribbon. While using two contrasting colors makes the diamondback pattern more apparent, it’s perfectly acceptable to braid using four strands of the same color.
Video of the Day