Things You'll Need
Masonite door
Flat work surface
Tape measure
Pencil
Chalk line
Circular saw
Finish blade
Masonite doors are hollow core doors typically used for interior applications such as bedroom, bathroom and closet openings. Masonite is a lightweight, hollow material, which makes it susceptible to breaching and damage from outdoor elements. When installing Masonite doors or adding new flooring, you make need to cut the material so that it fits properly. Cut a Masonite door using a circular saw equipped with a finish blade that has 40 or more teeth. Inspect the cut portion to make sure the wood inserts that surround the entire outer edge of the door are still intact for re-installation.
Step 1
Place the Masonite door on a flat work surface such as a pair of saw horses or a table. Adjust the table's position so that the portion of door that you will cut off does not rest on any work surface.
Video of the Day
Step 2
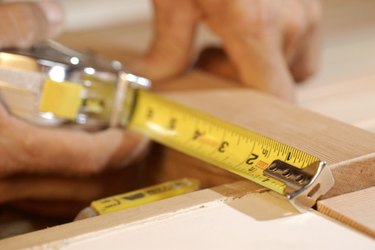
Measure the door length with a tape measure and pencil a mark on the left and right edges to indicate where you'll snap a line. Hook the end of a chalk line on one mark and stretch it across to the opposite mark. Hold the chalk line taught with one hand and use your other hand to slightly pick up the line. Release the chalk line quickly to snap a line across the surface of the Masonite door.
Step 3
Equip the circular saw with a sharp cutting blade that features 40 or more teeth. Check the circular saw for any defects such as cut or frayed electrical cords, missing safety guards or a cracked saw housing.
Step 4
Set the saw table down on the Masonite door with the blade resting along the outer edge. Release the depth-adjustment lever located at the rear of the circular saw to adjust the blade depth so that it only cuts the door material. Relock the adjustment feature.
Step 5
Move the circular saw to the side of the door where the widest portion of the cutting table will rest on the Masonite door material. Align the cutting blade with the snapped chalk line and squeeze the power trigger. Allow the saw to fully power up before making any cuts.
Step 6
Ease the circular saw forward while watching the positioning arrow at the front of the saw table, as well as the spinning blade, to make sure they match up with the snapped line. Push the saw across the entire face of the Masonite door material gradually to make a complete cut.
Step 7
Remove the saw from the Masonite material and wait for the blade to stop spinning before setting the tool down on the ground. Inspect the Masonite door's cut edge to make sure some filler material remains.
Step 8
If the wood insert at the bottom of the door was fully removed when you made the cut, locate it in the portion of door that you cut off. Remove any surrounding Masonite material, such as glue, nails or staples, using pliers and a wood chisel.
Step 9
Apply a liberal amount of wood glue to the inside edges of the Masonite door at the point where you will slide the wood insert back in. Position the wood insert into the door opening and tap on it with your fingers until it sits flush with the bottom of the door. Allow the glue to dry before reinstalling the door.
Tip
After making a cut in Masonite, smooth the edge with sandpaper to remove any burs.
Warning
When using power tools, wear personal protection equipment such as safety glasses, hearing protection and a dust mask.
Video of the Day