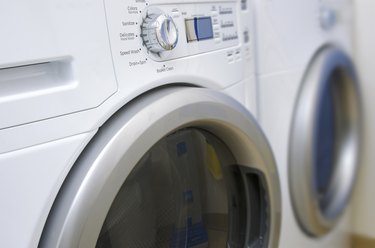
If you hear squeaks when your Maytag Neptune dryer is drying your clothes, you need to replace a blown fuse or you need to perform any other repair, the first thing you need to do is take apart the dryer. You'll find the procedure for doing this in your Maytag Neptune DC manual (DC stands for drying center), but it's simple enough to do even without the manual. Maytag gas dryer disassembly is similar to electric dryer disassembly even though the internal components aren't the same.

Video of the Day
Removing the Shroud From Your Maytag Neptune Dryer
The shroud includes the front panel, the door frame and the top of the dryer. Removing these gives you access to some internal wiring and may be all you need to do if the dryer is experiencing electrical problems.
Video of the Day
- Unplug the dryer. If it's a gas dryer, turn off the gas and disconnect the gas hose.
- Remove the two Phillips screws holding the door hinges to the front panel. Lift the door and pull to remove it.
- Unscrew the two hinge covers from the opposite side of the door frame by unscrewing the Phillips screws that hold them.
- Grasp both sides of the front panel and lift to disengage it from the clips on the bottom of the dryer. Pull it away from the dryer.
- Locate the two clips on the front of the dryer that hold down the top. Remove these clips by unscrewing the screws. You may need a 5/16-inch socket wrench for this. Note the orientation of the clips as you're removing them so you can put them back the same way.
- Lift the top and lean it back against the wall.
- Remove the door frame by loosening the four 5/16-inch bolts on the sides of the frame and the two 1/4-inch bolts on the bottom. Pull off the frame.
- Take a picture of the wires connected to the door frame so you can reconnect them properly and then pull the wires off and set the frame aside.
Servicing the Drive Belt
If the dryer is squeaking, or the drum isn't spinning, you may have to replace the drive belt with a new Maytag dryer belt. Further disassembly is required to access the belt. In particular, you have to remove an internal panel that covers and protects the drum and other internal components.
- Take a picture of the wires connected to the panel and then disconnect them. There are two or three on the bottom and two on the top.
- Unscrew the two bolts holding the panel. One is in the top right corner and the other is in the bottom left corner.
- Pull out the panel to expose the drum. The panel contains the dryer filter, and it usually needs a good cleaning.
- Grasp the drum and slide it forward off the rollers. Pull off the drive belt and remove the drum.
Accessing the Drum Rollers
Malfunctioning rollers are sometimes the culprits behind squeaking and other problems, and they can be replaced. This requires one more disassembly procedure.
- Remove the back panel of the dryer by loosening the four 5/16-inch screws.
- Disconnect the heater assembly by removing the two 1/4-inch screws holding it. Pull the heater assembly out and set it aside.
- Lift the drum assembly and pull it out from the back of the dryer.
If the rollers are binding, you can replace them with new ones. Each roller is held by a bolt that you can loosen with a 1/2-inch wrench. You now have access to any malfunctioning electrical or gas components, but for safety purposes, it's best to hire a service technician to service them.