Tip
Remain still when drawing blood. Shaking makes obtaining the sample more difficult because the needle is not steady.
If the dog's skin is tough, take the needle and make a tiny superficial stab incision that is not too deep but just enough to break the surface of the skin. Insert the needle where you made the incision.
If you have no help to obtain a blood sample, apply a tourniquet and muzzle on the dog.
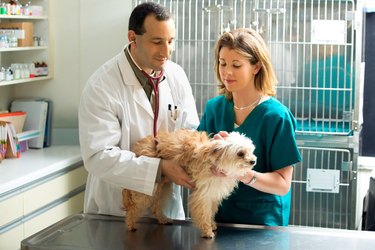
Taking blood samples is an important aspect of veterinary medicine. Many diseases are diagnosed based on serum biochemistry. As a veterinary technician, you must understand the process of drawing blood, also known as venipuncture. In some situations, getting a blood sample must be done quickly and there may be a large amount of stress on you as a technician to do this. A useful method for obtaining a blood sample for the beginning veterinary technician is to draw it from the cephalic vein.
Step 1
Restrain the dog so that taking the blood sample does not become a fight. The person helping you should have one arm around the dog's back while the dog is sitting and the other arm in a headlock position around the head.
Video of the Day
Step 2
Shave the area just below the elbow on the top of the leg. Find the olecranon process and where the leg bends at the elbow joint, shave where the cephalic vein is most prominent. In some dogs, the cephalic vein is not as prominent and you may have to draw from the jugular vein. If drawing a sample from the jugular vein, shaving is usually not required unless the dog has excessive amounts of hair.
Step 3
Occlude the cephalic vein by having your helper hold off the vein. This is done by placing your hand under the elbow so that the dog cannot move its leg back and taking your thumb over the top of the leg and applying pressure so that the cephalic vein will fill with blood and become more visible. Some dogs will willingly give you their leg and allow you to take a blood sample without much restraint.
Step 4
Twisting the correct needle size onto the syringe. Selecting the needle size should be based on the size of the dog and the size of the vein. Typically, a 22G needle (blue needle) works for most blood draws. In larger breed dogs, an 18G needle will be better and the blood sample will be obtained much more quickly.
Step 5
Spray alcohol on the area that is about to be punctured by the needle as this will sterilize the area and prevent any bacteria from entering with the needle.
Step 6
Grab the leg with your hand that is not holding the needle and place your thumb next to the lateral aspect of the cephalic vein to prevent the vein from moving on you.
Step 7
Insert the needle of the syringe directly over the raised cephalic vein. If you have entered the cephalic vein correctly, a small amount of blood will enter the tip of the syringe. At this point, you should pull back on the syringe plunger and blood should begin to enter.
Step 8
Pulsate the leg if blood is not entering the syringe very quickly. Your assistant can do this by letting up on the pressure exerted by her thumb on the cephalic vein and then quickly reapplying the pressure so that the vein will fill with blood again.
Step 9
Remove the needle and tell your assistant to release pressure over the vein before doing this. Otherwise, blood will start coming out of where you just inserted the needle.
Step 10
Apply pressure over the venipuncture site for 30 seconds and then apply a cotton ball and vetwrap around the area to maintain pressure over the site.
Step 11
Fill the lavender topped tube first (usually halfway) by removing the needle and also the rubber plug on the tube. Squirt a blood sample into the tube. If you do not remove the needle and squirt the blood through the needle, the red blood cells can become damaged and the results of the test may be off. Put the lavender plug back on and rock the tube back and forth. This ensures that the blood mixes well with the anticoagulant that is inside of the lavender topped tube. This tube is for a complete blood count and should not coagulate.
Step 12
Jab the needle into the rubber stopper of the marble topped tube. The top does not need to be removed for this tube because it does not matter if the red blood cells are ruptured since serum is being measured in this sample.
Step 13
Remove the vetwrap and cotton ball after about 20 minutes. Ensure that the site has closed and will not bleed.
Video of the Day