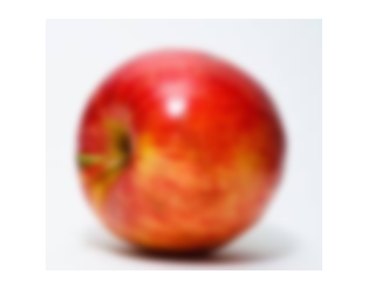
Microsoft's Paint program doesn't have a blur setting, but you can make a picture look blurred by decreasing its size and then increasing it again to add pixels to it. Although this does blur the image in a basic way, the end result may not look great. If you have access to one of Microsoft's Office programs, such as Word or PowerPoint, you can use a dedicated blur tool for a more subtle and blended effect.
Blur an Image in Paint
Video of the Day
Step 1
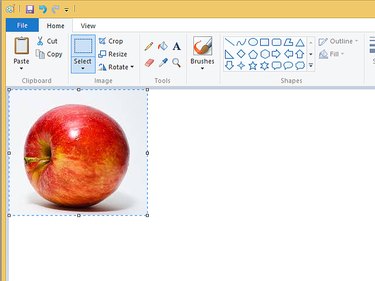
Open the picture in Paint and select Save As to save it as a copy if you want to keep the original image intact. Alternatively, paste the picture into the Paint window and save the file.
Video of the Day
Step 2
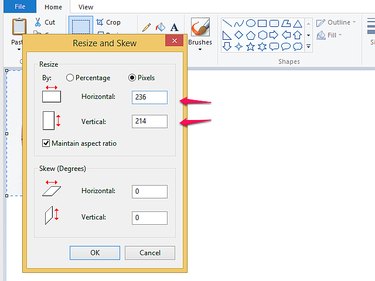
Select Resize and then check the Pixels button. Make a note of the pixel numbers in the Horizontal and Vertical boxes -- you need these later. Select Percentage and change the numbers in the Horizontal and Vertical boxes.
You may need to experiment here, depending on the size of the image. If you set the numbers to 5, most images will be very pixelated. Smaller images with pixel measurements in the hundreds may work best if you input 20 in both percentage boxes; images with pixels in the thousands may be better with a smaller number, say 10. Select OK to decrease the size of the image.
Step 3
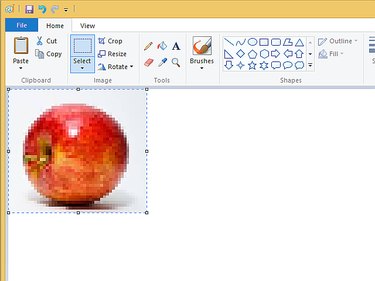
Select Resize again and then Pixels. Put your original pixel numbers back in the boxes. If the numbers keep changing when you enter them, uncheck the Maintain Aspect Ratio box and then select OK. The picture will go back to its original size but will now be blurred.
Blur an Image in Microsoft Office Programs
Step 1

Copy and paste the picture into your document and select it. Go to Format in the Picture Tools tab.
Step 2
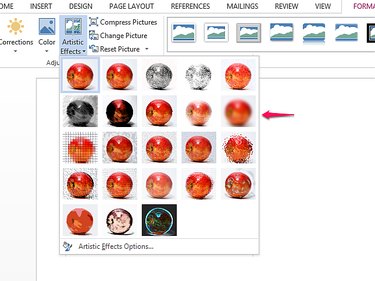
Select Artistic Effects and go to the Blur option. As you hold your mouse over it, your image previews the blur effect. If you're happy with the level of blurring, select the option to apply the change. To reduce or increase the blur, select Artistic Effects Options to customize the effect.
Step 3
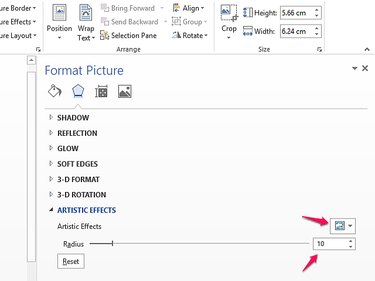
Select the Blur option from the Artistic Effects drop-down menu. Use the slider button or the up-down arrows next to the number until you get the effect you want. Select X at the top of the Format Picture menu to apply the blur.