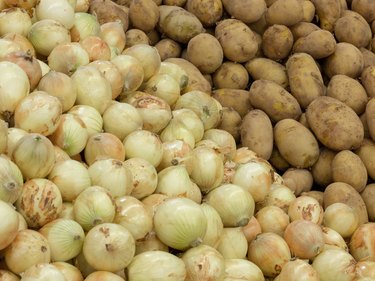
Potatoes and onions both keep the best under similar conditions: cool and dark with adequate air circulation. The same sort of bin will store either potato or onion storage crops equally well (and keep them from sprouting), but you should store each food product individually. Make one bin for the potatoes you've harvested and another, if you so desire, for your onions. These plans are for a 2-foot-by-3-foot-by-2-foot slatted storage bin that can be easily modified, as necessary, to create a larger or smaller bin.
Step 1: Lay Out the Pieces
Start building your potato and onion bin by laying out two of the 1-inch-by-2-inch-by-34-inch boards on edge, parallel to each other, with about 2 feet between them. Place one of the 1-inch-by-2-inch-by-24-inch boards on each side of the two longer boards, forming a box with the longer boards sandwiched between the shorter board end pieces.
Video of the Day
Step 2: Form the Corners
Hammer at least two nails through each end of the shorter boards into the longer boards, holding the corners of the box together.
Step 3: Add the Plywood Base
Place the plywood sheet on top of the open rectangular box you just made. It should line up perfectly. Hammer nails down through the corners of the plywood into the boards, then along the sides of the plywood at 6-inch intervals, to hold it against the boards.
Step 4: Turn It Right Side Up
Turn the plywood over so the boards are facing up. This is the base of your slatted potato and onion bin.
Step 5: Create the Wall Supports
Stand four of the 1-inch-by-2-inch-by-24-inch boards on end inside the rudimentary bin you've created. Snug them up against the sides of the bin, one in each corner. Hammer nails through them into the boards that make up the sides of the bin. These will support the walls of your slatted bin. Then lay the bin on its side to make the next step easier.
Step 6: Form the Sides
Build up the sides of your box by nailing 1-inch-by-2-inch boards in place up against the four supports you just installed, with 1 inch of air space between each set of two boards. You should be able to place seven more 1-inch-by-2-inch-by-34-inch boards on each of the long sides of the box and seven more 1-inch-by-2-inch-by-24-inch boards on the shorter sides of the box. Once you've nailed all the boards securely to the supports, you're done.
Step 7: Get It in Place
Place the bin, plywood-down, in a cool, dark place where you intend to store your potatoes and onions. It'll be too heavy to move easily once it's filled.
Video of the Day
The Humidity Factor
Different vegetables require different storage conditions, and gauging the humidity level is one of the most important considerations for proper vegetable storage. According to the University of Minnesota Extension, onions are best kept in cold and dry conditions — 32 to 40 degrees Fahrenheit at 65 percent relative humidity — while potatoes should be stored in a cold and moist environment of 32 to 40 F at 95 percent relative humidity. The University of Massachusetts Amherst notes that potatoes intended for use as tablestock should be cooled gradually after the all-important curing period to a holding temperature of 38 to 40 F.