Ernest Rutherford, originally from New Zealand, is credited as being the father of nuclear physics for his discoveries in atomic structure, even though Hantaro Nagaoka, a physicist from the Imperial University of Tokyo, first proposed the theory of the nucleus as it is known today. Rutherford's "gold foil experiment" led to the discovery that most of an atom's mass is located in a dense region now called the nucleus. Prior to the groundbreaking gold foil experiment, Rutherford was granted the Nobel Prize for other key contributions in the field of chemistry.
History
The popular theory of atomic structure at the time of Rutherford's experiment was the "plum pudding model." This model was developed in 1904 by J.J. Thompson, the scientist who discovered the electron. This theory held that the negatively charged electrons in an atom were floating in a sea of positive charge--the electrons being akin to plums in a bowl of pudding. Although Dr. Nagaoka had published his competing theory that electrons orbit a positive nucleus, akin to the way the planet Saturn is orbited by its rings, in 1904, the plum pudding model was the prevailing theory on the structure of the atom until it was disproved by Ernest Rutherford in 1911.
Function
The gold foil experiment was conducted under the supervision of Rutherford at the University of Manchester in 1909 by scientist Hans Geiger (whose work eventually led to the development of the Geiger counter) and undergraduate student Ernest Marsden. Rutherford, chair of the Manchester physics department at the time of the experiment, is given primary credit for the experiment, as the theories that resulted are primarily his work. Rutherford's gold foil experiment is also sometimes referred to as the Geiger-Marsden experiment.
Features
The gold foil experiment consisted of a series of tests in which a positively charged helium particle was shot at a very thin layer of gold foil. The expected result was that the positive particles would be moved just a few degrees from their path as they passed through the sea of positive charge proposed in the plum pudding model. The result, however, was that the positive particles were repelled off of the gold foil by nearly 180 degrees in a very small region of the atom, while most of the remaining particles were not deflected at all but rather passed right through the atom.
Significance
The data generated from the gold foil experiment demonstrated that the plum pudding model of the atom was incorrect. The way in which the positive particles bounced off the thin foil indicated that the majority of the mass of an atom was concentrated in one small region. Because the majority of the positive particles continued on their original path unmoved, Rutherford correctly deducted that most of the remainder of the atom was empty space. Rutherford termed his discovery "the central charge," a region later named the nucleus.
Potential
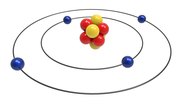
Rutherford's discovery of the nucleus and proposed atomic structure was later refined by physicist Niels Bohr in 1913. Bohr's model of the atom, also referred to as the Rutherford Bohr model, is the basic atomic model used today. Rutherford's description of the atom set the foundation for all future atomic models and the development of nuclear physics.
Photo Credits
iSailorr/iStock/Getty Images