The interactive nature of applications within office productivity suites such as Microsoft Office create opportunities to save time on repetitive tasks. An Excel mailing list can be shared with Outlook for contact management and email blasts, while the same list can merge with Word to create form letters or address and filing labels. To ensure the most flexible use of your Excel list, keep in mind a few best practices.
Creating Your Excel Mailing List
Video of the Day
Step 1
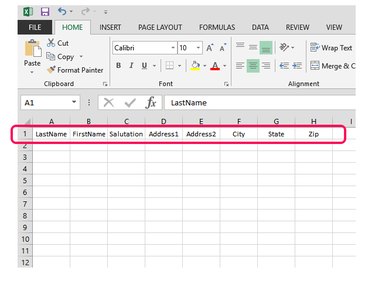
Open a new Excel workbook and set up field names for your list in Row 1. Make sure each field name is unique.
Video of the Day
Step 2
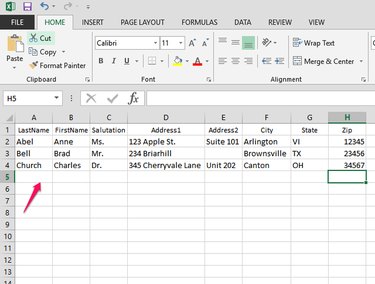
Enter data in rows under the field names to create records for each mail recipient. Format cells for column width or word wrap as needed. Cells can remain blank where information is not available. When data entry is complete, name and save your workbook by clicking the File tab and then Save.
Merging Excel Data With Word
Step 1
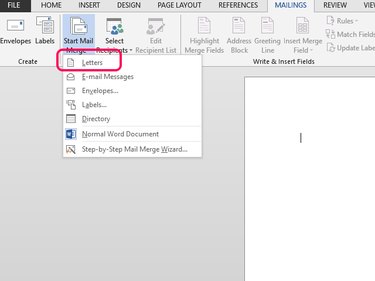
Open Word with a new, blank document. Click the Mailings tab, and then Start Mail Merge. There are a number of options for merging. For this example, select Letters.
Step 2
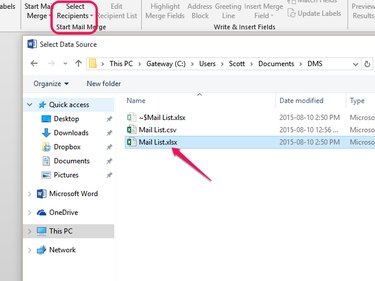
Click Select Recipients, Use an Existing List, and select the Excel mail list file. Select a table from the next window. However, with a simple mail list worksheet, there will be only one table defined. Select it and click OK.
Step 3
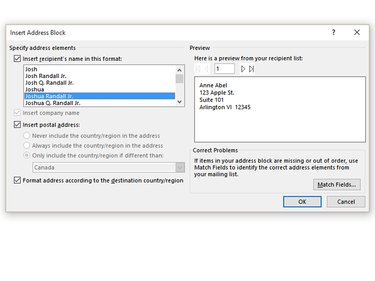
Write your letter to merge as you would any correspondence, leaving out personalized copy, such as addresses and greetings, i.e. anything that will be merged from your Excel mail list. Navigate to the start of the letter and click Address Block on the ribbon. The right side of the screen shows how the current format for the address block will look with your data inserted. The left side contains format options. Choose between these and click OK when you're satisfied with the result.
Step 4
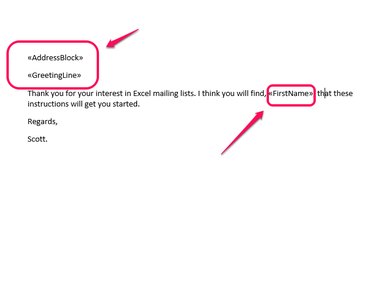
Repeat the process for the Greeting Line and any other data using the Insert Merge Field button.
When your letter is complete, click Preview Results to see how your merged letter will look. You can also click Check for Errors to ensure your letters will print as desired. When you're ready, click Finish & Merge and select the desired merge option.
Importing Excel Mailing Data to Outlook
Step 1
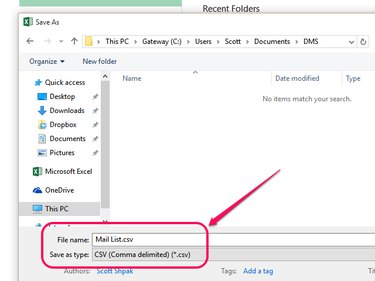
Convert your worksheet to a comma-separated value file. Click the File tab and Save As. Select a location and name your file. Select CSV (Comma delimited) (*.csv) in the Save as type box. Click Save and close the CSV file.
Step 2
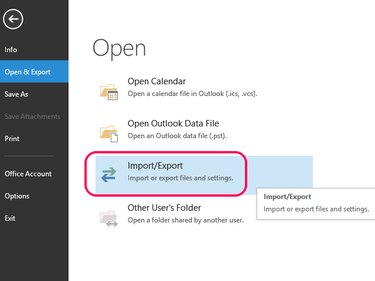
Open Outlook and click the File tab, Open & Export and Import/Export.
Step 3
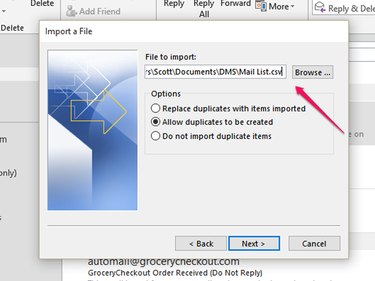
Click Import from another program or file. Click Comma Separated Values and then Next. In the Import a File window, browse for the mail list CSV file created in the previous step and click Next. Choose a destination folder for the imported records. Contacts is chosen by default. Click Next.
Step 4
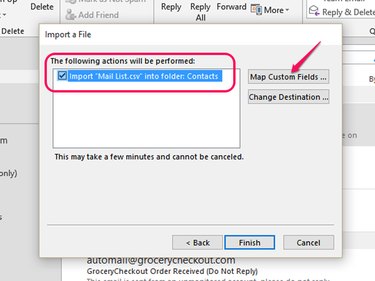
Make sure the box is checked for your CSV file, and then click Map Custom Fields.
Step 5
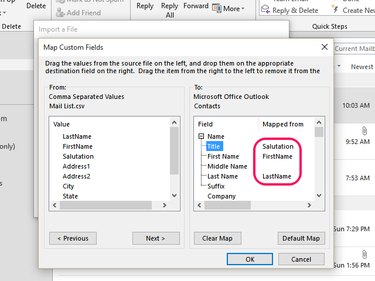
Click field names from your Excel data in From box on the left to the corresponding Outlook fields in the To box on the right. Perform this for every field you need from your Excel data. Click OK and Finish to complete the data import.