Things You'll Need
Dremel 395 rotary tool
Flat head screwdriver
Rubbing alcohol
Q-tip swabs
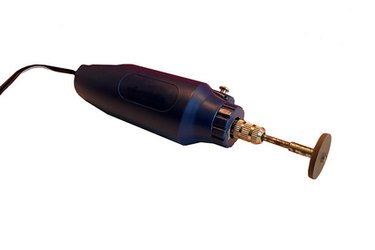
A Dremel 395 is a multipurpose rotary tool produced by the Wisconsin-based company, Dremel. The product is used for a wide variety of home-related projects, from cutting tiles to removing paint to filing a dog's nails. It is an extremely versatile tool as there are a number of Dremel attachments that can be used with it, including cutters, grinding stones, wire brushes, spiral or drill bits. Although the Dremel is known as a durable tool, it can malfunction for different reasons--mainly related to clogged dirt and dust. Luckily, there are a number of ways to troubleshoot and repair these problems.
My Dremel 395 Runs At Inconsistent Speeds
Step 1
Check the warranty on your Dremel 395. If the tool is still under warranty--which is five years from the purchase date--your best bet is to take it to a dealer rather than try and fix it yourself. Self-repair could void the warranty.
Video of the Day
Step 2
Unplug the Dremel from any electrical outlet if you are going to attempt your own repairs.
Step 3
Check the carbon brushes--located inside the plastic casing near the electrical cord end of the unit--if your Dremel suddenly loses and regains power or runs at slow, noisy speeds.
Step 4
Remove the two brush caps located on either side of the Dremel (near the electrical cord end) with a screwdriver. First remove the springs before removing the brushes themselves. According to Dremel's Operating Manual, if either brush is under 1/8 of an inch long and/or is worn, then both brushes will need to be replaced.
Step 5
Order two new brushes for the Dremel 395 model from any distributor of Dremel products.
Step 6
Push the brushes individually into the assigned slots on either side of the Dremel, following the exact directions on the brush package. Replace the brush springs. Screw in the brush cap using a screwdriver.
Step 7
Plug the Dremel into any electrical outlet. Switch it on and test it at different speeds to ensure it is now operating correctly.
My Dremel 395 Produces a Burning Smell When It Is Turned On
Step 1
Check the warranty on your particular Dremel 395. If the tool is still under warranty, your best bet is to take it to a dealer rather than try and fix it yourself. Self-repair could void the warranty. Unplug the Dremel from any electrical outlet if you are going to attempt your own repairs.
Step 2
Blow on the inlet and outlet openings, located on each side the Dremel. Use your own lung power or, even better, use a compressed air unit.
Step 3
Hold the valve end of the compressed air unit up against the inlet and outlet openings, doing one section at a time. Turn on the air compressor. This will blow out excess dirt and dust in the tool so do this step outside or in a work space.
Step 4
Plug in the Dremel to an electric outlet and turn it on. Sniff to check whether the burning smell is now gone.
Video of the Day
My Dremel 395 Stops Suddenly Or Is Inoperable
Step 1
Check the warranty on your particular Dremel 395. If the tool is still under warranty, your best bet is to take it to a dealer rather than try and fix it yourself. Self-repair could void the warranty.
Step 2
Unplug the Dremel from any electrical outlet if you are going to attempt your own repairs. If the Dremel stops suddenly or does not turn on, there may be a problem with the switch contacts which means taking the Dremel apart to fix it.
Step 3
Remove the carbon brushes, as outlined in the previous section.
Step 4
Remove the circular plastic collar near the attachment end of the tool. Unscrew the four screws that hold the Dremel's external plastic casing together. Pull off one side of the case half so you can see the inside workings of the Dremel. Put the one side of the casing on the table, out of the way.
Step 5
Pull out the motor and pull out the center shaft. Put these to the side as well.
Step 6
Look for the switch attached to the motor, which will be shaped like a small box. Pull this carefully off the motor. Slide the switch to ensure that it operates smoothly.
Step 7
Open the switch housing box by carefully opening its two widest parts with your hands. You should now be able to see inside the switch housing box.
Step 8
Look for the contact pieces, which are three small, crooked, metal contacts. Look for the related three long metal contacts on the other side of the switch housing box.
Step 9
Clean the tips of the crooked contacts very, very carefully with a small corner of 400-grit sandpaper. Use a toothpick to move them carefully, if you need to. Wipe them clean with some rubbing alcohol on a Q-tip swab. Make sure you do not leave any fluff behind from the Q-tip.
Step 10
Clean the long metal contacts with a Q-tip and rubbing alcohol. If particularly dirty, send them lightly and reclean them with rubbing alcohol.
Step 11
Wipe the other plastic pieces of the Dremel that you took apart with a new Q-tip and rubbing alcohol. Let these pieces dry. Replace the removed pieces in reverse order to which you removed them in the prior steps, starting with the switch housing box.
Step 12
Plug the Dremel into an electrical outlet and turn it on to check if it is operating correctly. Try running it at different speeds.
Tip
If you are opening up the Dremel to repair it, you will need to remember the exact location of each part before you move it or clean it so that you can later re-assemble the tool. One way to do this is to use a camera and take pictures of each step of the repair.